AI Image Generation: Experiment With Stable Diffusion Locally

For researchers, developers, and artists working with stable diffusion image generation, upscale, and image repair, there are multiple options available for running the tool. One option is to use professional cloud services on remote servers, which offer high computational power, scalability, and flexibility, and are especially useful when working with large datasets or complex workflows. This service can be nicely packed into commercial online service even for absolute beginners, and it is aimed for ease of use (Midjourney, Leonardo, DALL·E 2, etc.).
When experimenting with stable diffusion image generation and processing, you can use professional cloud services, or run the system on remote server virtual machines. Another alternative is to run it on your local machine, and it has its advantages.
A popular option is to run the system on Colaboratory virtual machines, which are provided by Google as part of their Google Colab service. Colaboratory is a cloud-based Jupyter notebook environment that allows users to run Python code and data science experiments in the cloud. There are also many other commercial providers of virtual machines.
However, running the system on a local machine has its advantages; it provides complete control over the hardware and software environment, which can be important for reproducibility and customization, it also allows users to work offline, which can be useful in situations where the internet connectivity is limited or unreliable —and also can be useful for project security and safety of datasets. Additionally, running the system locally can be more cost-effective in the long run, especially if users need to run experiments or workflows frequently or for extended periods.
In this brief Windows tutorial, I will show you how to install and run stable diffusion on your local machine. The prerequisites for SD 1.5 are a decent computer workstation (with an NVIDIA graphic card, I recommend more than 5GB of memory), and sufficient disk space (let's say 50GB at least, trained models are huge). If you have a laptop with RTX 3080 card, you can work with your models everywhere you go. You can test this even on older cards (using Xformers PyTorch library), you may be surprised by the results. However, I suggest at least 16GB for SDXL models,
Note to the graphic card: the more memory the better, as it allows you more options with the output resolution of generated images and model training.
Installing A1111 on Local Machine
- (Update) Notes to SDXL Installation and Upgrade
- How to Install the Graphic Interface and AI Models
- Step 1. Install Python 3.10.9 or 3.10.6
- Step 2. Install Git
- Step 3. Install AUTOMATIC1111 WebUI
- Step 4. Get Pre-trained Models
- Step 5. Set up AUTOMATIC1111 Webui for Xformers (Optional)
- Step 6. Run Test, Explore Extensions
- Step 7. Update Regularly
- How to Solve an Error When PyTorch and/or Xformers are Outdated
- Customizing Launch with Batch File
- Updating Issues: How to Install New Version of PyTorch/Python and Resolve Errors?
- How to Revert to Older Version of A1111
- Changing Branches and Development Branch
- Using LoRAs and Other Networks
- Tips for the Interface and Settings
- Tips for Your Experiments
- Conclusion:
(Update) Notes to SDXL Installation and Upgrade
All information from this article applies. However, I strongly suggest a fresh new installation of the A1111 web UI and testing the extensions you use one after another (some may and will cause issues). Put both models in your models/Stable-diffusion folder. For SDXL 1.0, use the base model in txt2img mode and the refiner model in img2img to test its function. Use Refiner extension for better integration of SDXL refiner into A1111 (dev version of A1111 has its option in UI already). Provided test LoRA offset (which belongs to models/ Lora) works in txt2img only. Set SD VAE on Automatic in both cases!
How to Install the Graphic Interface and AI Models
What you will need to install manually: Python, Git, and AUTOMATIC1111 (A1111) webui. You will also need to create a free Hugginface account for model download (unless you have your own already).
Step 1. Install Python 3.10.9 or 3.10.6
This is the programming language and framework for the tools.
Install this specific version: https://www.python.org/downloads/release/python-3106/. Web UI will also work with https://www.python.org/downloads/release/python-3109/
(Scroll down to Files section and choose the installer for your OS.
Step 2. Install Git
Git is a version control system that helps manage and track changes to code.
Install is self-explaining, you do not need to change any settings during installation. Choose your OS and download it here: https://git-scm.com/downloads
Step 3. Install AUTOMATIC1111 WebUI
This is the interface for using the tools and extensions.
Use Git for installation. You could just download the folder, but Git is more efficient and allows easy version updates. I suggest installing it directly on your C:/ path to avoid possible issues with longer paths. Move to your desired directory, and run cmd from here (on Windows) or other terminal. Since you have Git already installed, you can clone the repository:
git clone https://github.com/AUTOMATIC1111/stable-diffusion-webui.git
This will create stable-diffusion-webui directory structure on your disk and clone the content from github.
If you get error error: RPC failed; curl 92 HTTP/2 stream 0 was not closed cleanly: CANCEL (err 8), you can try increasing post buffer size using:
git config --global http.postBuffer 157286400
Step 4. Get Pre-trained Models
Sign in for the Huggingface account to get free access to the database of the newest public pre-trained models. When first accessing the database models, you may need to consent to the rules in the license.
SD 1.5 https://huggingface.co/runwayml/stable-diffusion-v1-5
SD 2.1 https://huggingface.co/stabilityai/stable-diffusion-2-1
SDXL 1.0 Base (download the example LoRA too), Refiner
On Model card, go to Files and versions and find the .safetensors file you want to test. Put downloaded models into the models/Stable-diffusion directory of your stable-diffusion-webui installation (there should be a text file named Put Stable Diffusion checkpoints here).
Use models from reliable sources and for security reasons prefer .safetensors variant of the model file if available, especially if you are not working on virtual machine
You may find many good models on Civitai, for instance:
- https://civitai.com/models/81458?modelVersionId=108576 AbsoluteReality
- https://civitai.com/models/4201/realistic-vision-v40 Realistic Vision
- https://civitai.com/models/4384/dreamshaper DreamShaper
- https://civitai.com/models/106055/photomatix Photomatix (read more here)
Step 5. Set up AUTOMATIC1111 Webui for Xformers (Optional)
If you are using batch files for command line arguments, you may skip this part (just simply add --xformers to your command line arguments).
Xformers PyTorch library is used to speed up and optimize your image generation on NVIDIA GPUs. It helps to efficiently use the memory (VRAM) of GPU (especially on an older card with lower VRAM).
Find this string in launch.py (you can use Notepad or free Visual Studio Code for that):commandline_args = os.environ.get('COMMANDLINE_ARGS', "")and add --xformers argument into it like this:
xformers argument like that commandline_args = os.environ.get('COMMANDLINE_ARGS', "--xformers")
Save the file.
Alternatively, you may put the arguments into the batch file webui-user.bat (and then use it to run the UI:
@echo off

set PYTHON=
set GIT=
set VENV_DIR=
set COMMANDLINE_ARGS=--xformers

call webui.bat
Step 6. Run Test, Explore Extensions
Run webui-user.bat. The first run will take a longer time to download all dependencies. Make yourself a coffee. After a while, you should see something like that:
C:\stable-diffusion-webui>webui.bat
venv "C:\stable-diffusion-webui\venv\Scripts\Python.exe"
Python 3.10.6 (tags/v3.10.6:9c7b4bd, Aug  1 2022, 21:53:49) [MSC v.1932 64 bit (AMD64)]
Commit hash: 685f9631b56ff8bd43bce24ff5ce0f9a0e9af490
Installing requirements for Web UI
Launching Web UI with arguments: --api --xformers
Loading config from: C:\stable-diffusion-webui\models\Stable-diffusion\v2-1_768-ema-pruned.yaml
LatentDiffusion: Running in v-prediction mode
DiffusionWrapper has 865.91 M params.
Loading weights [4bdfc29c] from C:\stable-diffusion-webui\models\Stable-diffusion\v2-1_768-ema-pruned.ckpt
Applying xformers cross attention optimization.
Model loaded.
Loaded a total of 0 textual inversion embeddings.
Embeddings:
Running on local URL:  http://127.0.0.1:7860

To create a public link, set `share=True` in `launch()`.
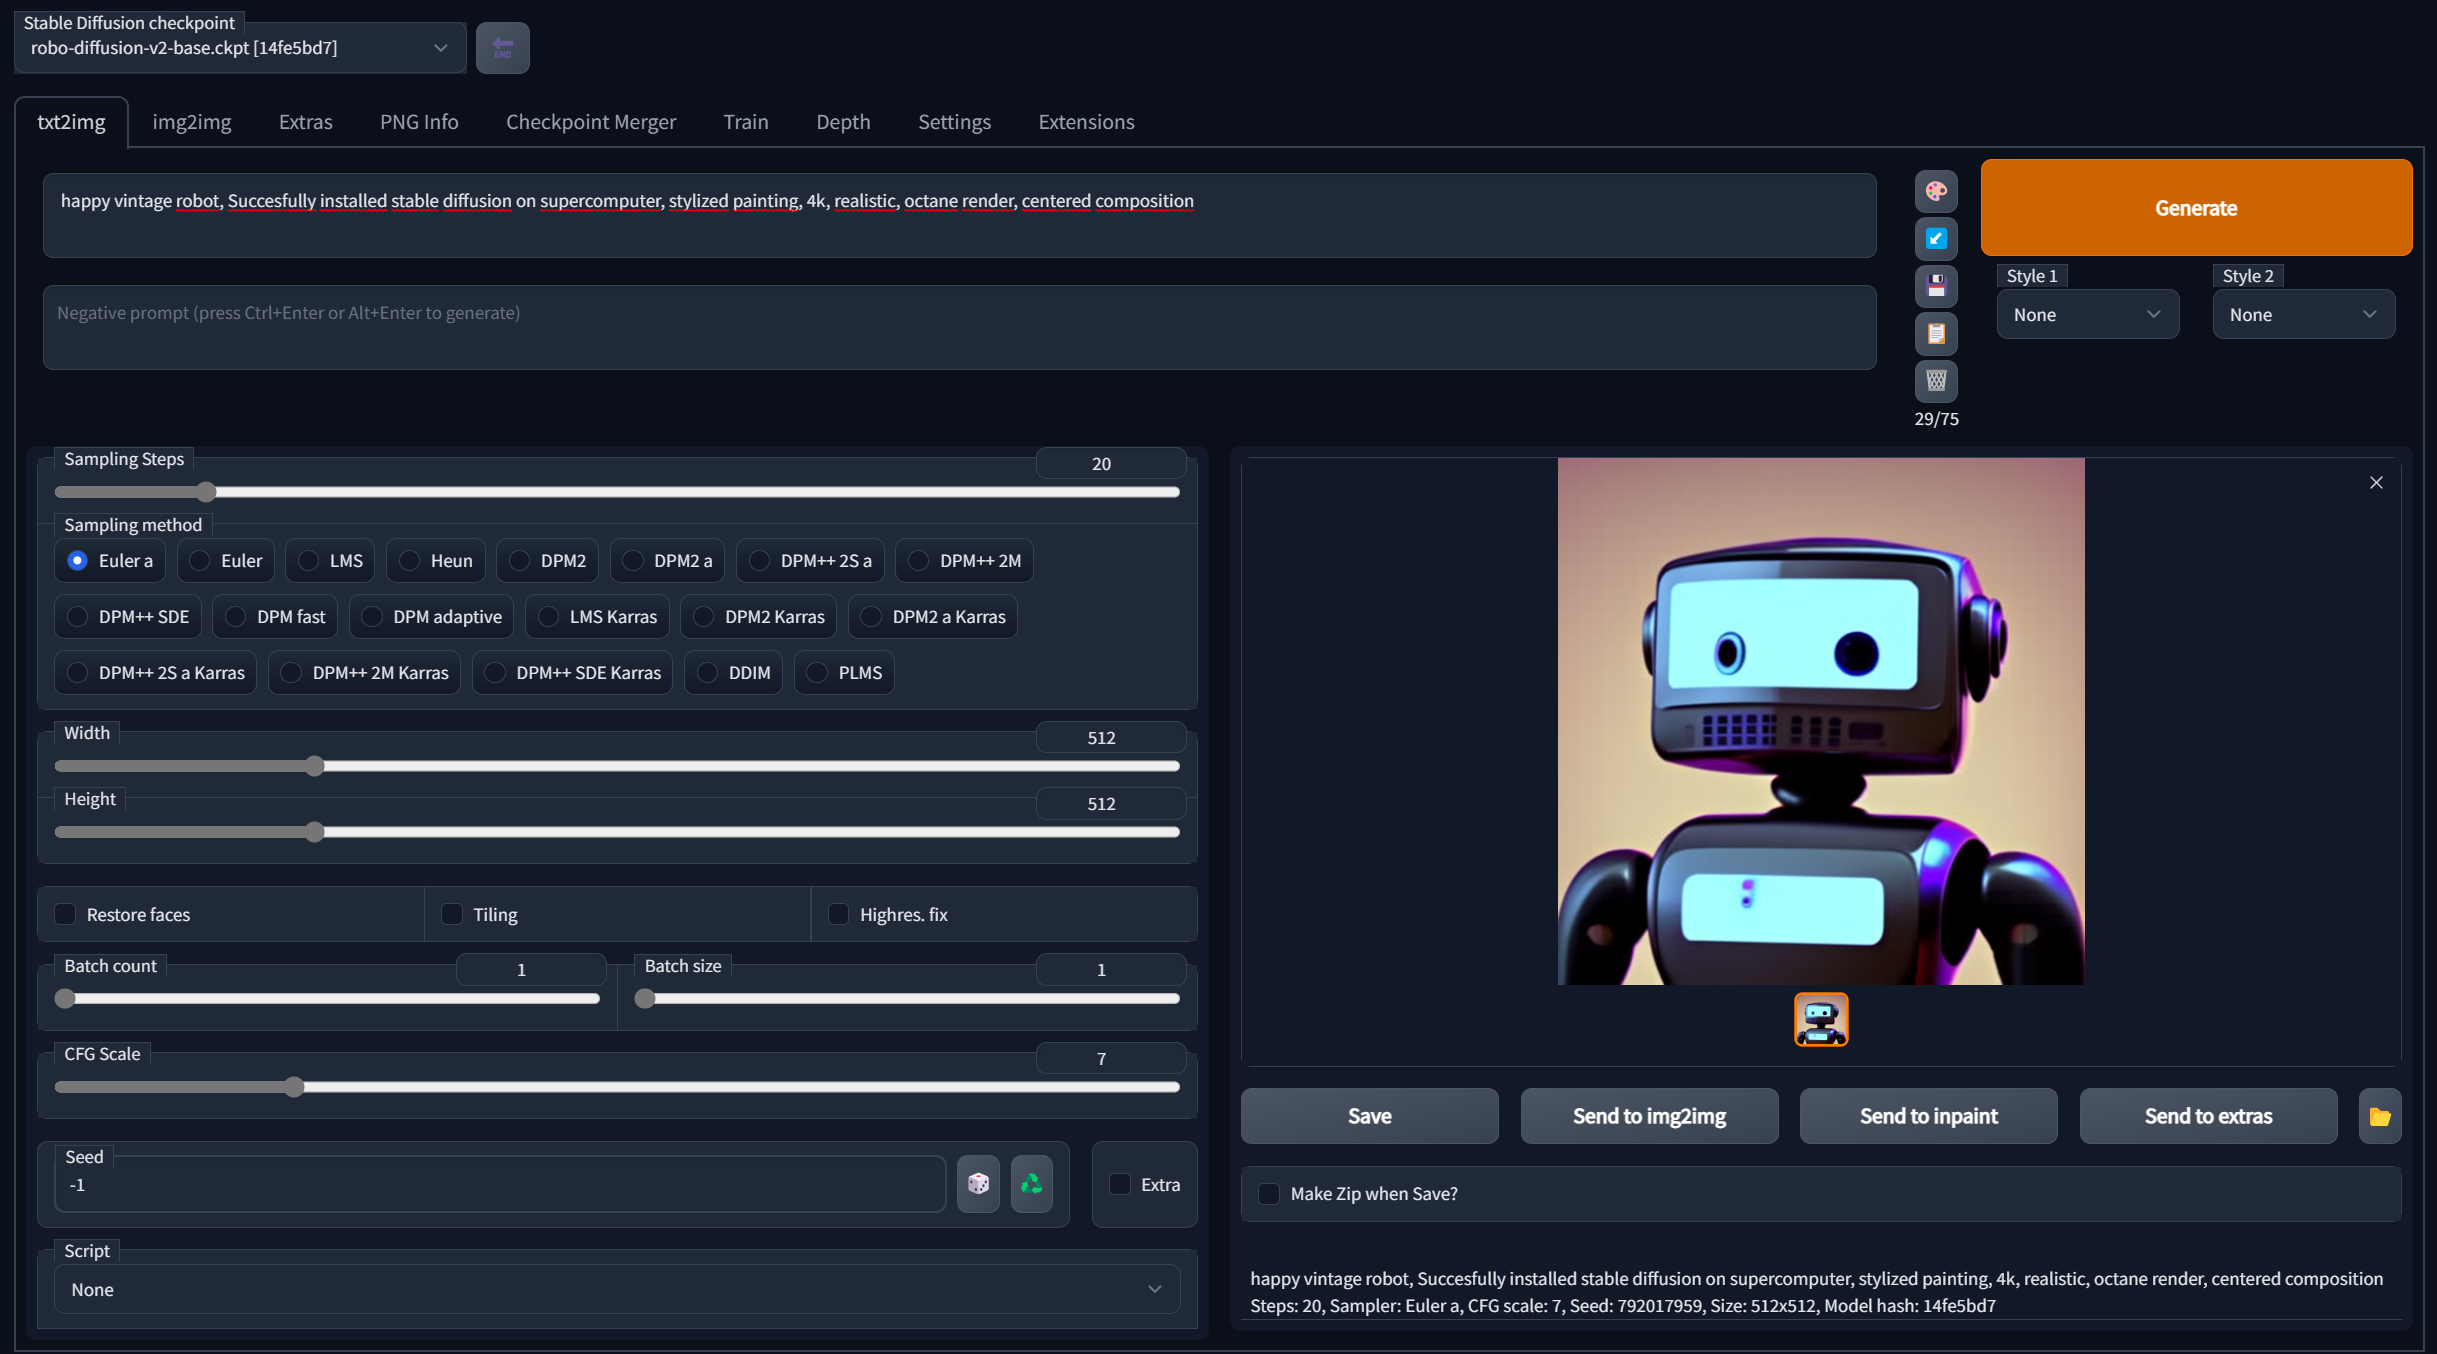
When it finishes, copy the address from Running on local URL line and paste it into a web browser of your choice. You are all set up!

For extensions, go to the Extensions tab and check Available, Load from. Choose the ones you want, install them, and restart UI. Experiment with these when you get hold of the UI, also note some extensions may need more VRAM.
One of the extensions you will probably want right away is ControlNet.
Easy Installation of ControlNet
From Extensions/Install from URL tab in AUTOMATIC1111 webgui, use Install from URL and enter the adress https://github.com/Mikubill/sd-webui-controlnet . Download control and adapter models (reduced) at https://huggingface.co/webui/ControlNet-modules-safetensors/tree/main and put them into /stable-diffusion-webui\extensions\sd-webui-controlnet\models folder.
You will activate Multi ControlNet options (it will show itself as multiple ControlNet tabs) in Settings/ControlNet/Multi ControlNet: Max models amount. Set it to 2-3.
Updated: ControlNet updated for SDXL, models here.
Step 7. Update Regularly
You can manually update the version of AUTOMATIC1111 by running git pull from its folder or put the command into the batch file (you may use webui-user.bat for that). This way the webgui updates every time you run the batch file. Edit the batch file and add the path to your python installation (if you run several Python versions on your machine, this steps seems to be optional) and the command for update, from this:
@echo off

set PYTHON=
set GIT=
set VENV_DIR=
set COMMANDLINE_ARGS=

call webui.bat
To this (add your correct python.exe location and git pull command):
@echo off

set PYTHON="C:\Users\YOURUSERNAME\AppData\Local\Programs\Python\Python310\python.exe"
set GIT=
set VENV_DIR=
set COMMANDLINE_ARGS=--xformers --api
git pull
call webui.bat
There are also some arguments added (--xformers argument is for running xformers and --api will help to connect with f.i. chaiNNer). I suggest keeping several different versions of the webui in different directories though, to replicate older experiments more easily.
How to Solve an Error When PyTorch and/or Xformers are Outdated
The API is developing fast. If you have a message about outdated PyTorch or Xformers in the terminal, edit webui-user.bat this way and run it once (it will download several gigabytes):
@echo off

set PYTHON="C:\Users\YOURUSERNAME\AppData\Local\Programs\Python\Python310\python.exe"
set GIT=
set VENV_DIR=
set COMMANDLINE_ARGS=--reinstall-torch --reinstall-xformers
git pull
call webui.bat
After succesful update, end the webui program in terminal by pressing CTRL-C (and answer Yes if needed).
Then change it to this and repeat the process:
@echo off

set PYTHON="C:\Users\YOURUSERNAME\AppData\Local\Programs\Python\Python310\python.exe"
set GIT=
set VENV_DIR=
set COMMANDLINE_ARGS=--xformers --reinstall-xformers
git pull

call webui.bat
Then revert the content of webui-user.bat to:
@echo off

set PYTHON="C:\Users\YOURUSERNAME\AppData\Local\Programs\Python\Python310\python.exe"
set GIT=
set VENV_DIR=
set COMMANDLINE_ARGS=--xformers --api
git pull

call webui.bat
Alternatively, it can look like this (if you have some persistent issues with Python version):
@echo off

set PYTHON=
set GIT=
set VENV_DIR=
set COMMANDLINE_ARGS=--skip-python-version-check --xformers --api

call webui.bat
Then update all the extensions to the latest version too.
Customizing Launch with Batch File
As you can see above, you can customize arguments for web UI batch file. You can put them after set COMMANDLINE_ARGS= . There are several useful ones
- --medvram : for low VRAM GPUs
- --api needed for API calls from other software (chaiNNer, Blender)
- --update-check can inform you about new version of UI
- List of all of command line arguments https://github.com/AUTOMATIC1111/stable-diffusion-webui/wiki/Command-Line-Arguments-and-Settings
Updating Issues: How to Install New Version of PyTorch/Python and Resolve Errors?
Sometimes you may run into issues when upgrading. To be sure your software versions are mutually compatible, I suggest to not install PyTorch manually. After installation of new version of AUTOMATIC1111 (or updating Python to version 3.10.9 f.i.), delete folder VENV in A1111 folder and let webUI reistall PyTorch itself.
Also after installation do not forget to restart the system.
How to Revert to Older Version of A1111
Sometimes when bigger update comes, it may affect the functionality. It may take some time then the issues are fixed. How to return—or downgrade—to the older version?
git log- Pick the hash you want
git checkout <THEHASHYOUWANT>
When the problem is fixed and you want to return to updating to the latest version:
git reset --hard
git checkout HEAD
or
git checkout master
git pull
Changing Branches and Development Branch
You can change to development branch to test new features before an official update (you may check actual branches on A1111 github). In your \stable-diffusion-webui\ folder, open cmdterminal:
- Run
git pull - Change to dev branch
git checkout dev - Run A1111 in dev branch (using webui-user.bat)
- Return to normal branch
git checkout master
Using LoRAs and Other Networks
After the installations and first run, Lora, hypernetworks etc. folders appears in your stable-diffusion-webui/models folder. To install new models, just copy the files into the appropriate folder (textual inversions and embeddings go to stable-diffusion-webui/embeddings folder).
Tips for the Interface and Settings
Go to Settings tab:
- Add useful quick settings on top of the UI. In Settings/User Interface find Quicksettings list. Add these in whichever order you want:
CLIP_stop_at_last_layers(perhaps the most useful),sd_vae,eta_noise_seed_delta(set it to 31337, or whatever number you wish) - In Saving images/grids, uncheck Allways save all generated image grids. This will prevent saving the grids from all your generations to disk, creating a huge folder. You can then save a chosen grid by the save button (this is completely optional).
Apply settings and reload UI.
Tips for Your Experiments
Read more about these subjects:
- Guide for SD Photorealism
- Prompting and Prompt Engineering
- Stable Outputs and ControlNet
- Techniques for Controlling Diffusion
- Training LoRAs
For more AI related articles, check Education/AI Stable Diffusion in the main menu or AI tag.You may also find some resources and useful links in my project for developing AI tools for designers.
Conclusion:
Today, even if an absolute beginner, you have learned something about tools used in data science, when working with machine learning models and artificial intelligence. Enjoy the experiments with AI image generation using machine learning models for diverse applications! You may also use the API for further editing images and videos in the node-based chaiNNer tool, as I described in this article.

