Forge (UI) Ahead: LLM Vision and Text Prompt Engineering for FLUX.1

Flux model is versatile (even if better suited for photorealism at the moment), and it seems to react nicely to verbose descriptions. To effectively leverage the power of FLUX.1 you can use LLM-Vision/Text LLama 3 model for generation directly from the A1111 Forge UI interface (there are also node solutions for ComfyUI, for some time already). This article will guide you through the process of setting up Auto LLM Extension and a suitable model for your LLM-Vision and LLM-Text experiments using FLUX.1.
What You Will Need
- Forge UI Installation
- Auto LLM A1111 Extension
- LM Studio Installation
- Llama 3 model or text/vision model
- Flux.1 model
- 16GB+ of VRAM is recommended (you probably may use the technique on lower VRAM, f.i. using a smaller FLUX and LLM quantized models)


Quick Installation Instructions
Forge UI + Auto LLM + FLUX.1
Install free version control manager git from git-scm.com. In target folder, where you want your Forge Ui installation, open cmd terminal and run git clone https://github.com/lllyasviel/stable-diffusion-webui-forge.git
Run webui-user.bat to automatically setup Forge UI.
After the installation finishes, run Forge UI (webui-user.bat) and head into the Extensions tab. Go to Available, click "Load from:" button. After the list appears, find Auto LLM (sd-webui-decadetw-auto-prompt-llm) extension and install it. Apply and restart Forge UI.
Now download FLUX.1 model version you want (consider your VRAM size). Unless you use flux1 bnb-nf4 versions you will also need clip , text encoder and the correct VAE files. You will find more detailed article about FLUX.1 in Forge here.
You may consider a smaller quantized version of FLUX, depending on your VRAM size, SCHNELL https://huggingface.co/city96/FLUX.1-schnell-gguf, DEV https://huggingface.co/city96/FLUX.1-dev-gguf
LM Studio + Llama Vision Model
With LM Studio you can easily install run LLM models locally. Install LMStudio https://lmstudio.ai/.
In LM Studio, go to Search section (a magnifying glass icon). Search for xtuner. Download two files:
- llava-llama-3-8b-v1_1-mmproj-f16.gguf (VISION ADAPTER)
- llava-llama-3-8b-v1_1-int4.gguf (MODEL)
You may experiment with various llama 3 models for text generation, but only versions with VISION ADAPTER will work in the LLM Vision mode in Auto LLM Extension.
An article about LM Studio and LLMs running locally is here on the site.
Settings in LM Studio and Forge
To run the downloaded VISION/TEXT LLM model in LM Studio, use "Local Server" icon on the left, click the top button for loading models, and load the xtuner llava llama 3 model. The server should start automatically (if does not, use "Start server" button in Configuration frame panel).
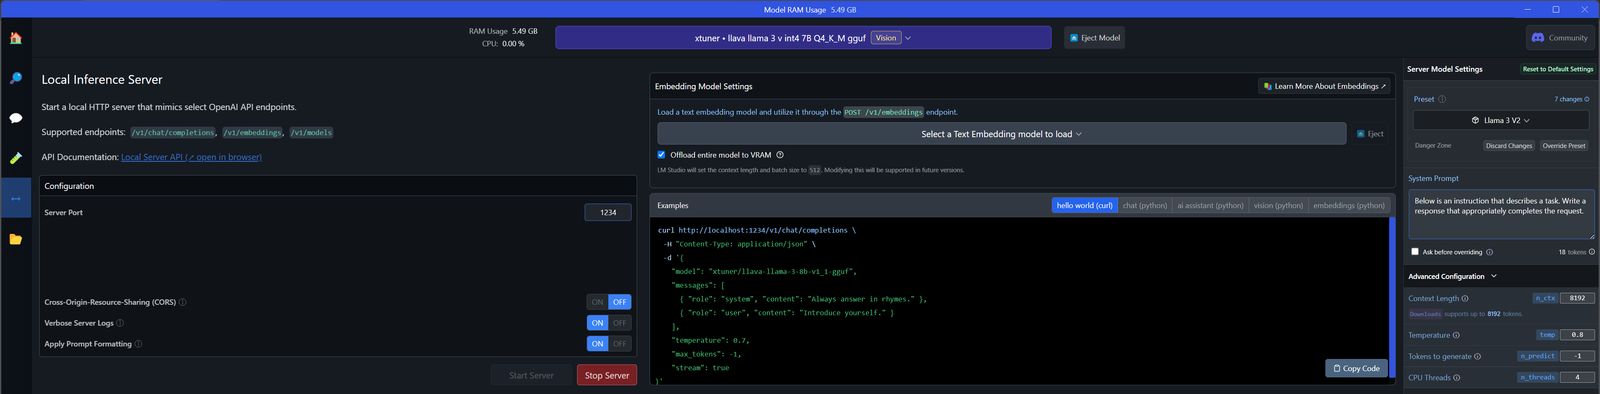
With these settings the controls from Auto-LLM should work for both LLM-text and LLM-vision.
Auto LLM Usage
LLM-text
- In Auto LLM, activate "Enable LLM-Answer to SD-prompt"
- In Auto LLM, put your prompt into [LLM-Your-Prompt], and you may use A1111 "Generate" button to create and image even with empty normal prompt.
- Additionally, You may use Call LLM above button in Auto LLM extension, to generate the prompt into the text window, and copy+paste from there.
LLM-vision
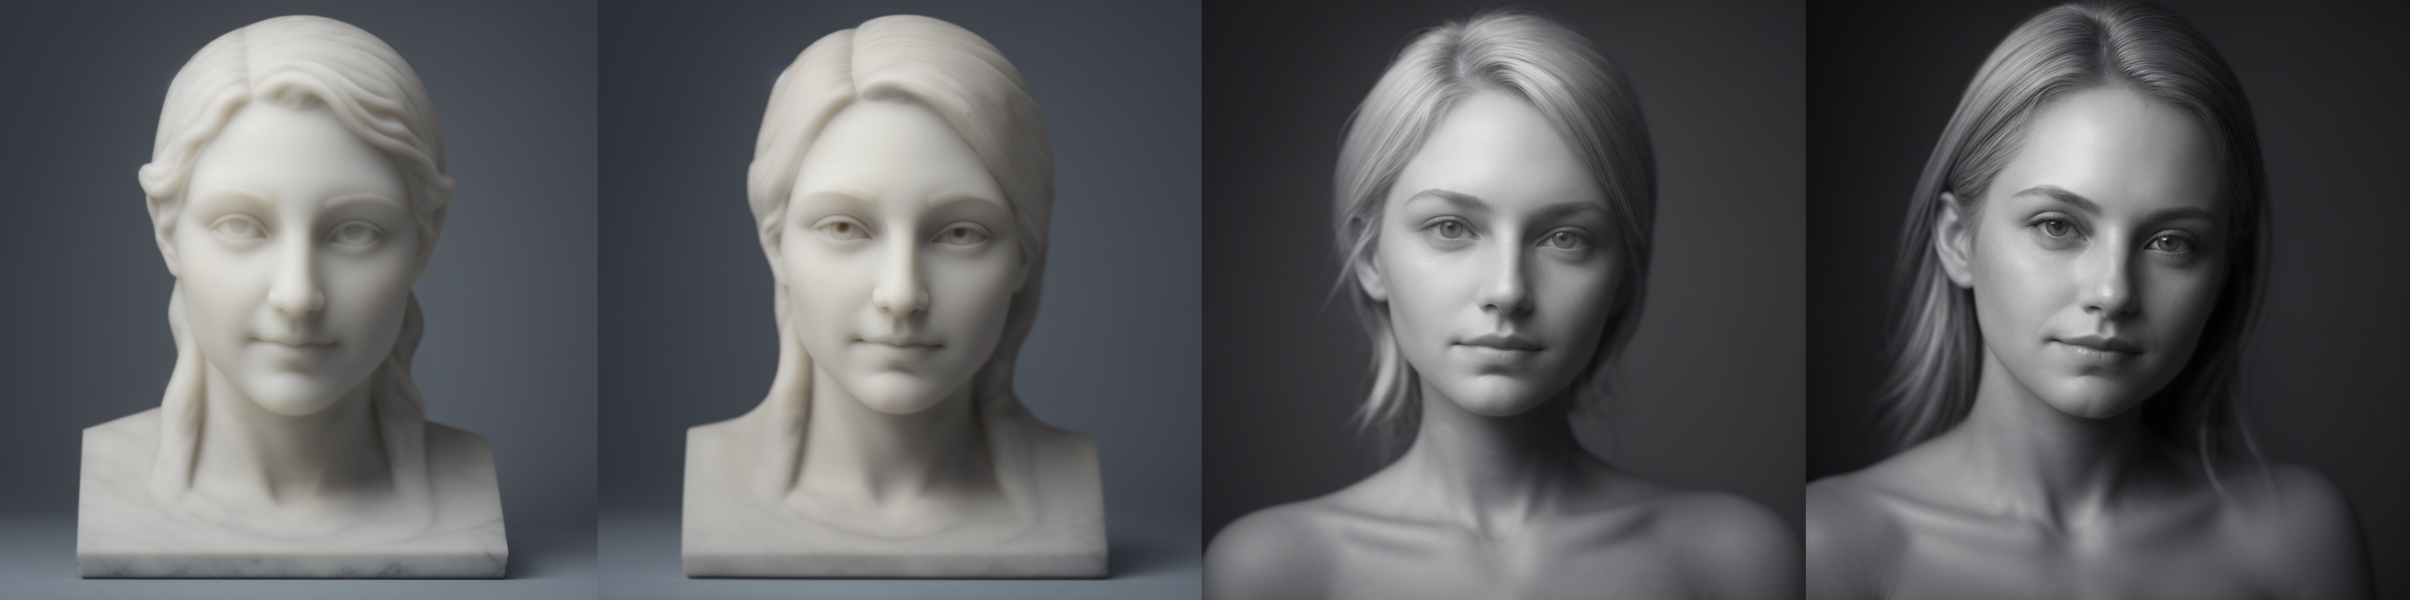
- Drag+drop an image and press Call LLM-vision above. You need a model with vision adapter installed, see instructions above.
- For another image, close the current one with cross symbol, and drop the next one.
- If "Enable LLM-vision" is active, the prompt generated from an input image is used as a main prompt, similarly to LLM-text.
Note: Auto LLM is currently under development, so some new features may not work as expected.
Tips
- You may use automated prompt generations, or use both text and vision outputs to use in a prompt manually
- Auto LLM has interesting iterative functions, check LLM-text Loop for instance
- Experiment with LLM temperature, the higher the more creave the LLM output is. In some scenarios though, setting it too high may cause errors.
- Experiment with LLM Max length(tokens), you may set it for a max and see the results.
Solutions to Errors You May Encounter
Error code: 400 - {'error': 'Vision model is not loaded. Cannot process images...
LLM-vision error. You are using a Llama model without a vision adapter. Install the proper model with a vision adapter as described above.
Connection error.
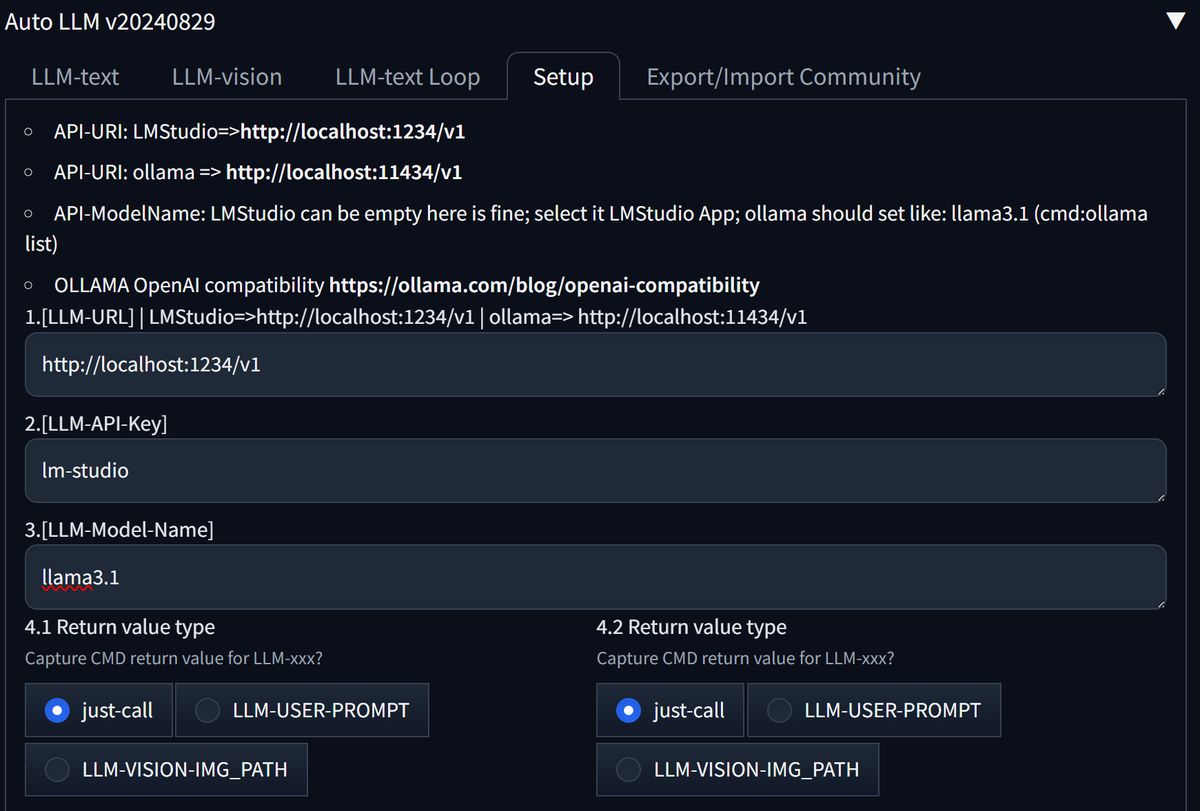
LLM-text error. Check if the LM Studio server is running, with a loaded model. The error may appear with an incorrect Setup. Check Auto LLM Setup and fill all needed info to connect to LM Studio: [LLM-URL] http://localhost:1234/v1 [LLM-API-Key] lm-studio
[Low GPU VRAM Warning]
This may show in A1111 Forge terminal. Usually, the rendering will be very slow after the warning. Use a smaller model, free some VRAM, or prepare the final prompts separately before rendering. In LM Studio, experiment with GPU Acceleration/GPU Offload in the right 'GPU Settings' tab, try to lower the offload to VRAM (Low setting, the text generation will take much longer).
Testing LLM Prompts Created by Llama 3.1 Storm
The model (akjindal53244/Llama-3.1-Storm-8B-GGUF/Llama-3.1-Storm-8B.Q6_K.gguf) makes great use of Auto LLM extensions LLM Max length(tokens) 5000 (:p) cap. Although it does NOT have a vision adapter, it is worth to test for prompt text generation (higher VRAM needed). I would suggest 2500 tokens to be a reasonable cap for testing, depending on your GPU and FLUX model. Check References for a link to my test settings.

Conclusion
By following the steps outlined in this article, you've successfully set up a suitable LLM-Vision and LLM-Text model for your experiments with Flux.1.
One of the significant advantages of using Flux.1 is the ability to experiment with highly verbose prompts (especially with techniques like Hyper-SD). This flexibility allows you to provide detailed descriptions and instructions, leading to more precise and tailored results.
You can expand your existing prompts and test them with FLUX.1. This iterative process enables you to refine your prompts, learn from the model's responses, and continually improve your generations and styles.
References
- Auto LLM https://github.com/xlinx/sd-webui-decadetw-auto-prompt-llm
- My Auto LLM test [LLM-System-Prompt] here> https://github.com/sandner-art/ai-research/tree/main/Auto%20LLM
- FLUX.1 bnb https://huggingface.co/silveroxides/flux1-nf4-weights/tree/main
- LLAMA VISION https://huggingface.co/xtuner/llava-llama-3-8b-v1_1 , https://huggingface.co/xtuner/llava-llama-3-8b-v1_1-gguf
- LLama 3.1 Storm 8B GGUF Quantizations https://huggingface.co/bartowski/Llama-3.1-Storm-8B-GGUF