Prompt Engineering and Diffusion Control in Synthetic Photography
With the fast development and application of custom training methods, (available even on consumer hardware) the prompt engineering approach can be often overlooked, sidetracked, or complemented with other control methods. With custom models, you can achieve the expected result without a complex prompt.
With that said, it is useful to get into the very basics of prompt engineering, Consider the prompt as a natural language script to generate your image (which literally it is). With good structure, you can get the best output even with very simplistic prompting.
Prompting is also specific for the environment and extensions used, we will explore AUTOMATIC1111 web GUI in this article.
Order of Tokens
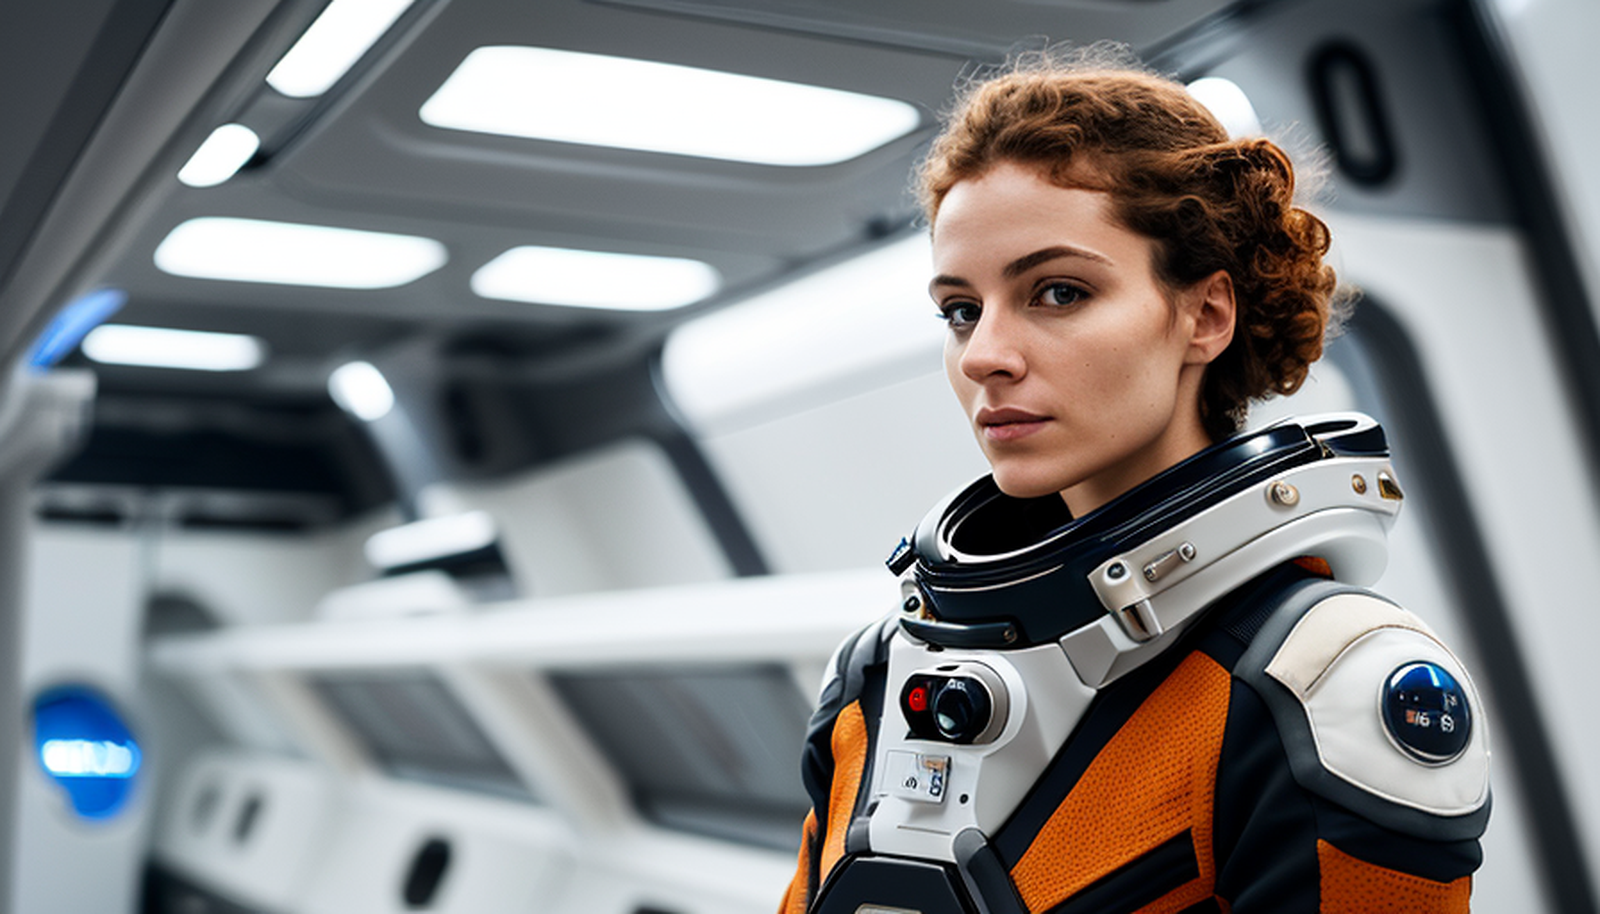
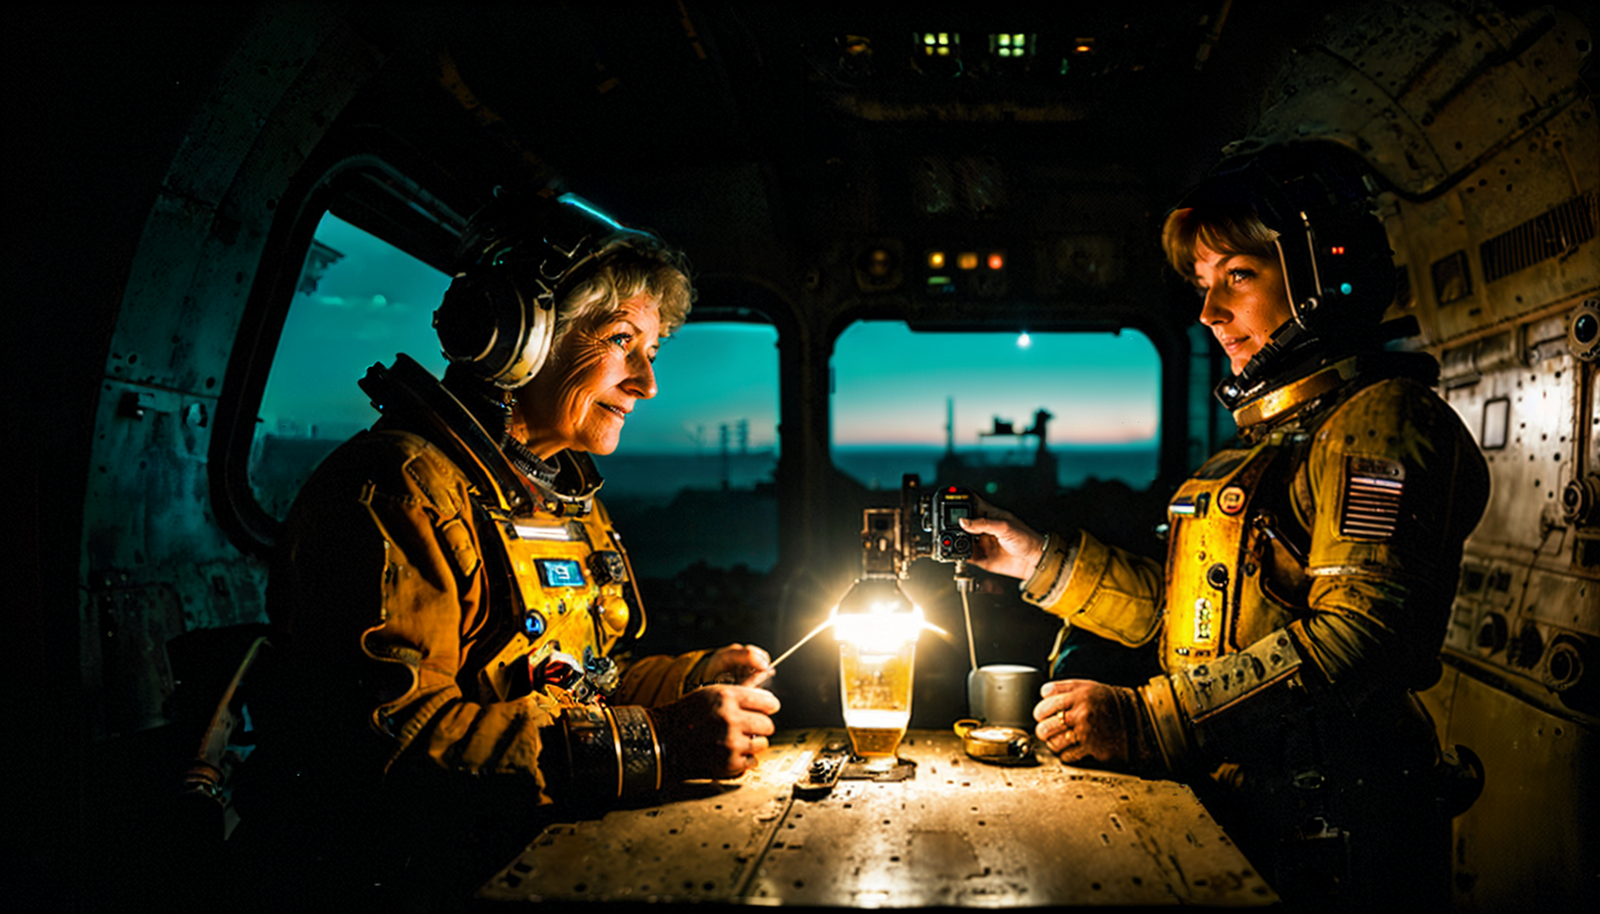
A word (or number, interpunction) in the prompt is called a token (because a word is eventually translated into one). Depending on the model, the order of tokens in the prompt affects the result. In this illustration, you may notice the first image takes a more photographic composition of the living model. Brackets and punctuation marks in the example prompt will be explained in a bit.
Dividing with Interpunction (Commas, Dots)
Dots and commas organize the prompt and are in a way interchangeable. Prompts "woman, sitting, chair", "woman. sitting. chair." and " woman sitting chair" create different outputs but with the same concept. If you want to divide the separate subjects or make an object prominent, use | or weight brackets.
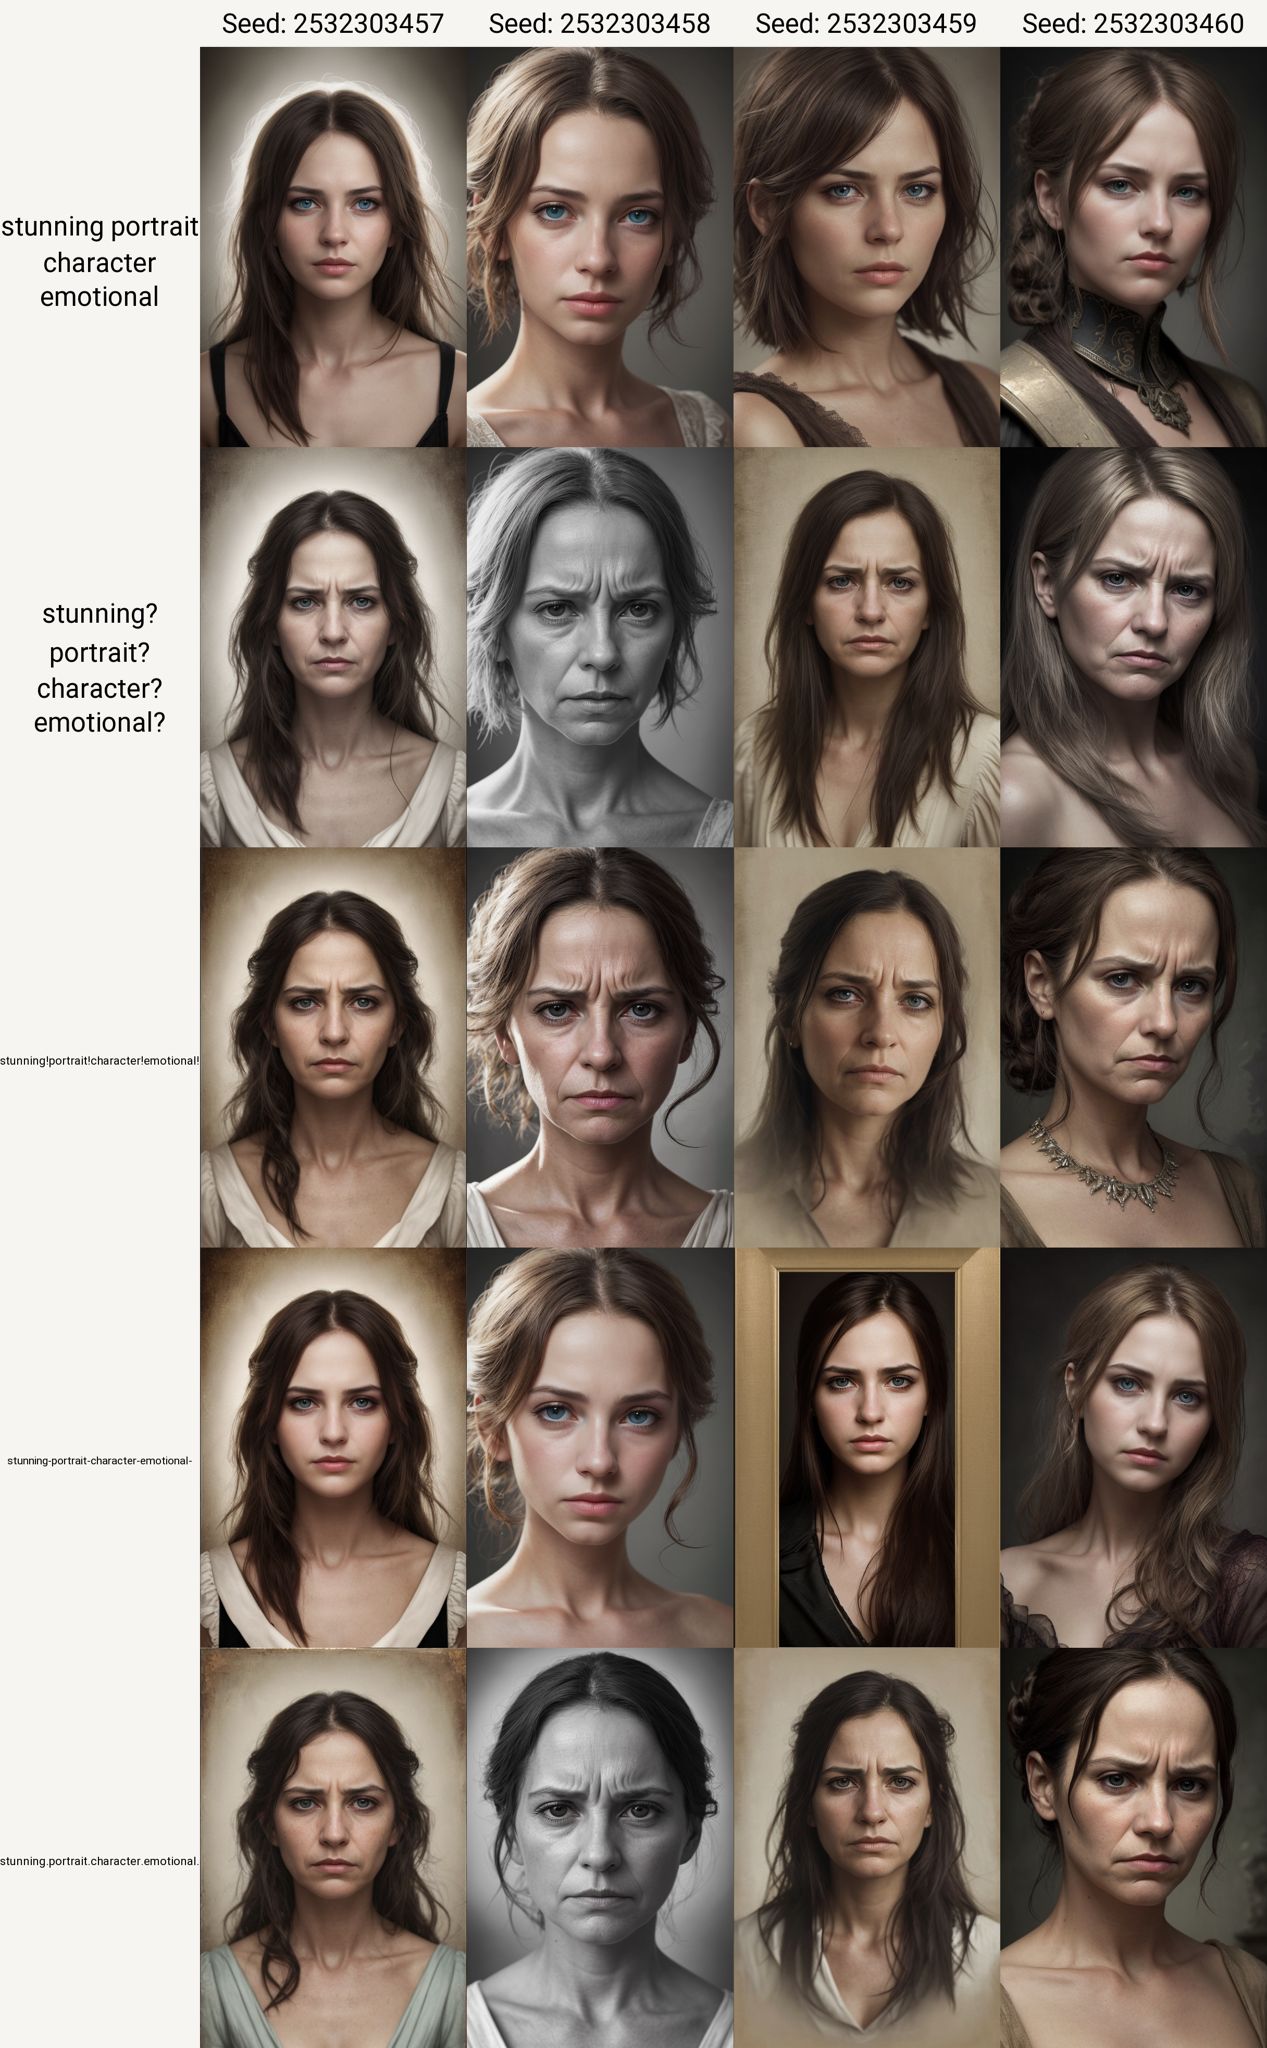
You may notice, for instance, that using dots tends to result in more realistic outputs, while dashes create a more painted look. These effects are subtle and in a complex prompt, they will likely be overshadowed by tokens with more weight (such as photography or painting), but it is still worth experimenting with while using minimalistic prompts.
You may also experiment with quotation marks or parentheses if you need to divide your prompt, but mileage may vary. It is a pity there is not a tool available (yet) to visualize the neural connections which are causing these effects—available documentation is sparse, misleading or non-existent.
Compound Tokens
Experiment with compound tokens to achieve various effects. Example: product-photo, futuristic-design-style, mystery-element, feature-tatoo, feature-spikes etc.
For better quality and consistence of an image, especially to fix anatomy, you may test pixel.perfect, picture.perfect, or pixel.sorting compound tokens.
Weights and Weight Brackets
The weight looks like this (ceramic vase:1.3). It can also be a negative number. It means that there is more weight on this set of tokens when generating diffusion output. In A1111, you can use the shortcut CTRL+UP when a word is selected to make weight higher and CTRL+DOWN to lower it. You may also use CTRL with arrows to move between words in the prompt and CTRL+SHIFT to quickly select them. ALT+LEFT/RIGHT will move the prompt segment.
You may also layer the brackets ((ceramic vase:1.3) (dry flowers)) to emphasize the objects and make sure it appears in majority of iterations. This can be useful when testing concepts or a new model.
How to Use Square Brackets
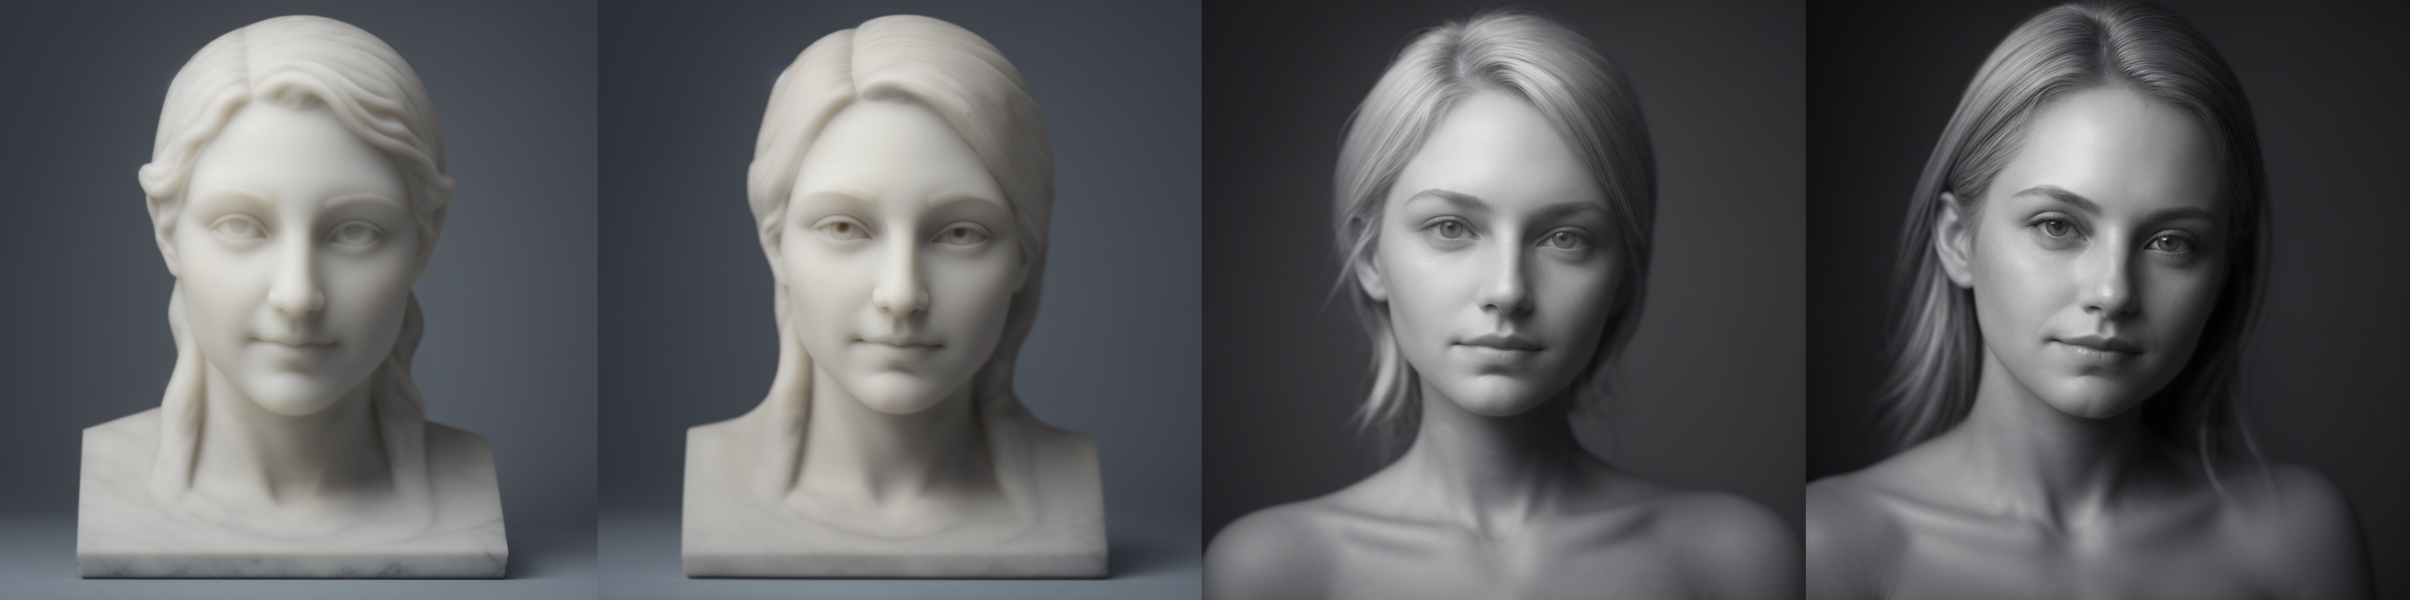
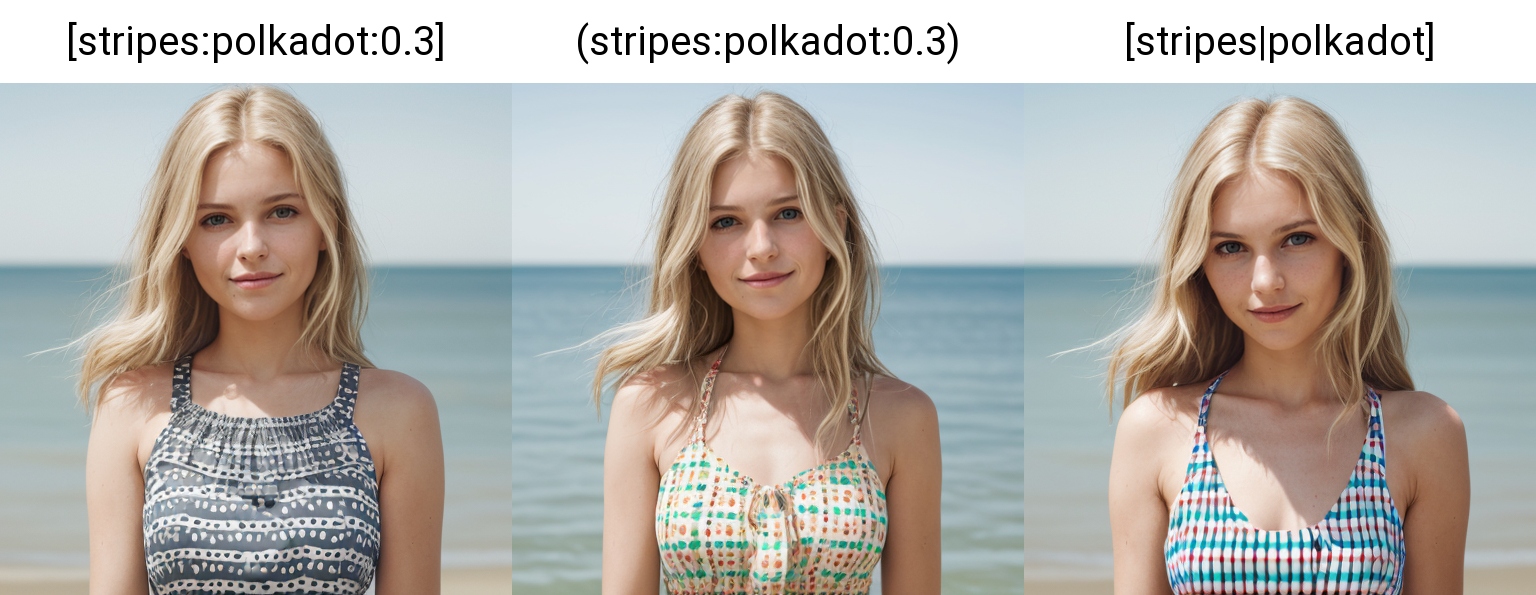
Using ( ) emphasize the token (or token string), square brackets [ ] de-emphasize it. In practice you will see the difference when using ratios (see image below). Note, that [token:number or ratio] de-emphasize only in the sense seen in the below illustation. Also, ( ) does not allow steps syntax or higher value than 2, [ ] does allow steps.

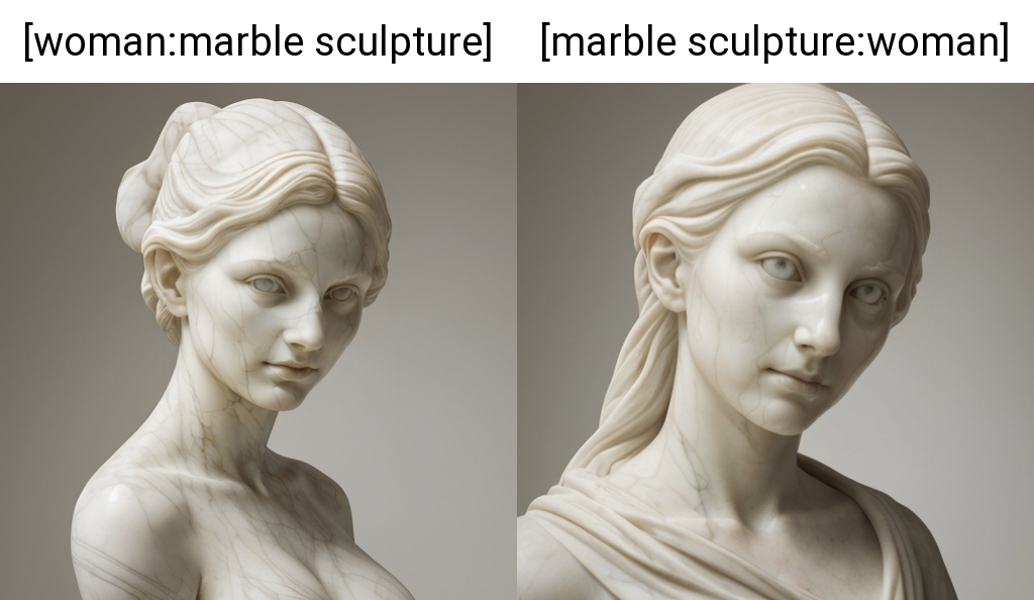
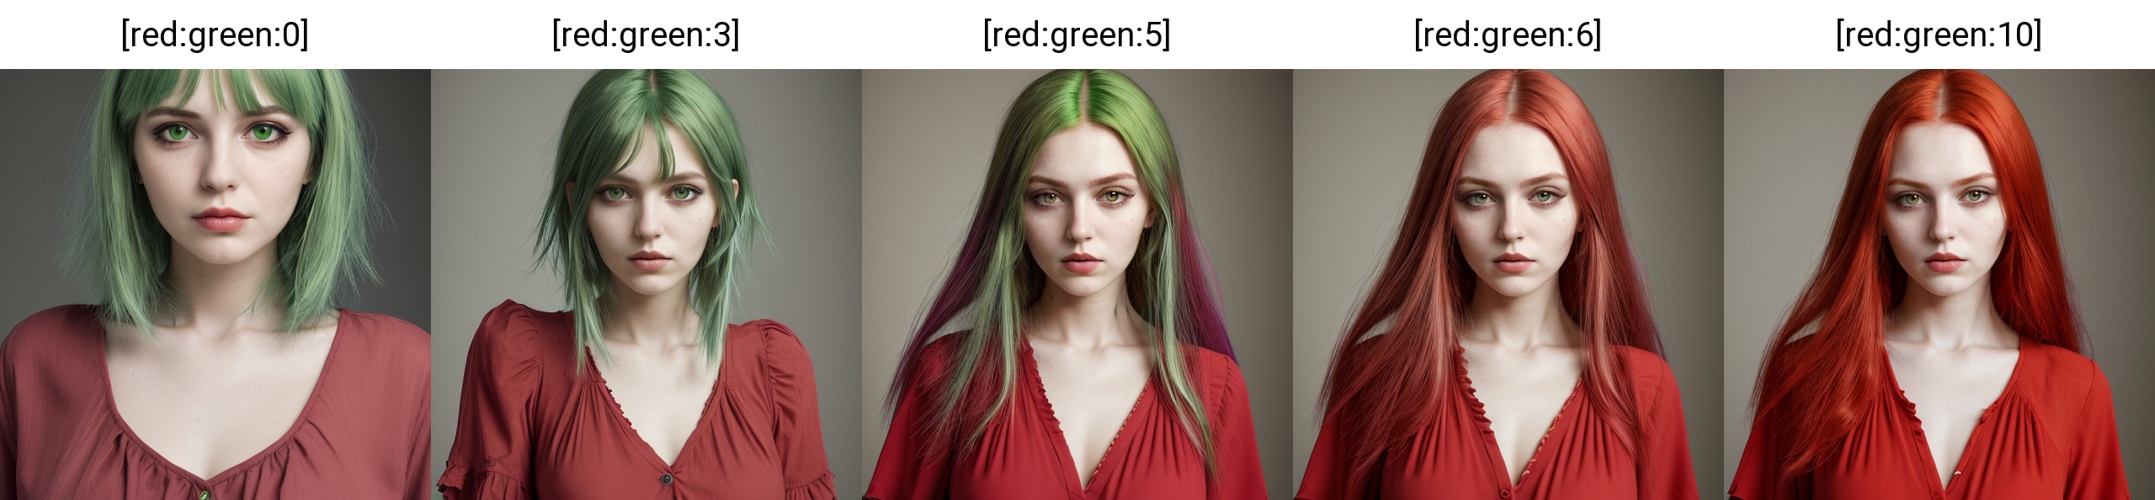
Switching Tokens with Square Brackets
You can switch tokens during diffusion after defined number of steps is reached. It is tricky, but you can perform some interesting design experiments with it. The syntax is:
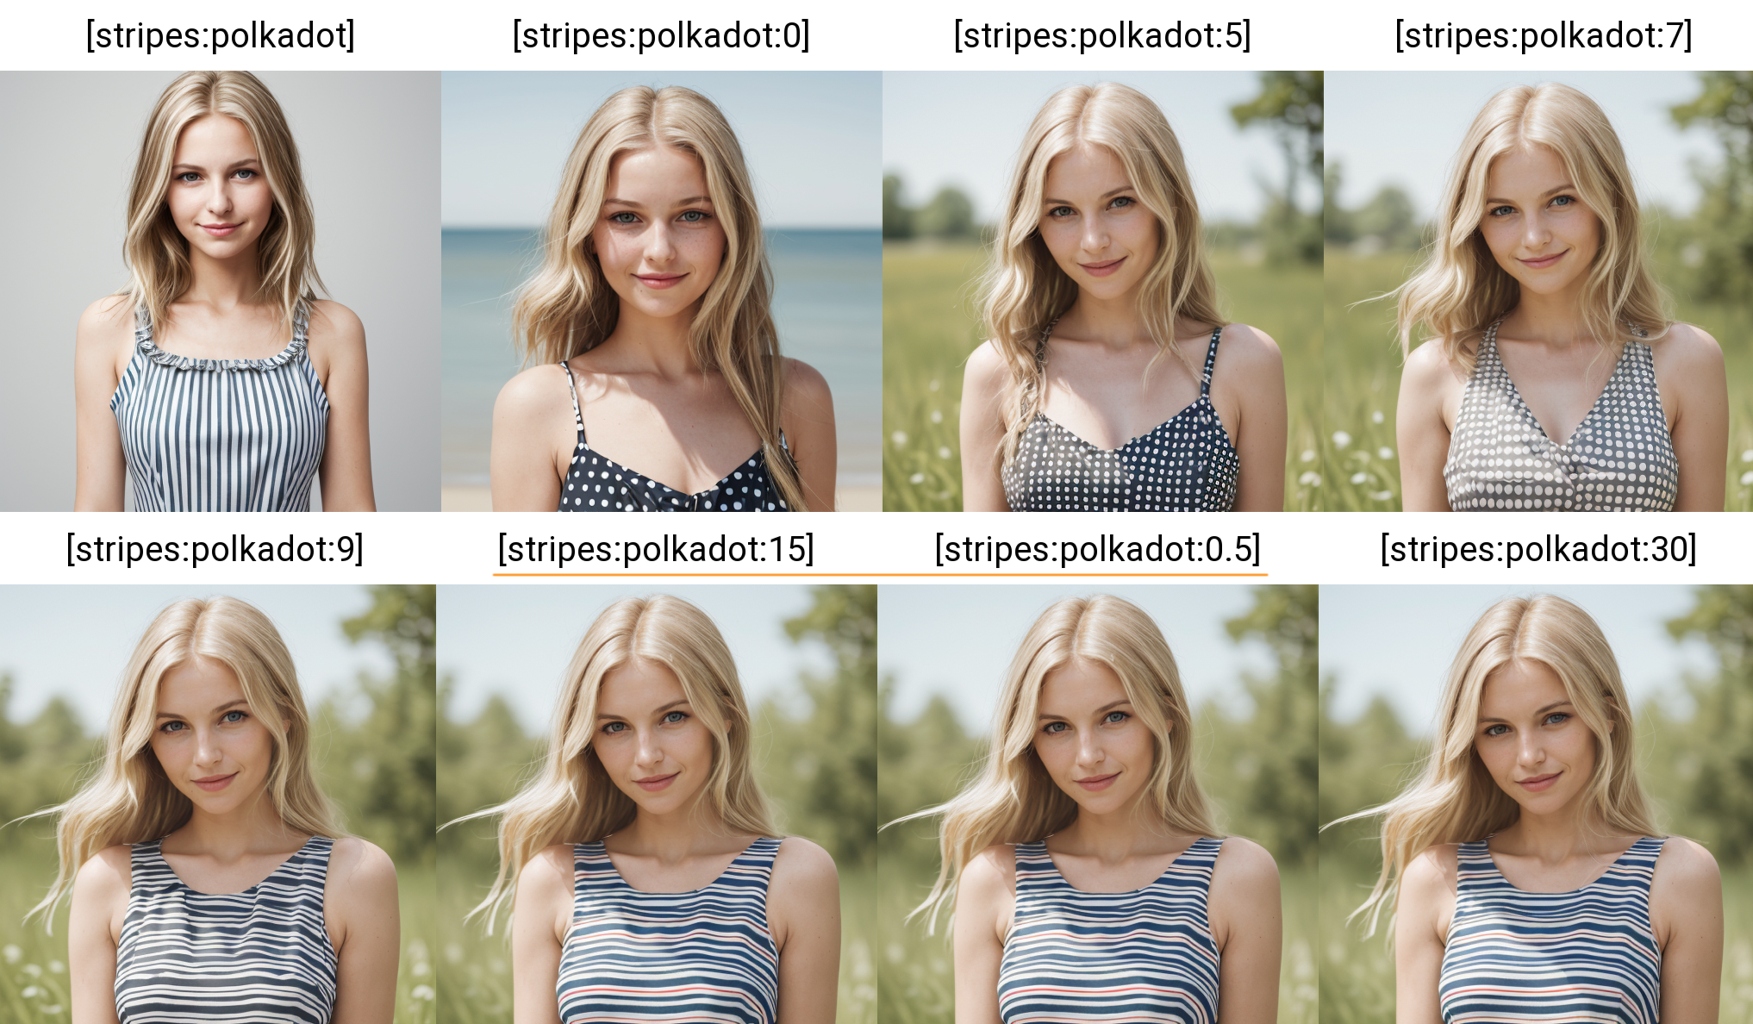
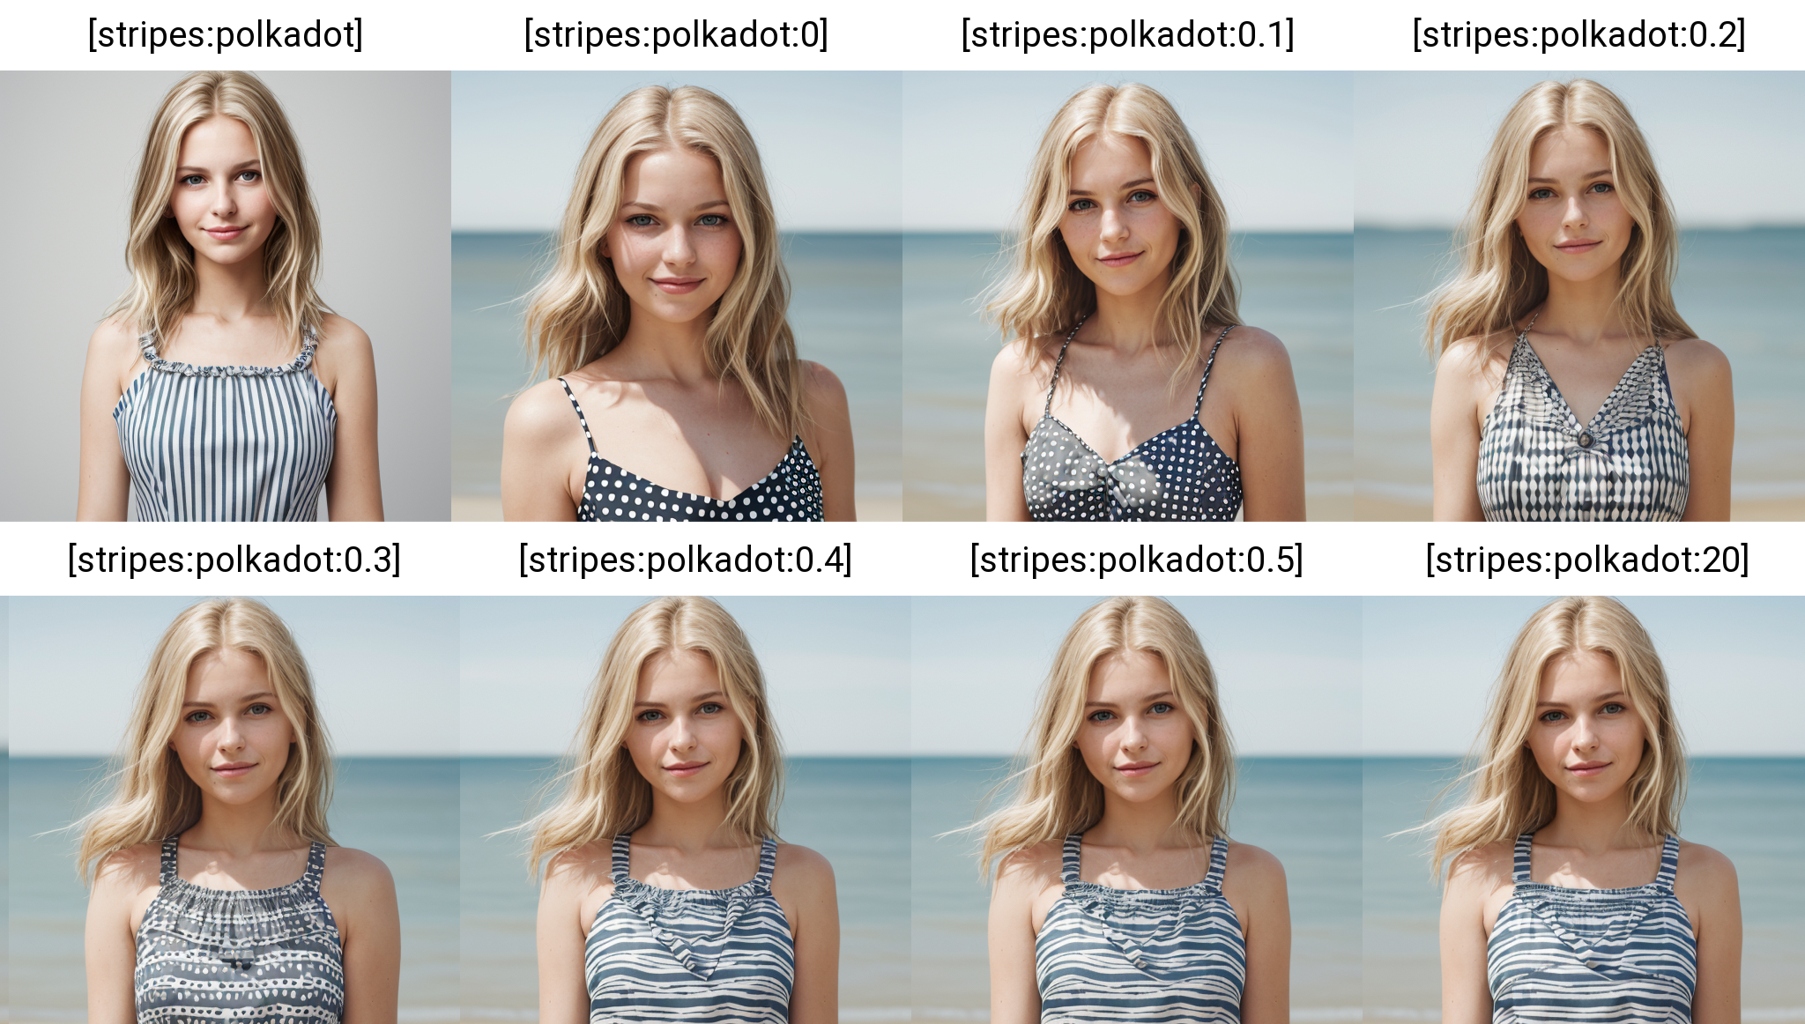
[token:number]Ignores token until the number steps have finished (tends to have very unintuitive outputs, use ratio syntax instead). It has the expected output between values 0.2-0.3[token::number]Ignores token after number steps have finished, no change after around half steps finished[token:token2:number]Switches to token2 after number steps have finished

IMPORTANT> The effects can (and will) change with sampling methods used (DPM++ 2M SDE Karras in the examples) and are also biased for the number of total steps.
Negative Prompt
In the negative prompt, you can point out tokens, which you want to filter from the output image. Weighting also applies here. You may also put embeddings or LoRAs here for a negative effect. Some advanced base models do not need overly convoluted negative prompts for a good result.
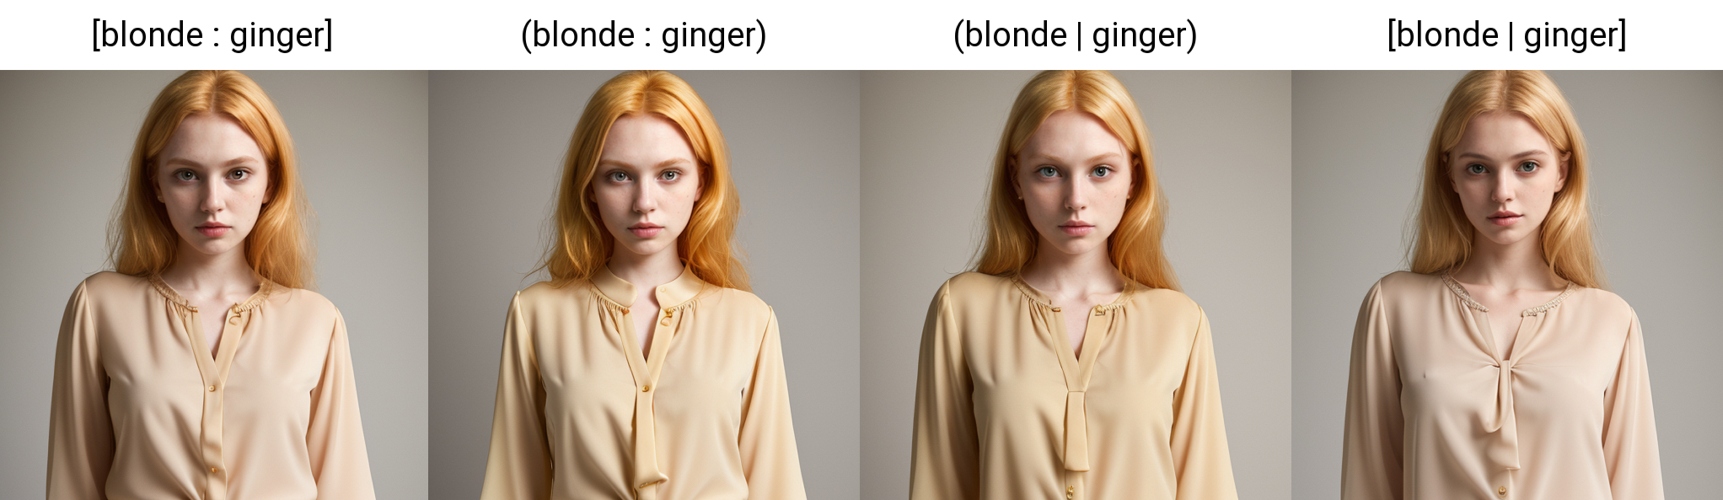
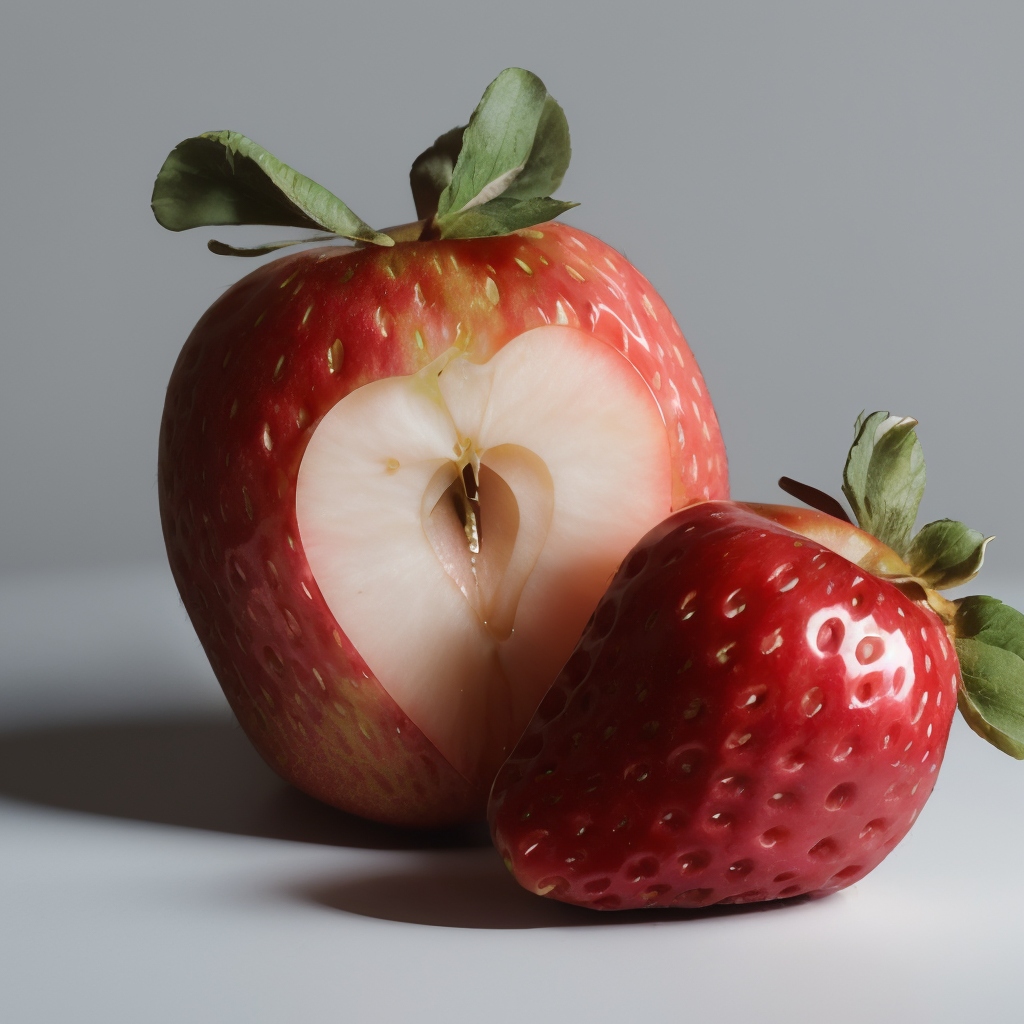
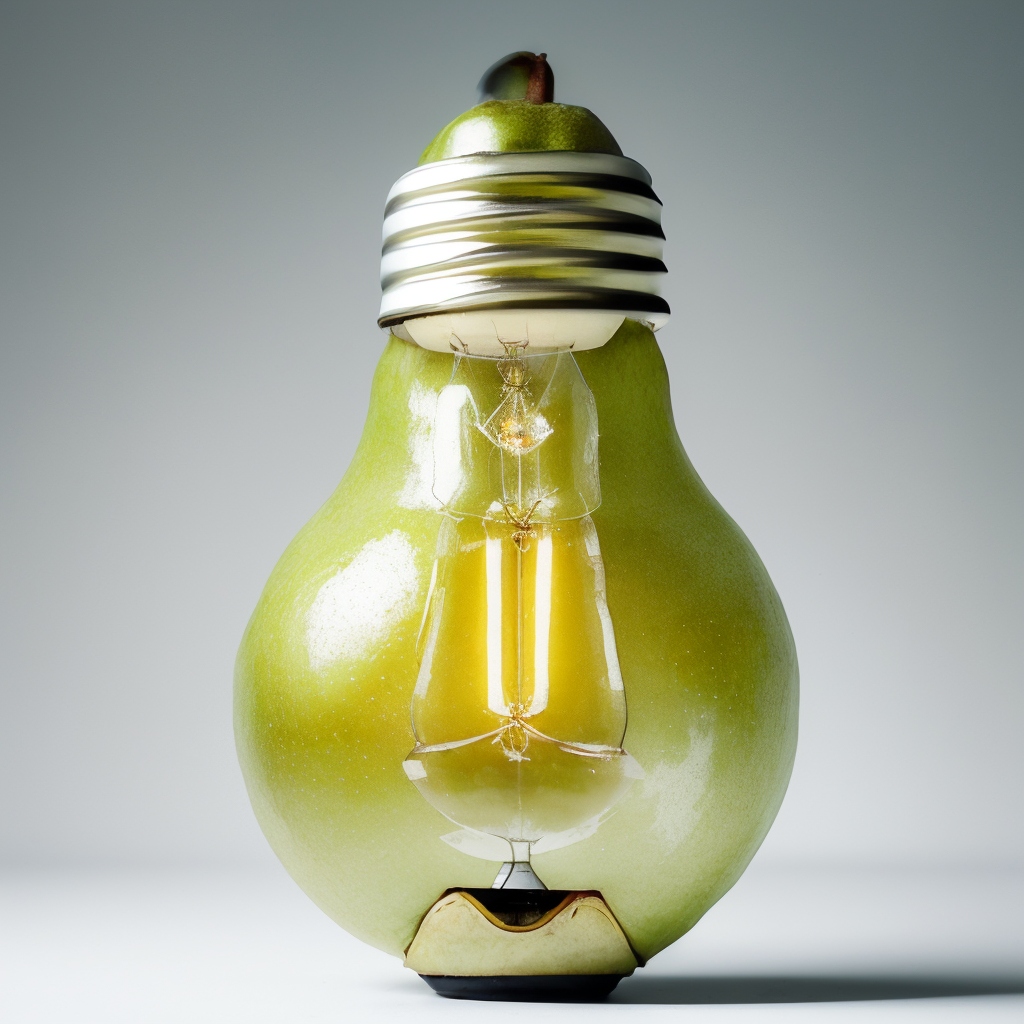
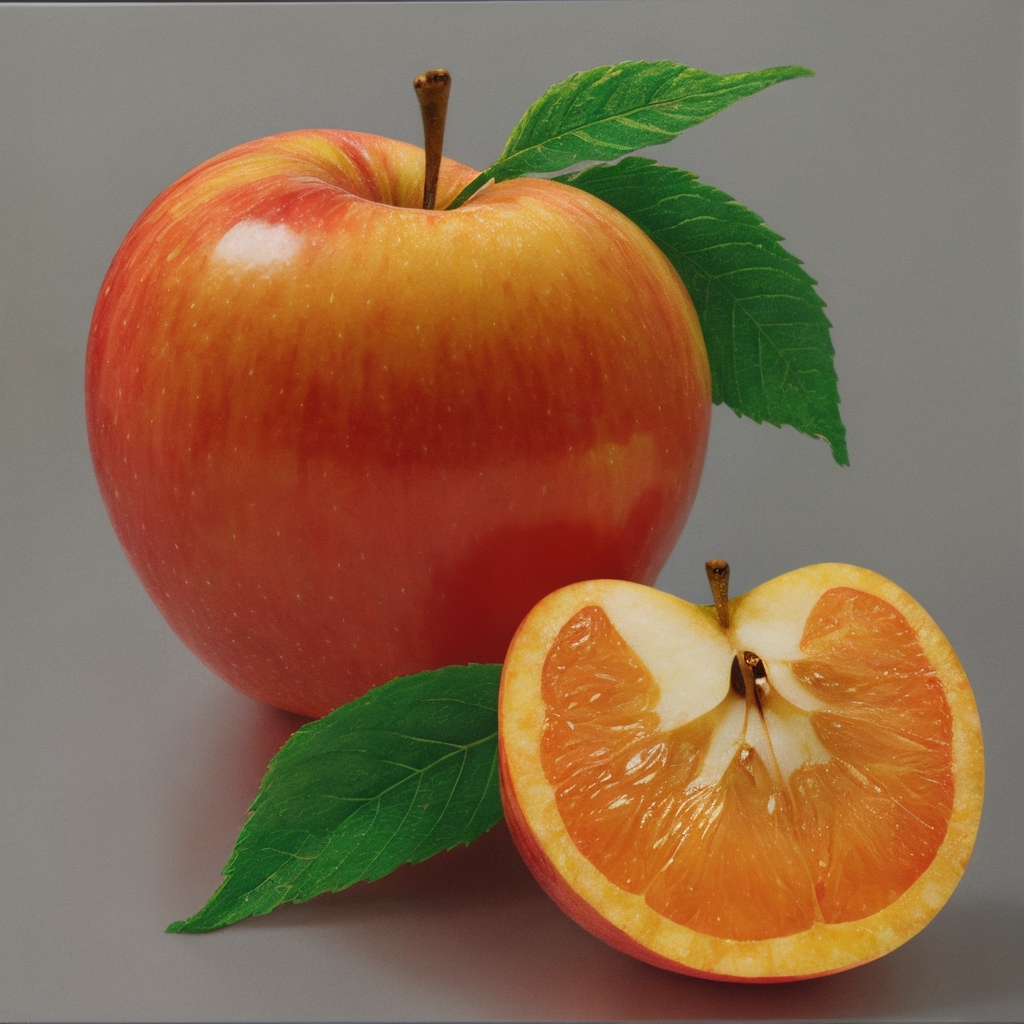
Blending and Variations
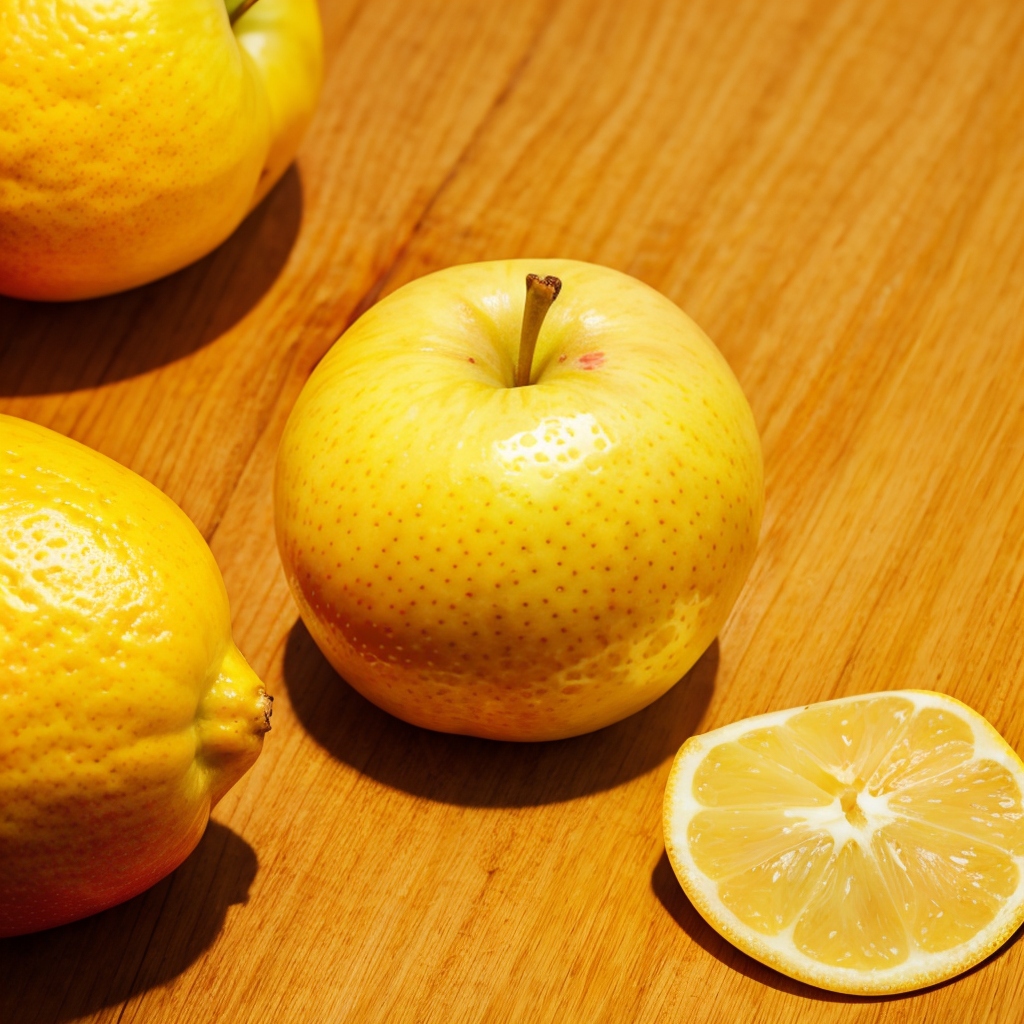
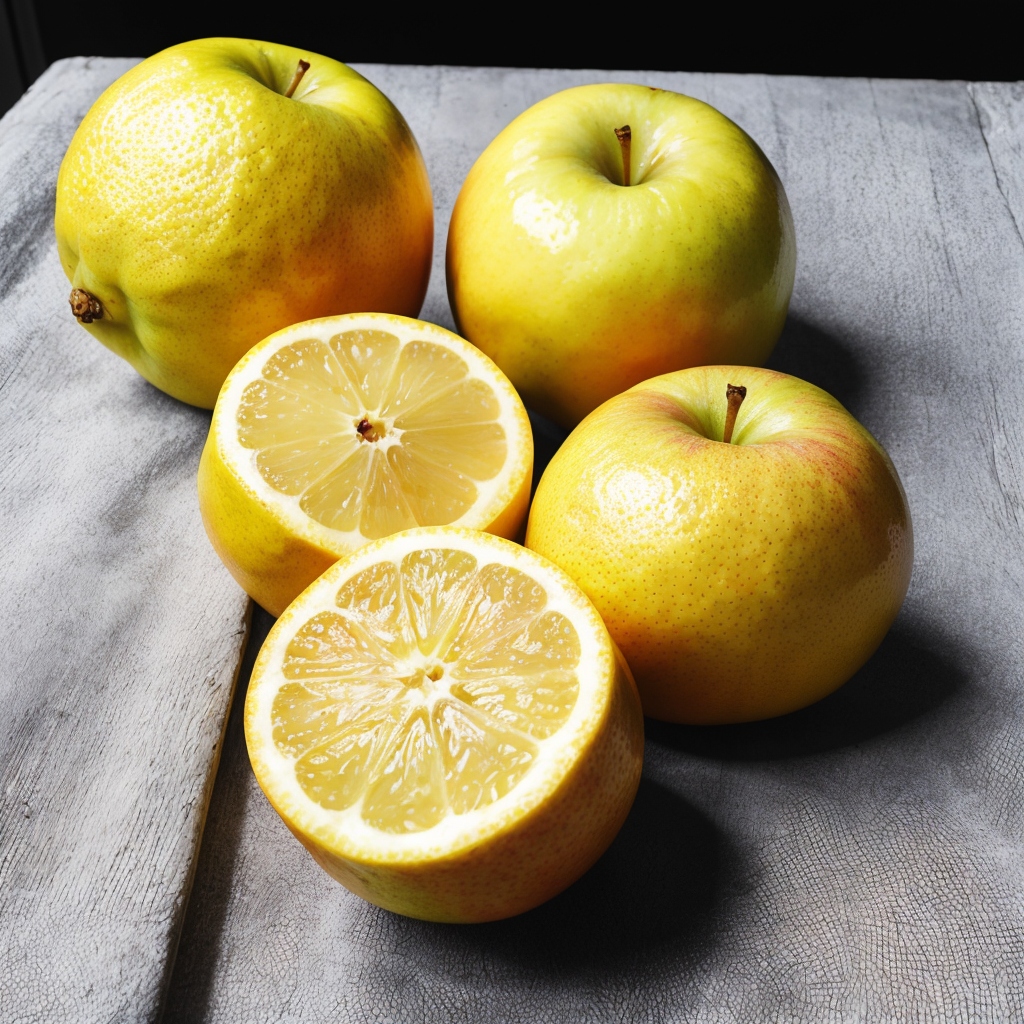
You can use various syntaxes to mix and blend subjects in stable diffusion (A1111). It is using brackets "()", square brackets "[]", pipe symbol "|", and colon or ratio symbol ":". Alternatively, you may use keyword "AND" to create morphs and alternations, but this method seems to create overbaked results and it has issues when upscaling (lower the CFG scale to around 5 to remedy this). Take a look at the examples and the gallery at the end of this chapter.
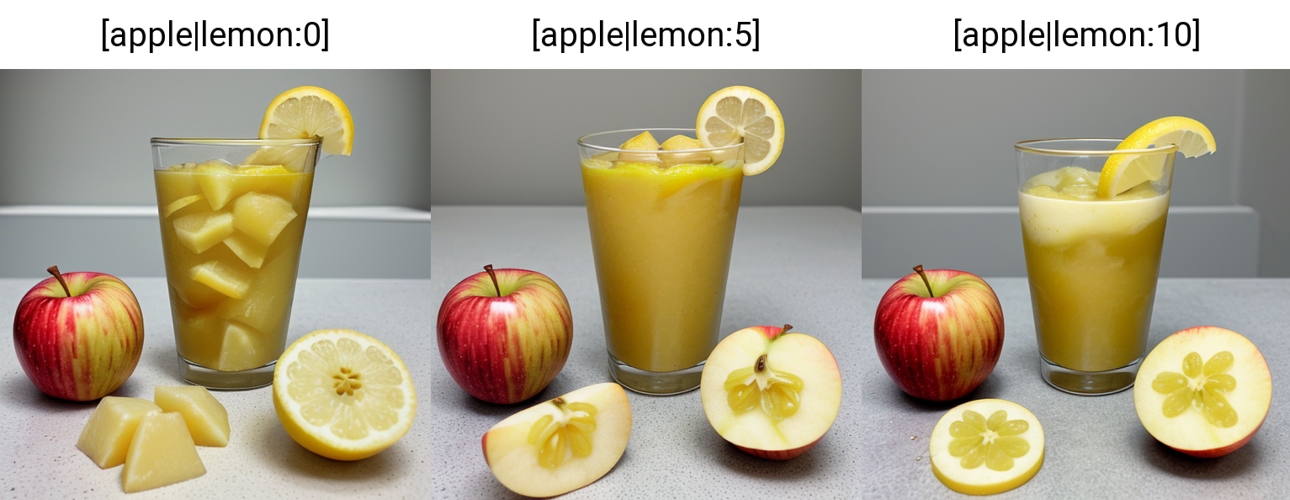
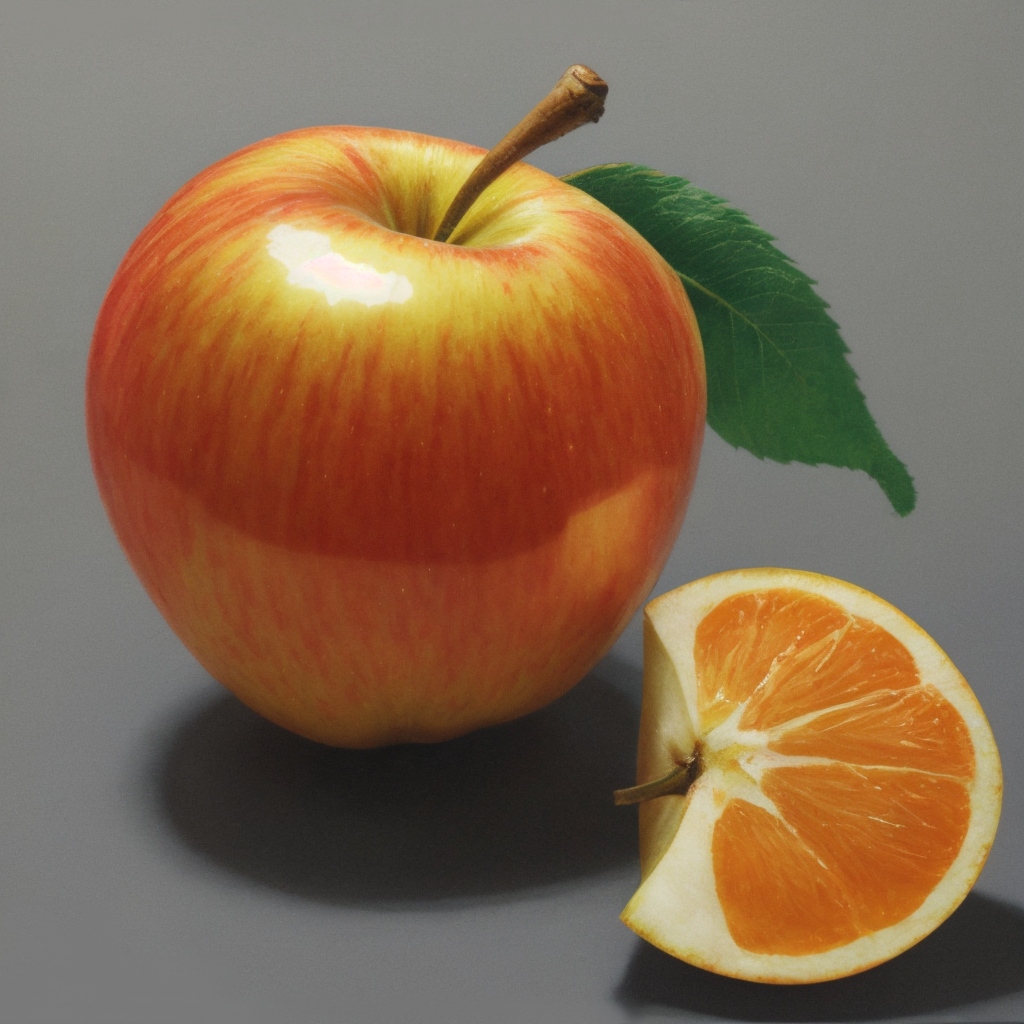
Ratio of elements can be inserted in steps or—as a ratio. In the above example, with a 20 total number of steps the last image could be written equivalently as [apple|lemon:10] or [apple|lemon:0.5].
Here you may see various syntaxes of properties combinations:
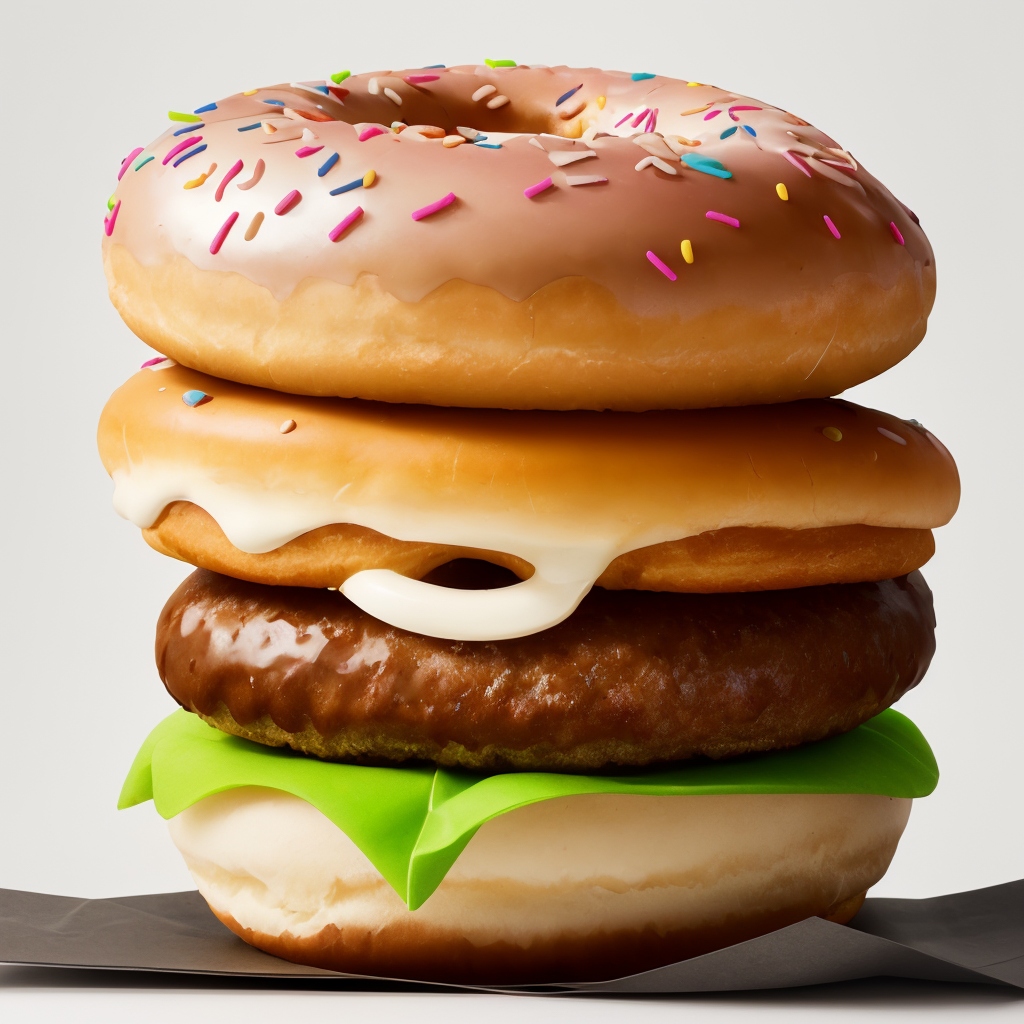
Above you have some examples of using AND operator. Due to token spilling, you may create hybrid images also with BREAK operator or without any operators, as you can see on examples below:
BREAK Operator and Chunks
Stable Diffusion 1.5 accepts tokens by chunks of 75 tokens (in SDXL it is more). If you reach that limit, the next chunk will start. If you will have too many tokens in the prompt, SD will tend to take some from different chunks. BREAK operator ends the chunk and starts the next one, so it sometimes separate parts of the prompt (you can use it for some experiments with long prompts). It can sometimes inadvertently separate subjects or properties in the scene.
More advanced use of BREAK operator to separate items is with Latent Couple and Regional Prompter extensions, as you can see in this article.
Stripes and Polkadot Experiment
This technique lends itself to creating combinations in design and pattern creation for various subjects. In this experiment, we will try to find the ideal setup for blending patterns on clothing.
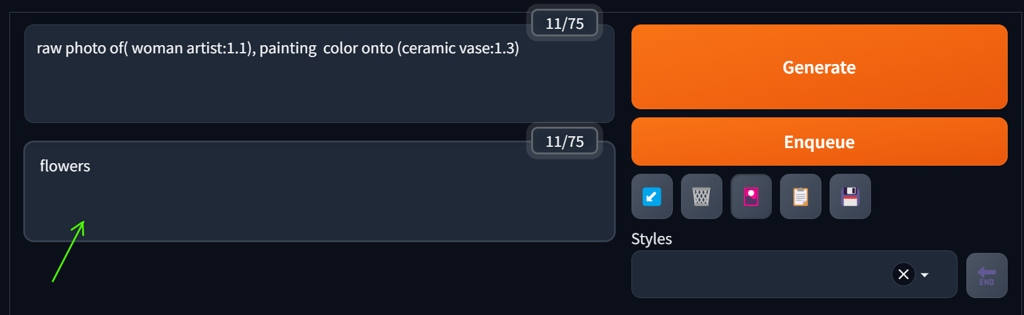
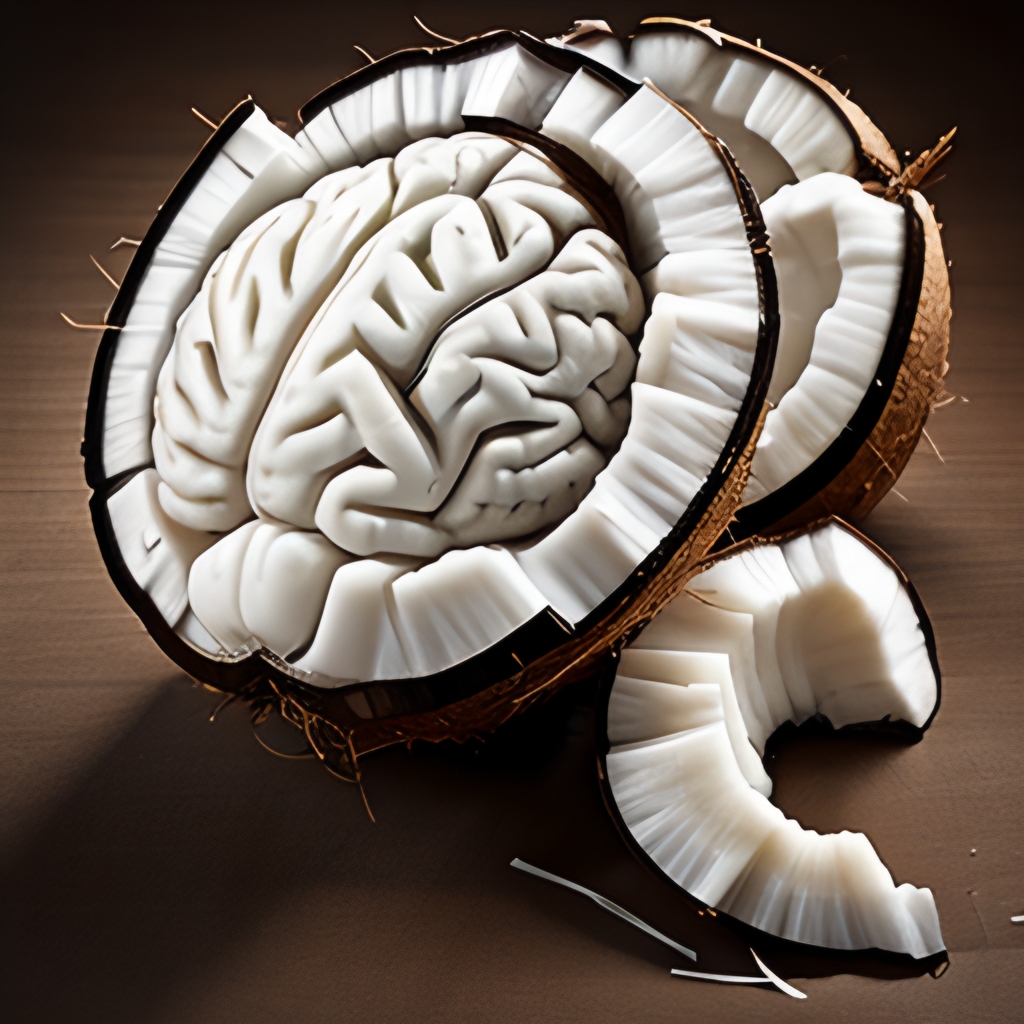
Token Spilling
Some token concepts tend to "spill" into the scene (sometimes it is called "prompt bleed"). The prompts containing colours or ambiguous words (like "painting") can influence the style or other objects in a scene. You can avoid this with advanced controlling techniques, it is very hard to deal with this with prompt engineering alone. In this example, you can see the token painting spilled both in the style and also in the overall composition. We can limit the effect with a very specific prompting:

Specific Keyword Tokens for Photography
As you can guess, the more precise you get concerning style or technique, the more realistic the output can be. However, this really depends on the quality of the model and its training. The output is specific to the base model used. There are models trained for this task, where complex prompts are not needed, and also hypernetworks, LoRA, and textual inversion (embeddings) which help with photorealistic outputs.
For a general use, you may try these tokens and prompt:
- backlit, intricate details, highly detailed, atmosphere, cinematic, dimmed colors, dark shot, muted colors, film grain, lut
- hasselblad, film grain, unity 8k wallpaper, sharp focus, high dof, masterpiece, dynamic angle, rule of thirds composition, volumetric lighting, subsurface scattering, f2, 35mm, bokeh, blur
- realistic, 8k uhd, dslr, cinematic lighting, high quality, film grain, Fujifilm XT3, rim lights
- sharp focus, soft focus, 8k, uhd, soft lighting, high quality, beautiful, professional, hyperrealistic, depth of field, Hyperdetailed, analog style, realistic, soft shadows, masterpiece, best quality, ultra realistic, 8k, golden ratio, intricate, High Detail, film photography
- hyper photorealistic, crispy quality, digital photography, cinematic, 4 k ultra hd
- RAW analog 3/4 photo portrait of (( definition )) with parameters, Photorealistic, Hyperrealistic, Hyperdetailed, detailed skin, soft lighting, subsurface scattering, realistic, heavy shadow, masterpiece, best quality, ultra realistic, 8k, golden ratio, Intricate, High Detail, film photography, soft focus, rimlight
You may also test some tokens specific for drawings or paintings, like (masterpiece), absurdres, best quality.
Tips
- Use models trained for photography
- Go from simple concepts to more advanced
- Help your prompt with ControlNet and Regional Prompter
- Use LoRAs for contrast adjustment during diffusion process
- Experiment with high dynamic VAE (combined with Dynamic Thresholding techniques) if you intend to post-process the image like a digital photo
- Test the prompt with and without negative prompt. Some newer models works great without filtering
You can make a great image from a simple prompt if you put some work into the design of your workflow.
Conclusion
It is useful to use brackets to organize your prompt and to achieve various effects of blending or morphing. A well-defined structure is important for the output. Any token added or removed affects the result. The order of tokens does make a difference. Use negative prompts if needed to make your scene description simple. You can achieve more complex effects by using trained LoRA models, which can have more predictable results on various base models.
Read more about synthetic photography in the upcoming articles Ultimate Guide for SD 1.5 Photorealism and Advanced Tips for Synthetic Photography: Visual Effects and Postprocessing Diffusion Models. You may also learn some tips in my previous article on synthetic photography.