Ultimate Guide to SDXL: Mastering Photorealism in Generative Art for Begginers and Advanced
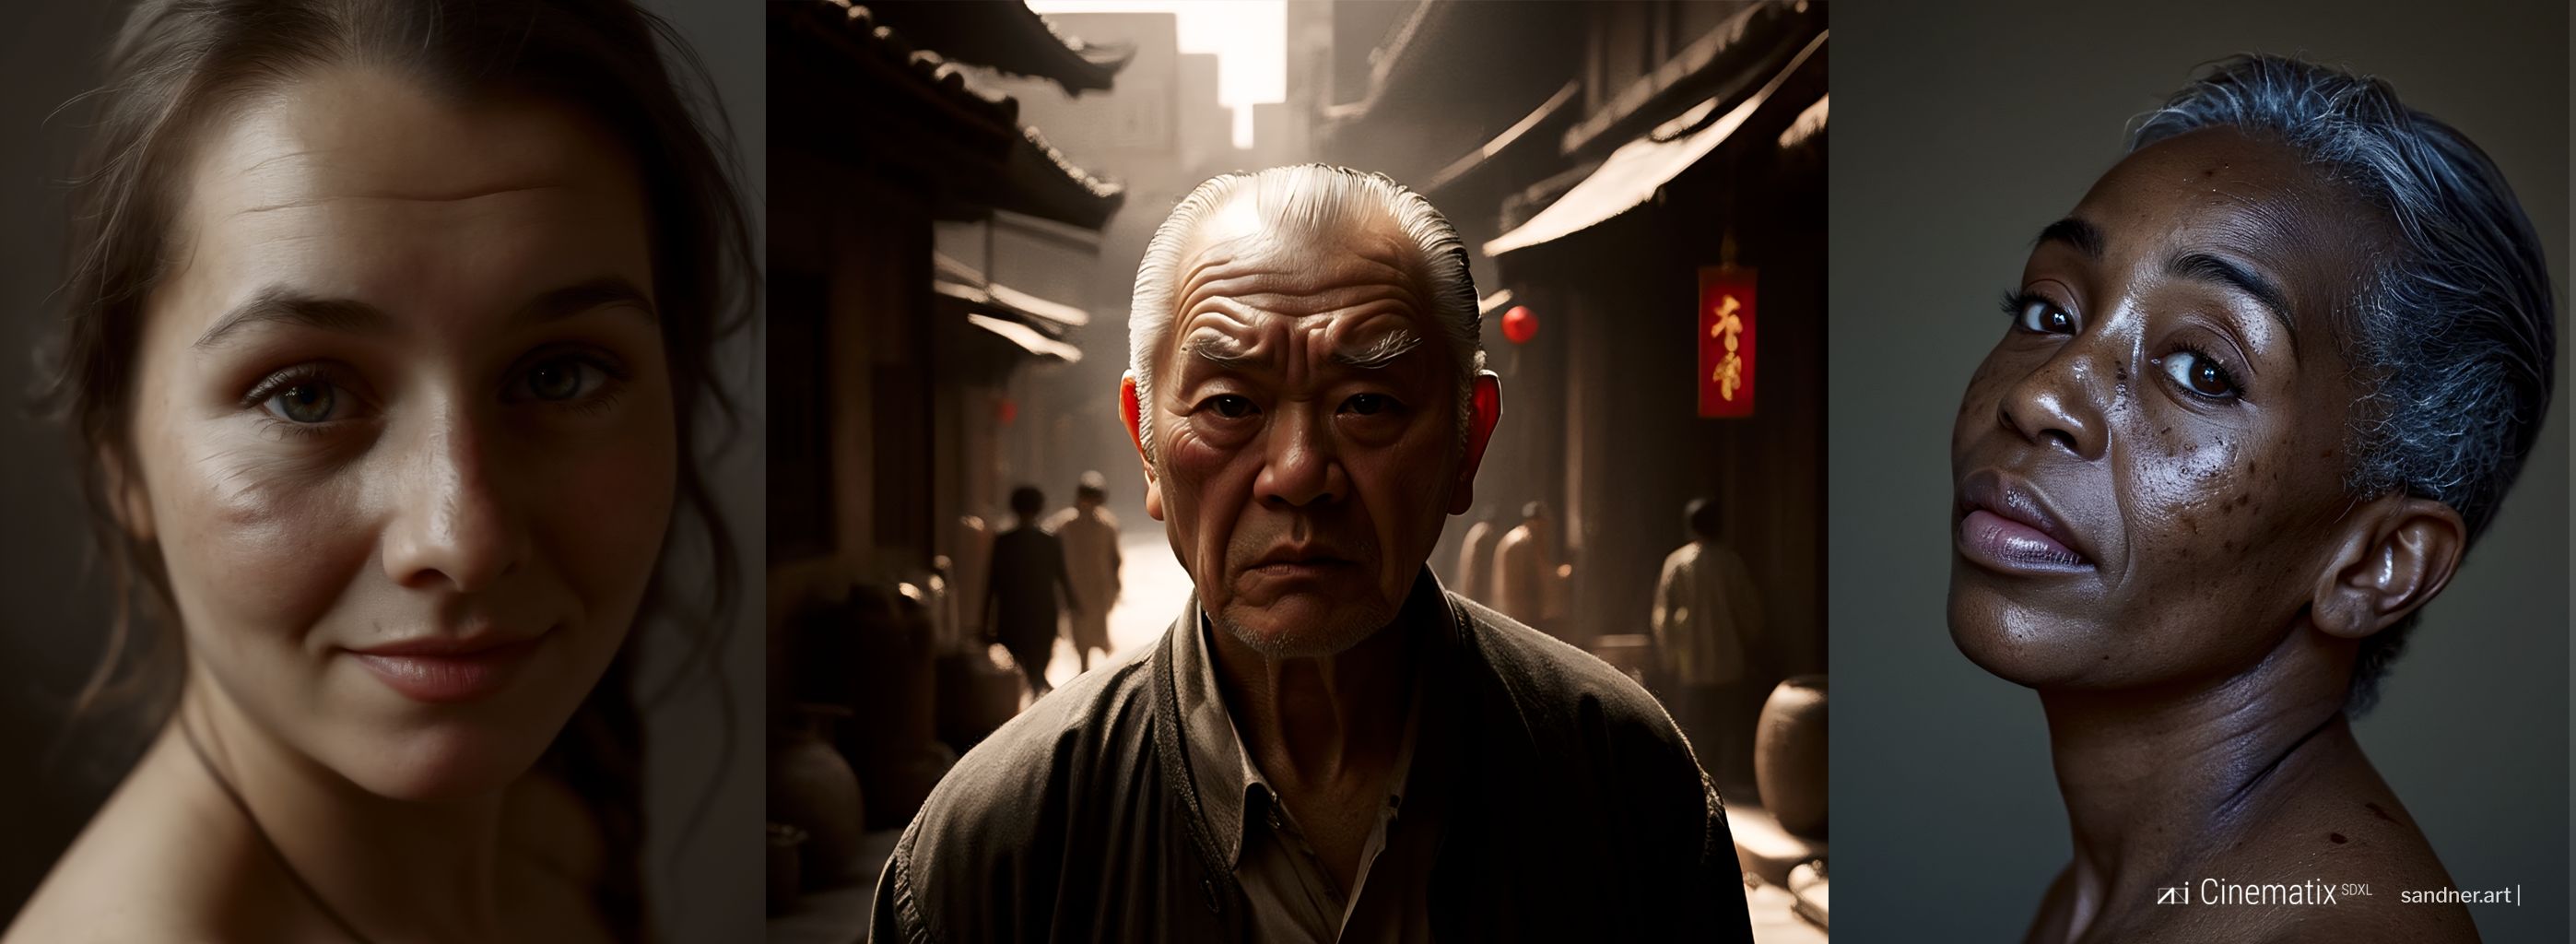
As everything evolves rapidly in the realm of stable diffusion and generative AI, this is the extension to the previous stable diffusion guide. In this article, I'll summarize my experiments and findings, sharing tips and tricks for achieving photorealism with SDXL, highlighting changes in techniques compared to former stable diffusion versions.
While I'll use the Cinematix model and AUTOMATIC1111 GUI, the principles apply to most SDXL-based models. Additionally, I'll provide a brief overview of basics for those new to Stable Diffusion. Considering the recommended tools, I included only those I consider absolutely must-have for any meaningful creative photorealistic work.
Stable Diffusion XL is a text-to-image deep learning model released in 2023 based on diffusion techniques. It provides many improvements over previous models in higher resolutions (hence XL) and also simplifies prompting.
While the focus is on SDXL techniques, basic principles are included for a comprehensive overview, alsp for a future reference. For more tips and tricks, check the extensive article on SD 1.5 Photorealism.
Installation
A1111 (Automatic1111)
Prerequisites include having Python 3.10.9 and Git installed on your system.
- https://www.python.org/downloads/release/python-3109/
- https://git-scm.com/downloads
You will install A1111 web UI easily by going to proper folder (I recommend short names), start CLI terminal in it (cmd in Windows) and enter
git clone https://github.com/AUTOMATIC1111/stable-diffusion-webui.git
This will download all necessary files and creates folder structure. If you encounter any issues, check this thorough article.
There is another couple of git commands you will need. To update your installation use
git pull
To change branch between master (main branch) and development (dev) with newest features, use
git checkout dev
to return back to main use git checkout master. After switching branches, you will usually run git pull to download any changes which were meanwhile pushed to the repository.
In the main folder, there is a file named webui-user.bat. Duplicate the file with CTRL+C CTRL+V and rename it to something simple, like go.bat. This way you will run A1111 by typing go into the CLI console.
Set up A1111
It is handy to have some controls accesible from UI. Go to Settings tab, find User inteface and under Quicksettings list, add after sd_model_checkpoint:
sd_vae (for VAE selection), ClLIP_stop_at_last_layer (for CLIP skip), s_noise (for sigma noise), sd_unet (if you are using unets, for example for purpose of RT models), eta_noise_seed_delta (optional, just for changing seed variable)
Advanced Settings
In the 'Settings' tab, you may also change (and then Apply settings and restart UI):
- In 'Stable Diffusion/Optimizations' section:
- check 'Pad prompt/negative prompt' (improves performance when prompt and negative prompt have different lengths; changes seeds)
- switch FP8 weight (Use FP8 to store Linear/Conv layers' weight. Require pytorch>=2.1.0.) to Enable for SDXL
- check Cache FP16 weight for LoRA (Cache fp16 weight when enabling FP8, will increase the quality of LoRA. Use more system ram.)
- If you GPU can handle it, set 'Cross attention optimization' to sdp or sdp-no-mem (deterministic, replicable results)
Note: FP8 weight require pytorch>=2.1.0. To update, run webUI first with --reinstall-torch parameter, then with --reinstall-xformers parameter (you can create a copy of webui-user.bat and insert it into set COMMANDLINE_ARGS= line). Then run it as normal.
- In 'Stable Diffusion/Stable Diffusion' section:
- Enable quantization in K samplers for sharper and cleaner results. This may change existing seeds (requires Reload UI)
- In 'User Interface/Infotext' section:
- uncheck Disregard checkpoint information from pasted infotext (when reading generation parameters from text into UI)
- In 'User Interface/UI Alternatives' section:
- check Hires fix: show hires checkpoint and sampler selection (requires Reload UI)
- check Hires fix: show hires prompt and negative prompt (requires Reload UI)
Setting Default Values and Resolution in A1111
You can set default generation values in ui-config.json. Open it in Visual Studio Code or Notepad and edit the values (backup recommended). If you want to change width and height of an image in txt2img, you will edit "txt2img/Width/value": 512, and "txt2img/Height/value": 512,
Setting Styles in A1111
Styles are stored in file styles.csv by default. You may load a custom style file or several at once. Put your .csv styles file in SD directory. Use parameter set COMMANDLINE_ARGS= --styles-file="styles.csv" --styles-file="other-style-name.csv". You may add it to your batch file at the end of all COMMANDLINE_ARGS parameters.
How to Set Paths for Models, Loras, and Embeddings in A1111
In a similar way, you may set paths to checkpoints or LoRAs. Normally these files reside in your /models folder, but you may need to have them on a different drive or use several A1111 installations with shared model files. Put your path to set COMMANDLINE_ARGS= like that:
--ckpt-dir "C:\stable-diffusion-webui\models\Stable-diffusion"
You may use --hypernetwork-dir , --embeddings-dir , and --lora-dir this way.
Forge
Forge is an optimized and more efficient UI based on A1111 interface with many additional tools and quirks. It is less memory and GPU resource hungry than A1111. You can install it and use it instead of A1111 (with an added benefits of already preinstalled versions of important extensions), or you can install it as a branch to your current installation of A1111. This way you will keep all your model paths and extensions (the variants of the extensions embedded into Forge will replace your versions). You will do this in your A1111 main "\stable-diffusion-webui\" folder:
git remote add forge https://github.com/lllyasviel/stable-diffusion-webui-forge
git branch lllyasviel/main
git checkout lllyasviel/main
git fetch forge
git branch -u forge/main
git pull
You can then switch between dev (A1111), master (A1111) and main (Forge) forge branches:
git checkout main
You will run the forge the same way as A1111 after switching to its branch, so in our case use go.bat (see above). Note that Forge is not compatible with all A1111 extensions and functions, but if you are going for a better performance and lower VRAM needs, Forge is a valuable option.
Other UI
Other notable user interfaces for Stable Diffusion include ComfyUI, using visual nodes and ideal for automations, and Fooocus, which streamlines the installation and controls for beginners.
Models
To start working, you will need some SDXL models. SDXL 1.0 base model require also refiner models. We will be using fine-tuned models which generate nice images without a refiner in this tutorial. Here is a short list of very good models:
- AlbedoBase XL on Civitai
- Dreamshaper XL on Civitai (although this one is also for stylized images)
- NewReality XL on Civitai
- Hephaistos on Civitai
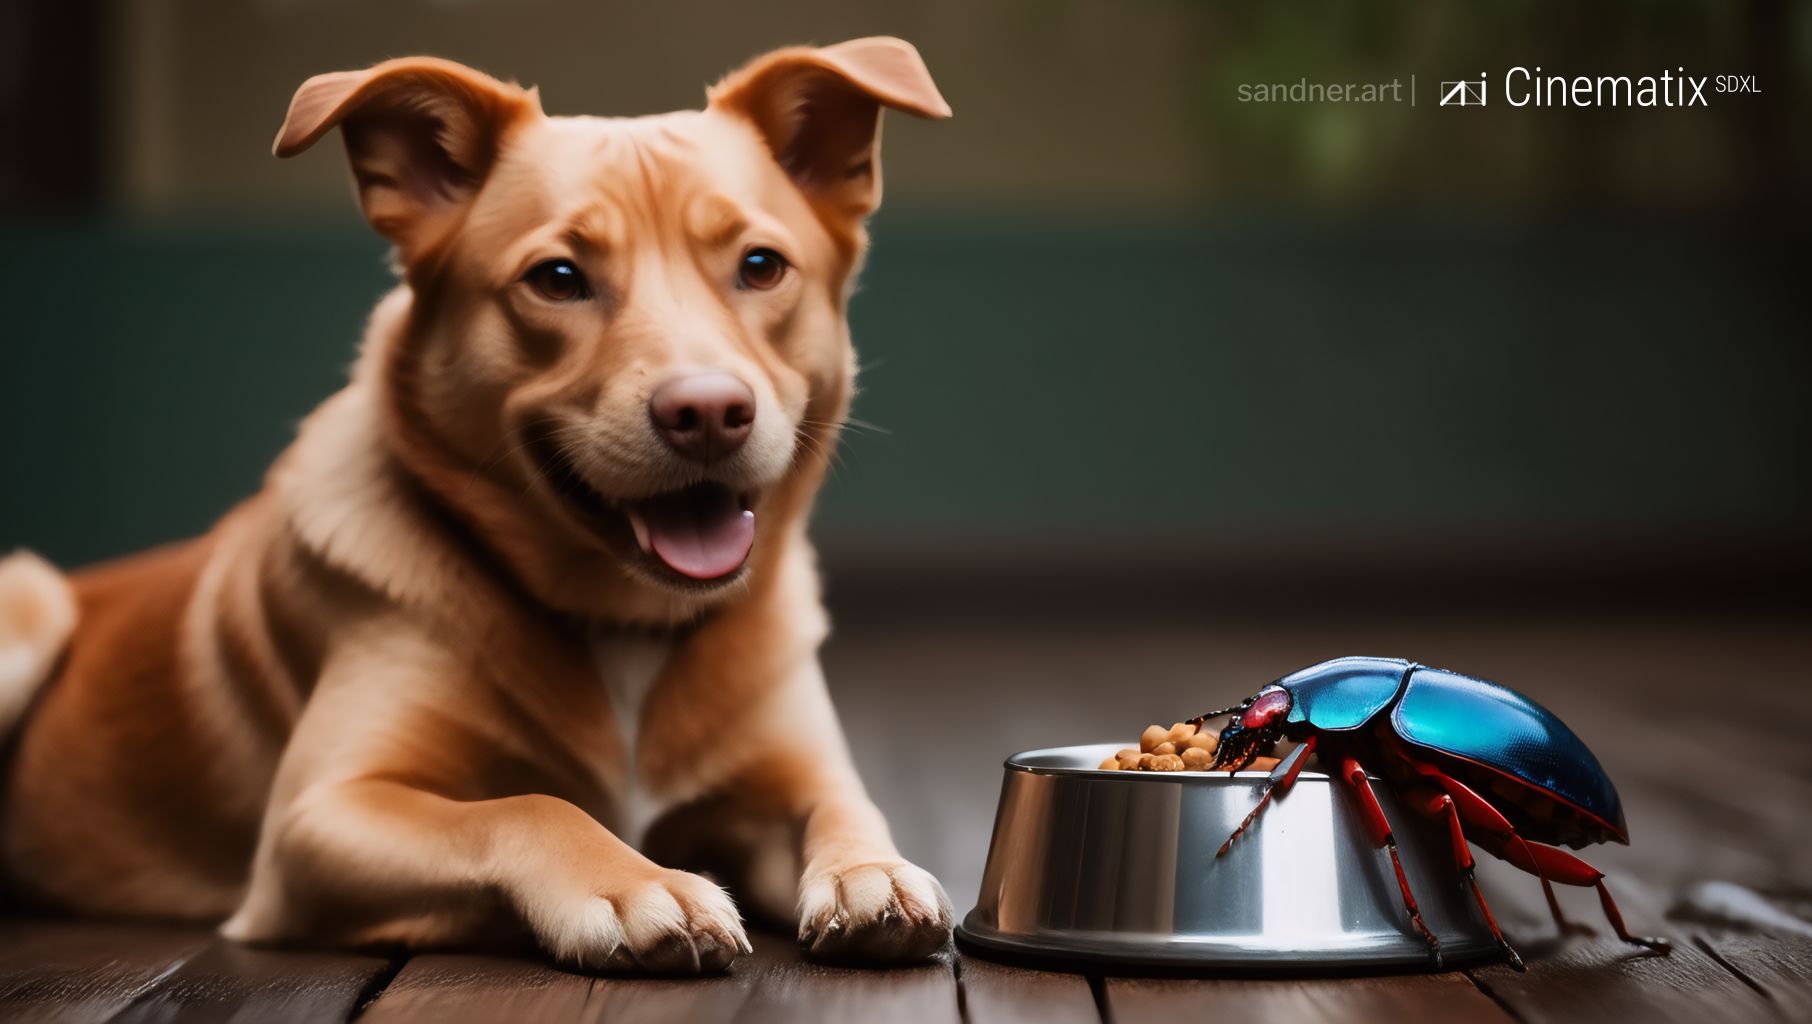
- You will find many interesting models both merged and trained. I am using my merge for the illustrations in this article, you may get Cinematix on Civitai.
Download the model into the "\stable-diffusion-webui\models\Stable-diffusion" folder.
LCM and Turbo Models
Latent Consistency (LCM) and Turbo models represent optimized ('distilled') versions of SDXL checkpoints, capable of producing acceptable images with minimal computational steps, albeit sometimes at the expense of finer details. Distilled LCM models can yield impressive outputs, making them a worthwhile consideration. You can experiment with these in the form of LoRA models too.
SDXL-Lightning
You can use this (similar in concept )solution for speed rendering, which surpasses former LCM and Turbo in performance and quality in SDXL.
- Download the models from https://huggingface.co/ByteDance/SDXL-Lightning/tree/main
- select 2, 4, or 8 step versions (f.i. sdxl_lightning_2step_lora.safetensors file) and save it into the "\stable-diffusion-webui\models\Lora" folder. The files are 394MB. Then refresh LoRAs in A1111, and now you can insert them from the UI into a prompt, as a normal LoRA model:
<lora:sdxl_lightning_2step_lora:1> - In Forge, set the CFG to 1.5 and select 'Euler A SGMUniform' sampling method (or other SGMUniform or Turbo versions )
- For 2-step version, use at least 3 steps
CosXL
Cosine-Continuous Stable Diffusion XL (CosXL) models are capable of producing a wide range of colors and tones. They will take a source image as input alongside a prompt, allowing for instructed image editing. However, CosXL models require a ComfyUI workflow-based user interface to function. The full article on CosXL can be found here.
Aspect Ratio and Resolution
These are the standard image ratios recalculated to pixels. A standard SDXL model is usually trained for 1024×1024 pixels, and performance in various image ratios can vary. For more complex scenes, divide the image area into regions with inpainting techniques or tools like the Regional Prompter. Some tools also work only in certain resolutions, usually divisible by 4 or 64, or have some maximum effective resolution.
| 4:3 Classic TV/Film | 1365×1024,1024×768 | 1024×768 | 683×512, 512×384 |
|---|---|---|---|
| 3:2 Classic Film | 1536×1024, 1024×683 | 1152×768 | 768×512, 512×341 |
| 16:9 TV/LCD | 1820×1024, 1024×576 | 1365×768 | 910×512, 512×288 |
| 21:9 Cinemascope | 2389×1024,1024×439 | 1792×768 | 1195×512, 512×211 |
The table above is just for orientation; you will get the best results depending on the training of a model or LoRA you use. Here are some resolutions to test for fine-tuned SDXL models: 768, 832, 896, 960, 1024, 1152, 1280, 1344, 1536 (but even with SDXL, in most cases, I suggest upscaling to higher resolution). You may get interesting outputs also with quite unusual resolutions (812×1236, 640×1536, 512×1536).
There are extensions helping with setting resolutions, f.i. https://github.com/xhoxye/sd-webui-ar_xhox , you may install it from Extensions tab.
Changing the resolution can limit the flexibility of the model. If you go too low (less than 256 pixels), a model will probably fail to generate a meaningful image. You can test the workflow of upscaling very small images, as the upscaler models are very good. However, you will not gain performance speed this way (it may be useful to generate fast sketches).
Prompt Engineering and Syntax
Most prompt manipulations involve shifting weights of tokens and token compounds. Ultimately, the result depends on the training of models or LoRAs used for image generation
A prompt is a text string comprising words or 'tokens,' akin to a programming script expressed in natural language. Tokens may vary in their influence on the final image (token weight), determined by the model's training. In SDXL, prompts enable more precise and cleaner control over the output. Negative prompts, containing tokens we want to exclude from the output, don't need to be overly extensive in SDXL.
Not all tokens in your prompt have the same weight from the outset. As a general theoretical rule, a token closer to the beginning of your prompt (or chunk, as described below) carries more weight. In practice, you'll need to adjust the importance of tokens using syntax. Essentially, all described techniques aim to address this issue to some extent.
We can change token weight by syntax. Select a word in A1111, adjust weight with CTRL+UP/DOWN ARROW. Changing weight changes also the composition of an image. Basic principles:
- Tokens are divided by commas, but you can create also longer structures using dash/minus, like
monster-woman,vintage-style-design, brackets(retro style),[retro style], and other symbols. Experiment with these in positive and negative prompts. - You can also use brackets () to create regions in longer areas of prompt
- Although it is somewhat undocumented, you can also use punctuation marks ("") or an question or exclamation mark "!" to assign a weight to a token. It may not work as expected in some models.
- Square brackets lowers the weight, but you can use it to divide the prompt
- You can use square brackets as in this example:
[pinkcompany] logo - Order of tokens does matter, but weight is more important
- Some tokens inherently have more weight, influenced by the base model, fine-tuned model, or LoRA.
- The prompt in SDXL is divided to invisible chunks of 75 tokens (you can see the counter in A1111). Tokens from the beginning of a chunk tend to have more weight.
- Using command tokens AND or BREAK will start a new chunk (it is also used to divide regions in Regional Prompter)
- You may use various symbols (dot, slash,question mark etc.) to connect or divide tokens. A symbol has a certain effect to the weight of the token. A symbol does count to the token total number.
- There are token combinations, which are highly effective for specific type of model (because the model was trained for this word combination). Such triggerwords are described in LoRA documentation. For base checkpoints you need to experiment (f.i. try
pixel-sortingorpixel.perfectin SDXL).
You can use various types of brackets and word delimiters (.,\/!?%^*;:{}=`~()[]<> ) for different effects. You can comment a line with //(must be at the beginning of the line—may not work with your styles then, since styles can change the formatting of prompt). More extensive article on prompt engineering is here, the syntax is not specific for SDXL (it is generally used in A1111 web UI). You may read more about CLIP (Contrastive Language–Image Pre-training) on Open-AI website.
The Dynamic Prompts extension (see Tools section) introduces additional syntax for enhancing subject variations.
ControlNet
Installation of ControlNet
Install from "Install from URL" tab, https://github.com/Mikubill/sd-webui-controlnet.git
You need to download some SDXL adapters and models separately into "\stable-diffusion-webui\models\ControlNet" folder.
Models and Adapters
List of SDXL community controlnet models: https://huggingface.co/lllyasviel/sd_control_collection/tree/main
If you need to choose a couple from the many (currently 21) ControlNet models, I would recommend:
- IP-Adapter: Infers style and concept from source image
- Instant ID: Modifies and transfers facial features instantly
- Depth and NormalMap: Utilizes a 3D scene from Blender as a sketch
- OpenPose: Creates character poses with reduced anatomical errors
- SoftEdge: Retains shapes, ideal for photo recoloring
You may find some ControlNet tips in the other articles, especially in those on Creative Control and Advanced Control of Consistent Output. There will be a new extensive article on ControlNet tricks soon.
Tools
These are fundamental tools for SDXL photorealistic workflows. Note that such tools can be mutually incompatible; sometimes, extension X may not work with extension Y in a workflow. The extensions listed here should not interfere with other functionalities of A1111. You can install extensions from the 'Extensions/Load from' list of A1111 extensions. After installing an extension, Check for updates, apply and restart the UI for changes to take effect.
ADetailer
Can detect and segment part of an image and recalculate details for it. Usable for eyes, face, and whole figure. Hand detailing does not work well in most cases in SDXL. Unfortunately, SDXL does not eliminate the need for post-processing segmentation workflows. However, on the other hand, ADetailer also enables interesting adjustments within its own prompt.
Note that ADetailer does change facial features in character portraits.
Regional Prompter
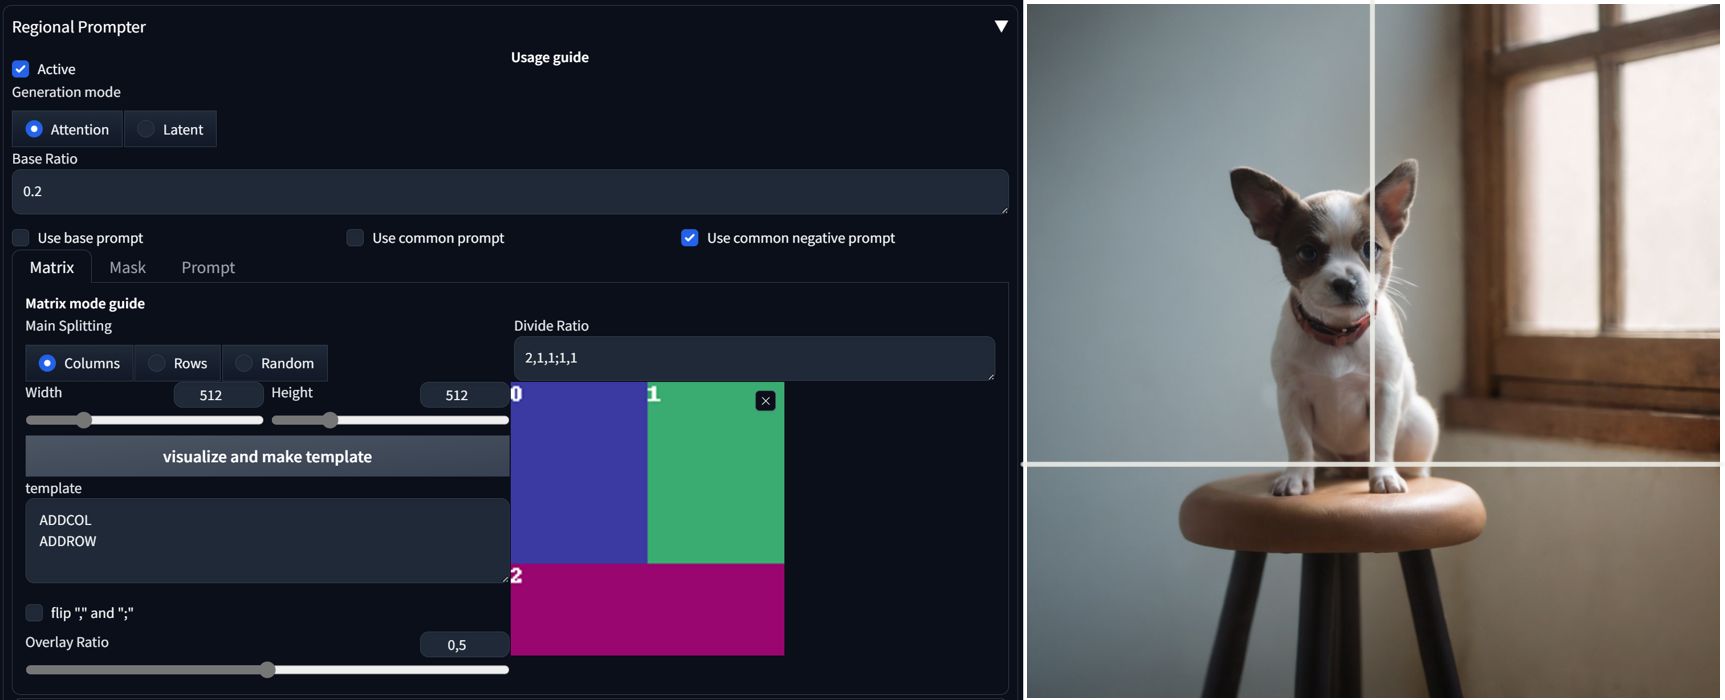
Regionar prompter solves compositional outline of an image. You can use BREAK or AND to create divisions in the prompt.
You have Matrix, Mask and Prompt options to divide the scene. In Matrix mode, you are creating divisions from top to bottom. Simple 1,1 divisions splits the area in half. 1,1,1;1,1,1 creates four rectangles, in this case the first number determine ratio of vertical split, rows are divided by a semicolon. You need to have correct number of areas in your prompt.
When using base or common prompt checkbox, you need to add another BREAK segment at the beginning. Tokens in common or base prompt section will be shared by the whole scene.
Read more in this article about Regional Prompter.
Semantic Guidance
Can modify scene with an additional prompt while keeping a general composition. This is a must have for complex scenes and creating variations. A closer look to Semantic Guidance is in this article.
VectorscopeCC
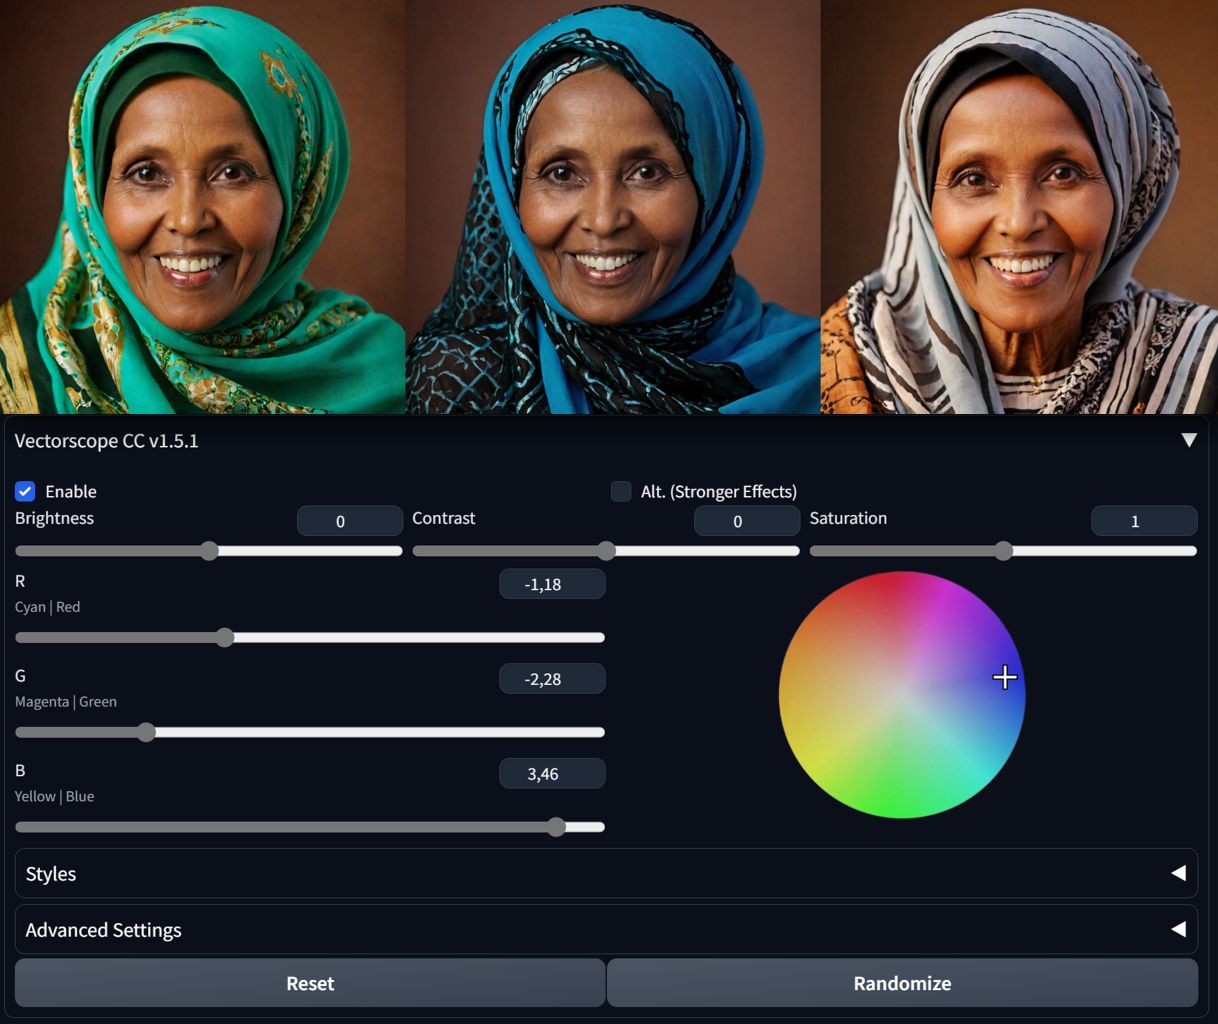
VectorscopeCC is great tool to experiment with color schemes. Since it works during diffusion, adjustments alter the image rather than overall color tones.
- If you want to shift colors in the image using the color wheel, select the color you want to filter on the oposite side of wheel (want yellow shift, pick blue).
- You may experiment with great HDR script, coming with this tool. More on VectorscopeCC in this article.
For best results with color manipulations, use Hires fix with VectorscopeCC and CD Tuner in SDXL!
CD Tuner
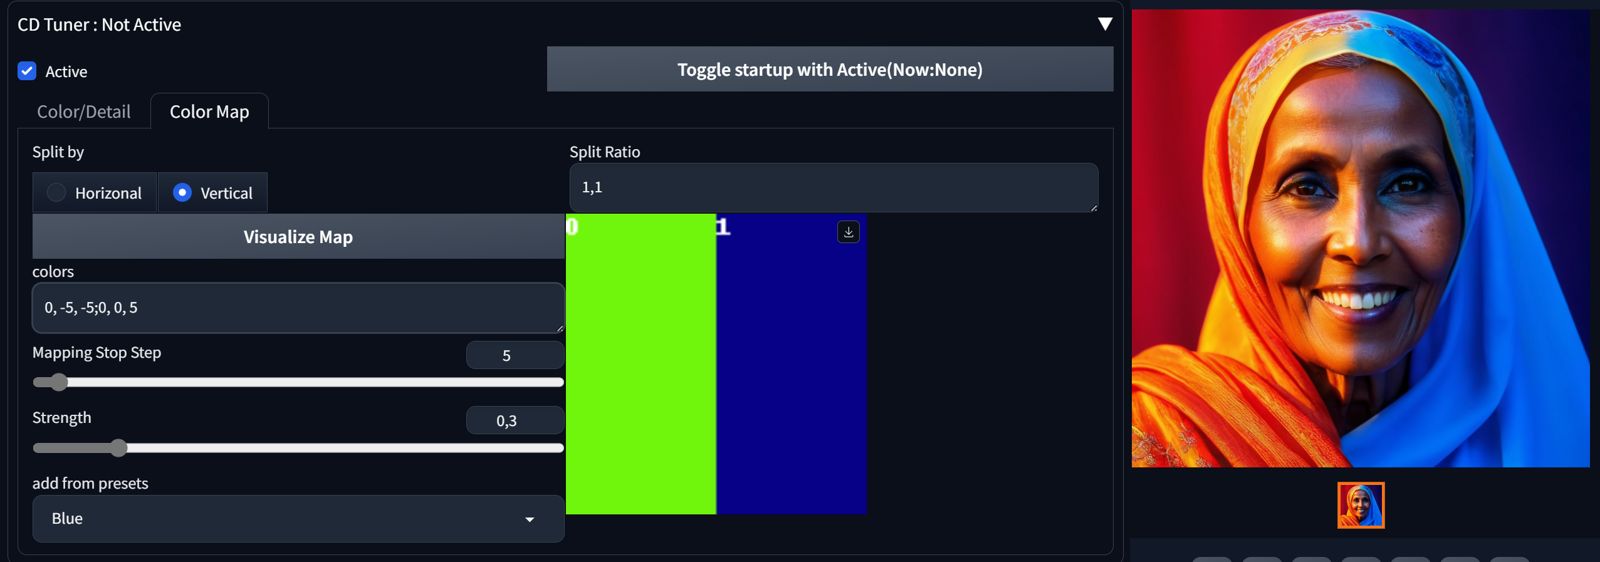
Similar to VectorscopeCC, this tool modifies colors and tones during diffusion, with the ability to affect colors in specific regions (syntax follows the logic of the Regional Prompter).
- In SDXL, use lower Color Map Strength (max 0.35) for the effect to be reasonable.
- In Color/Detail tab, variant 1 of a parameter is applied earlier in the diffusion process and seems to affect the composition more, f.i. Detail(d1)/Detail(d2). Experiment with adding the parameter against each other, like Detail(d1) -2, Detail(d2) +2 to add details without overbaking.
- It may not be compatible with certain upscalers (e.g., 4xNomosUniDAT), but generally functions well with most.
FreeU and Self Attention Guidance
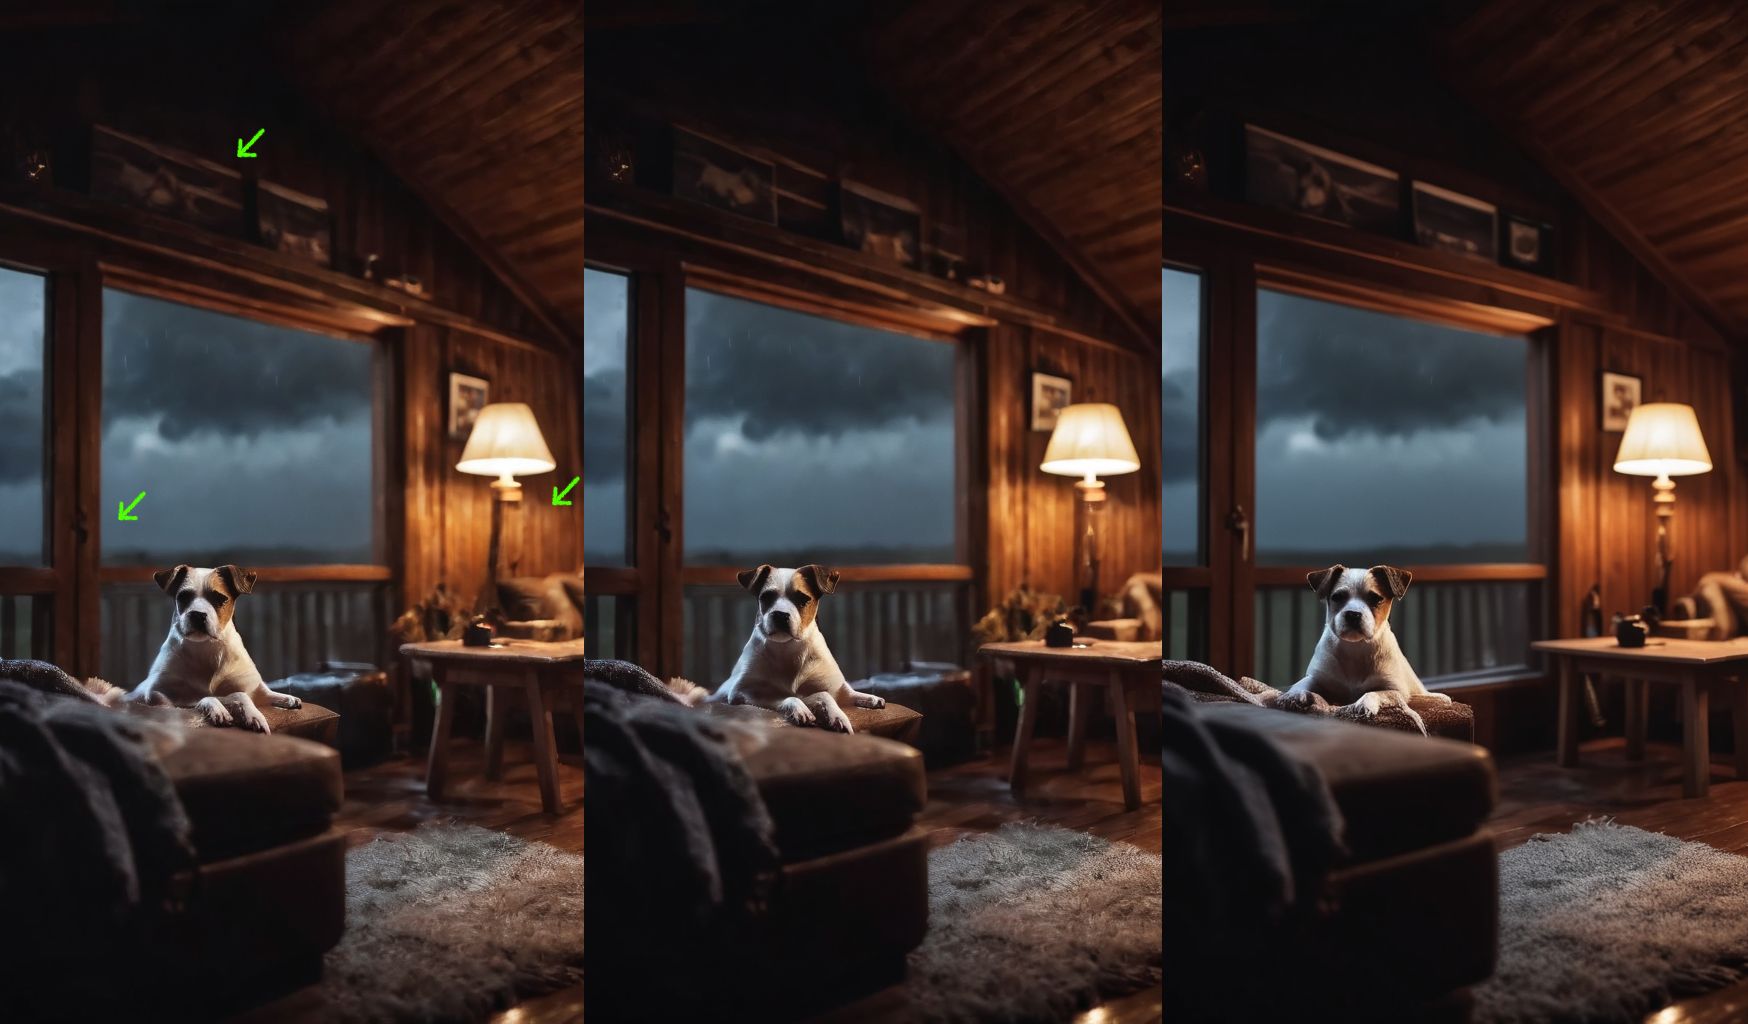
Those are two different utilities, improving consistency and details. In Forge these are already pre-installed. Sometimes the changes are subtle, but it is worth the try in complex scenes. Self Attention Guidance slows the generation by about 30%.
Scripts
High Dynamic Range
Approximation of HDR photo, can generate 16-bit image. Installs with VectorscopeCC.
Test My Prompt!
You will install this as an extension. It helps to see how various tokens change your scene.
Inpainting and Outpainting
You can inpaint and outpaint with the model you use for generation. A proper SDXL model for the specific task is not yet available. You can also use a good SD 1.5 inpainting model for this phase.
Outpainting with ControlNet
You can outpaint in txt2image or img2img.
- Download inpainting model for your type of checkpoint into "\stable-diffusion-webui\models\ControlNet" folder. Find SD 1.5 inpaint model which you like (I am using this Photomatix inpainting LCM model).
- You may experiment with SDXL in Forge with this Fooocus model here https://huggingface.co/lllyasviel/fooocus_inpaint/tree/main (inpaint_v26.fooocus.patch)—you need to set "Ending Control Step" to 0.5 (you would use numbers close to 1 in SD 1.5 models).
- Set your source image in Controlnet
- Choose inpaint_only+lama Preprocessor
- Set 'Controlnet is more important' and 'Resize and fill'
- Set Denoising strength close to 1 (not available in txt2img)
- Set the final Resolution (change the resolution in one dimension at the time)
- Set Sampling method for "Euler a", set steps high (80) and CFG 4+ (for Cinematix)
- Set your prompt and Generate
- Create several variants, select the best and if needed create some retouching adjustments
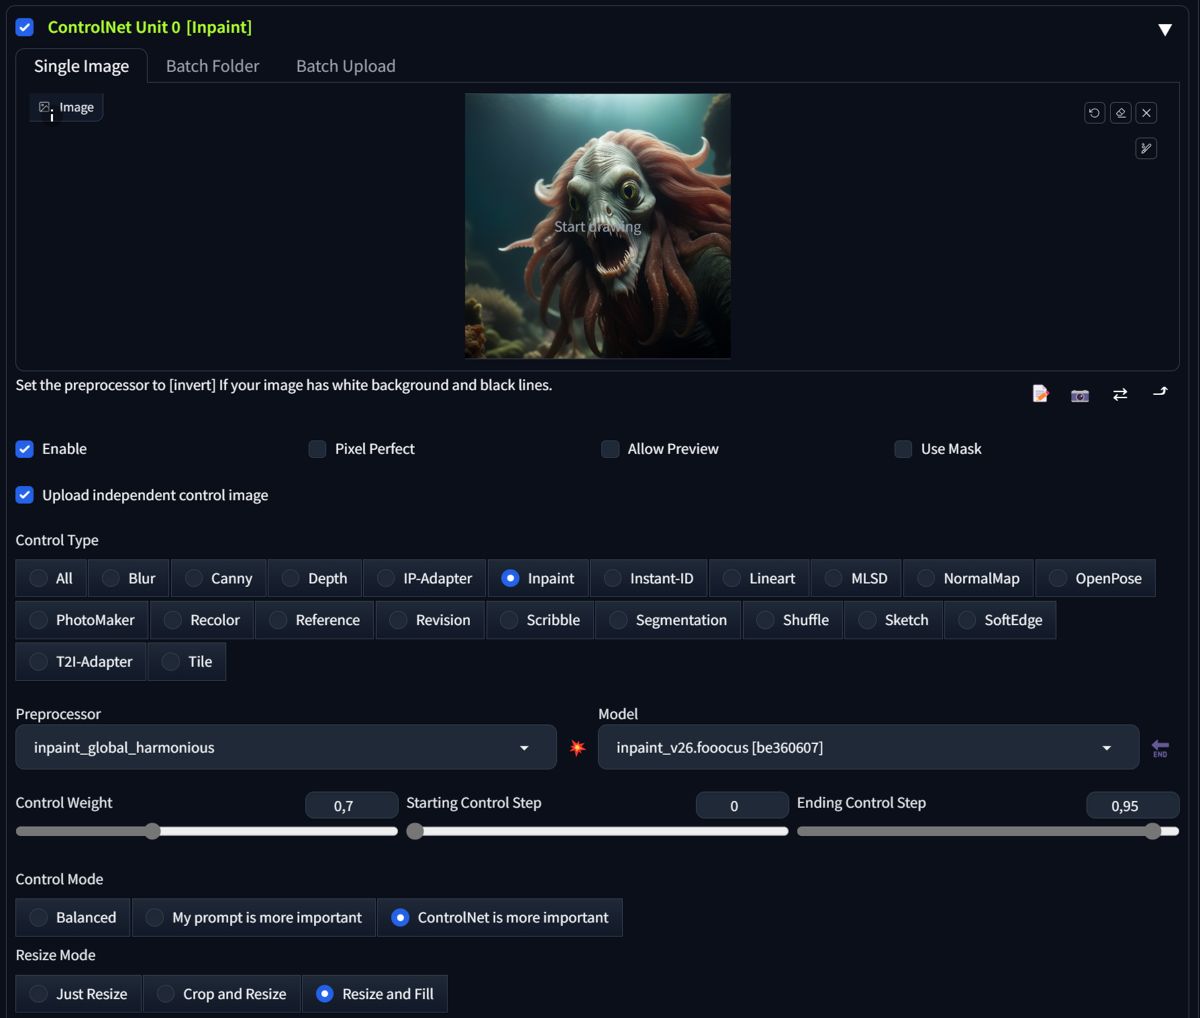
Another strategy is to select inpaint_global_harmonious as Preprocessor and after generations retouch your source image back right away. This has the advantage of very continuous background image, and it can be even faster to finish the image.
- Set everything as before, set inpaint_global_harmonious and you set Ending Control Step 0,8 - 0.95 (it works). This way, the changes will be only minor.
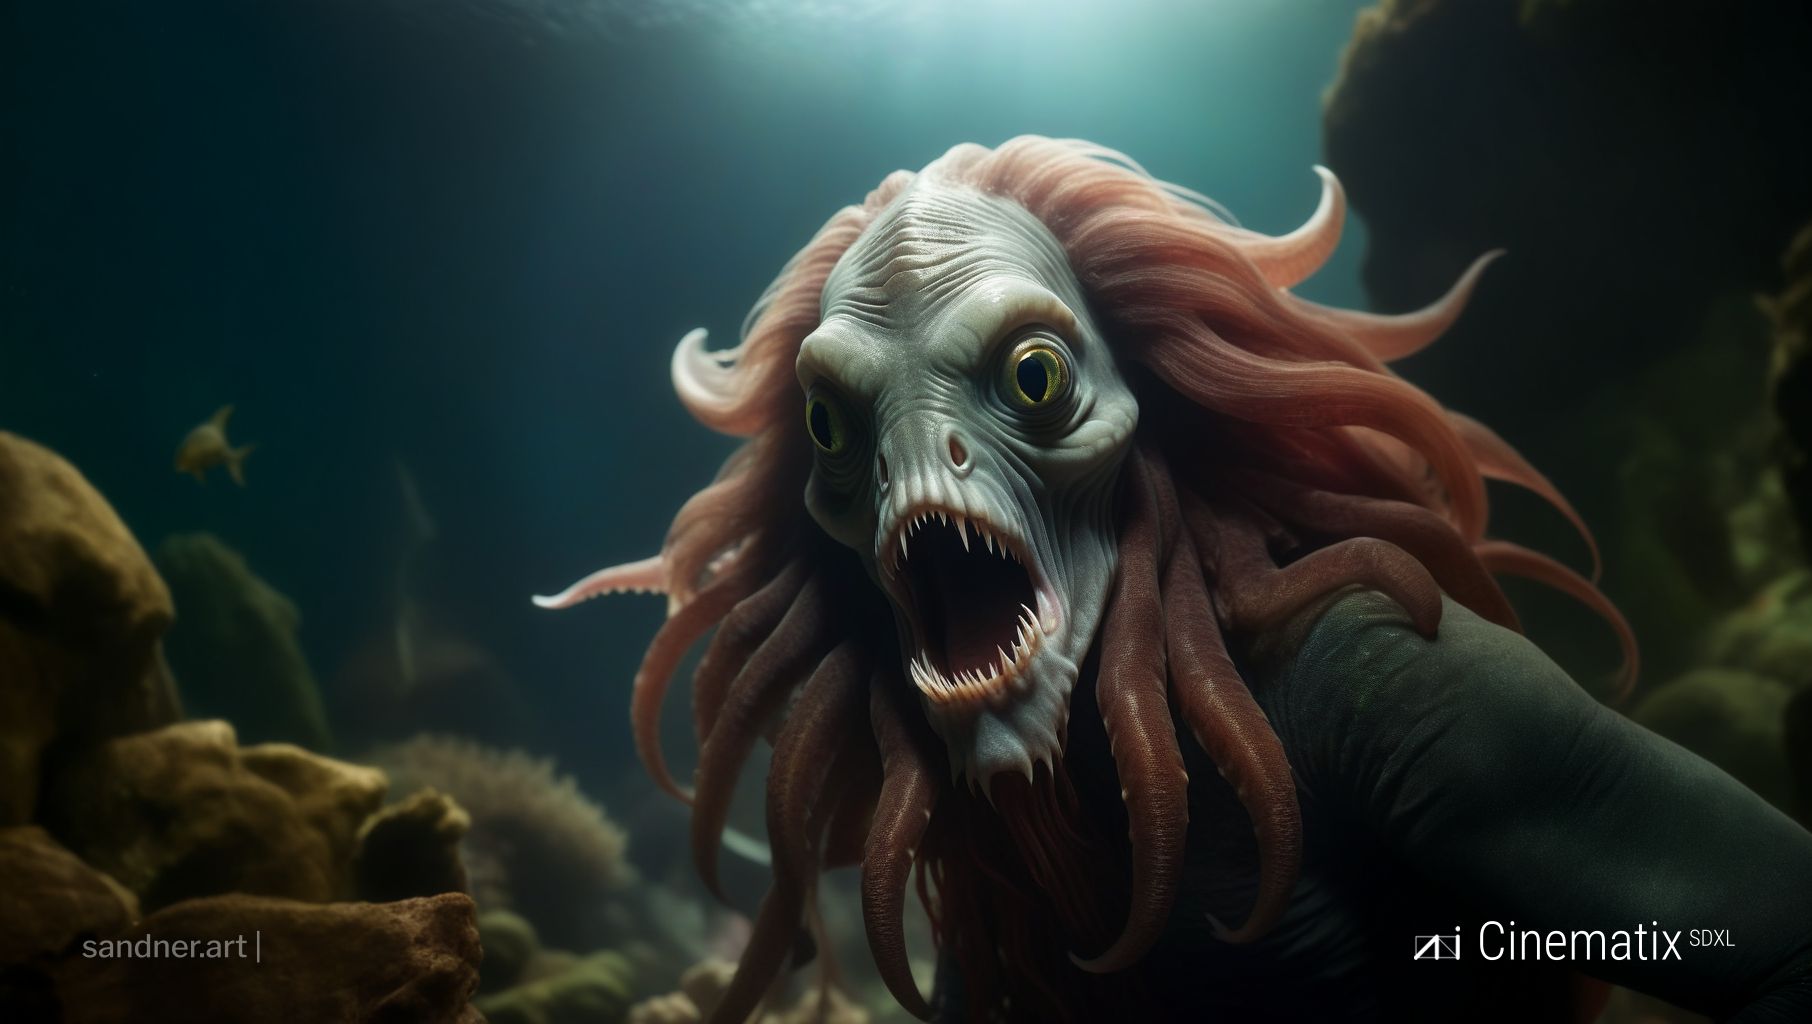
Inpainting with Controlnet
Use the setup as above, but do not insert source image into ControlNet, only to img2image inpaint source. Inpaint as usual.
Standard SDXL inpainting in img2img works the same way as with SD models. Send the generation to the inpaint tab by clicking on the palette icon in the generation window, or drag it into the inpaint tab. Mask the area you want to change and set the prompt accordingly. Set 'denoising strength' high if you want bigger changes to the original. You may set 'Inpaint area' to 'Only masked'. Then, generate. However, in SDXL, I do recommend using the Controlnet workflow.
Workflows
ADetailer + Hires fix
This is the most common workflow for portraits. Enable ADdetailer with 1st model face_yolov8n.pt (or another face ControlNet model) and mediapipe_face_mesh_eyes_only as 2nd model. You can also alter this with person model as 1st and face model as 2nd when the character is far from camera.
Enable Hires. fix and set Denoising strength 0.3-0.6. Choose your favourite Upscaler (good start is Latent Bicubic, DAT, or SwinIR).
Planning Composition
Plan color composition with CD tuner and scene setup with Regional Prompter. Adjust with Semantic Guidance.
Plan your scene in planes. To enhance depth, utilize ControlNet Depth.
ControlNet Compositions
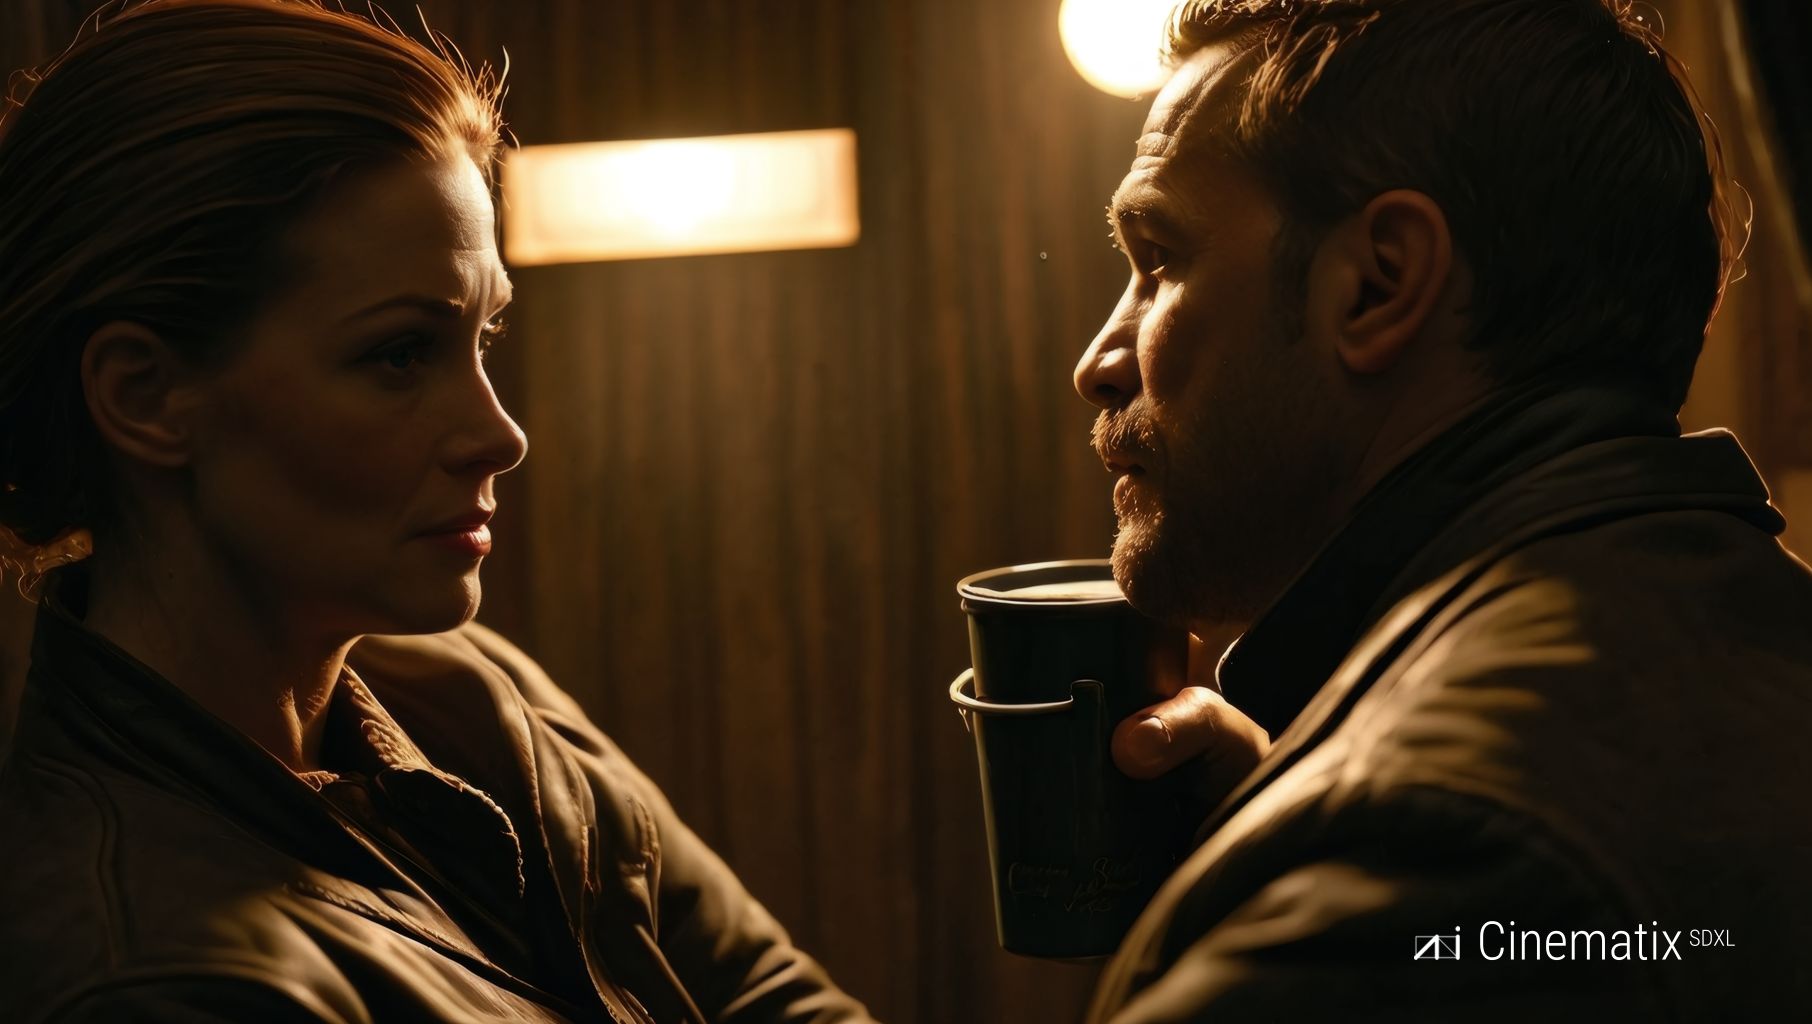
You can "force" the diffusion process with ControlNet models of your choice. Use OpenPose, SoftEdge, and Normal/Depth map for use with 3D sketches of composition. You can streamline a scene setup with IP-Adapter with a low Control weight.
Upscaling
Finish your images with an upscaler. Even upscalers which come with A1111 (Latent Bicubic, DAT, or SwinIR) are very good. For DAT you will need dev version or you can download various DAT upscalers from https://openmodeldb.info/ database.
To get you started, these files go into models/DAT:
- 4xFaceUpSharpDAT (safe upscale 2x), good for face proportions
- 4x-ClearRealityV1 .pth universal, (safe upscale 2x)
- 4x SPSR, Structure-Preserving Super Resolution, good for architecture, is very fast. It does introduce some noise into portraits, which may be either good or bad, depending on the situation.
- 4xLSDIRDAT, nice universal model
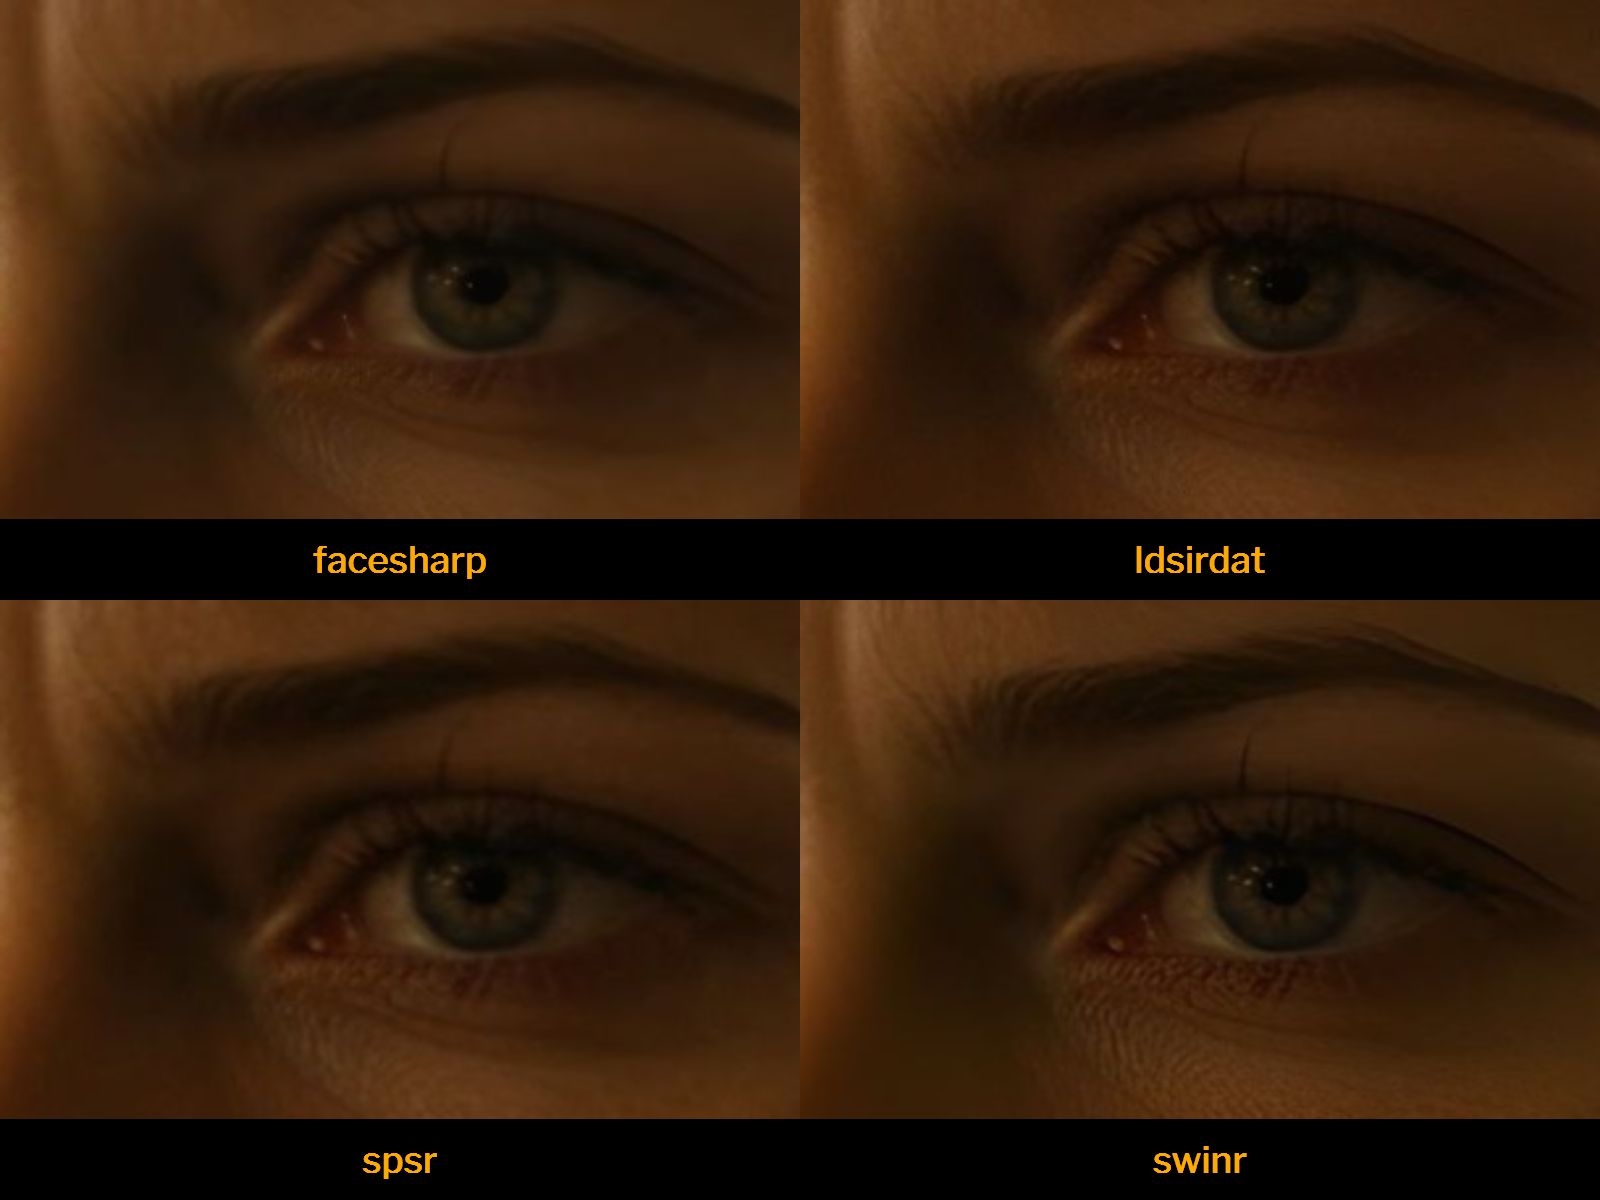
You may use these models for upscaling via Hires fix, in Extras tab, or in img2img postproduction (SD upscale script in img2img).
In img2img, deactivate any image altering extension for Outpainting (CD tuner etc.).
LoRAs
LoRAs are models that help to extend the options of a checkpoint. You will download LoRAs into the "\stable-diffusion-webui\models\Lora" folder. Then, you can insert them from the UI into a prompt.
The most universal LoRAs has something to do with noise offsets or detailing. There are also some style or concept LoRAs in this brief list.
- extremely-detailed-no-trigger https://civitai.com/models/229213/extremely-detailed-no-trigger-slidersntcaixyz (works better in semi-stylized checkpoints)
- Detail Tweaker XL https://civitai.com/models/122359/detail-tweaker-xl
- xl_more_art-full / xl_real / Enhancer https://civitai.com/models/124347?modelVersionId=152309
- Low-key lighting Style XL https://civitai.com/models/280421/low-key-lighting-style-xl?modelVersionId=315777
- Rembrandt (Low-Key) Lighting Style XL https://civitai.com/models/280454/rembrandt-low-key-lighting-style-xl?modelVersionId=315808
Tips for Photorealism
Here are some tips for achieving photorealism in your generative art:
- FreeU and Self Attention Guidance will help with clear details, especially in architecture
- For a visual noise or imperfections, try to add an organic texture LoRA in a very low weigth (0.05-0.1)
- Try to avoid standard SDXL styles Cinematic and Photographic. Especially Cinematic can heavily affect the scene and the tokens in it tend to overshadow subtle details. Experiment with token combinations in my styleset or create your own with help of "Test My Prompt" script.
- Use color and detailing techniques of VectorscopeCC, CD Tuner, and detailing LoRAs. Add or remove details, even during single generation, with various means.
- Remove arifacts with Hires fix. Sometimes noise or artifacts are good in the original image before upscaling—it can create better texture or tones in the final image.
- You can relight your scene with Semantic Guidance (even without ControlNet) to some extent. You can use CD tuner in a similar manner.
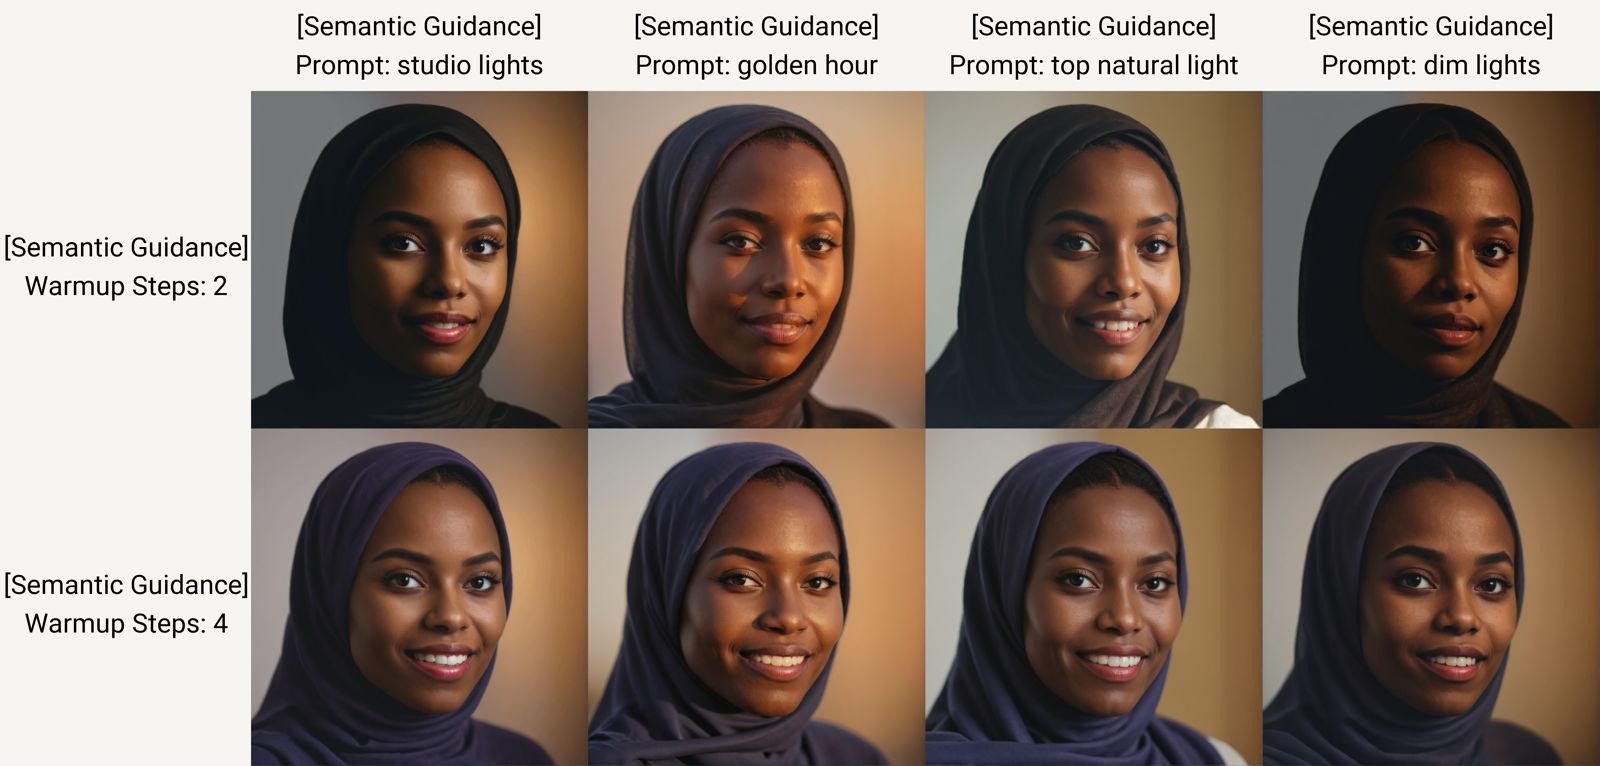
- If you make significant changes in lighting, use SoftEdge ControlNet to stabilize the subjects in the scene.
- Add some imperfection and texture details, along with visual noise (small random details). If it starts to break your txt2img composition, add it in img2img.
- Avoid overdoing depth of field or bokeh in your images.
Conclusion
Exploring generative art with Stable Diffusion XL opens creative possibilities for both beginners and advanced users. Fine-tuned SDXL models can significantly benefit your workflow and unlock new creative options. Remember to start with the basics, understanding the nuances of prompt engineering and controlling the diffusion—as you progress, experiment with different techniques, leveraging the power of the new innovative and experimental (naturally) tools and extensions for enhanced results. The best results take time and effort, unsurprisingly.
Let's anticipate that future generative art models (perhaps SD 3.0?), will deliver enhanced color depth, dynamic range, performance, and object proportions representation in higher resolutions.
References
- SDXL https://huggingface.co/stabilityai/stable-diffusion-xl-base-1.0
- A1111 https://github.com/AUTOMATIC1111/stable-diffusion-webui
- ControlNet https://github.com/lllyasviel/ControlNet
- Controlnet installation https://github.com/Mikubill/sd-webui-controlnet.git
- Forge https://github.com/lllyasviel/stable-diffusion-webui-forge
