Advanced Control of Consistent Output for Stable Diffusion
Stable diffusion models are a powerful tool for generating consistent and realistic synthetic images. However, to fully realize their potential, advanced control techniques must be employed to fine-tune the output.
The basic idea behind these techniques is to use diffusion models to generate images while maintaining control over specific aspects of the output image by modifying the diffusion process or adding additional control mechanisms to the model.
We can achieve great results by using a combination of these techniques. I will again demonstrate this on AUTOMATIC1111 Web UI, running on the local machine. You may check the other articles on how to install the UI, download models, and add extensions to the UI.
Use Proper Models for the Task
This tip may seem obvious, but remember you can combine the outputs of different models (or layer and iterate img2image outputs) to achieve the needed results. You may check universal and specific models, f.i.:
- https://civitai.com/models/4823/deliberate (Based on SD 1.5, Universal)
- https://civitai.com/models/106055/photomatix (SD 1.5, Photography, Universal, Realism), see examples of Photomatix
- https://civitai.com/models/81458?modelVersionId=108576 AbsoluteReality (SD 1.5, Realism)
- https://civitai.com/models/3855/epic-diffusion (Based on SD 1.x, Universal)
- https://civitai.com/models/13020/avalon-truvision (Based on SD 1.5, Photography)
- https://civitai.com/models/4384/dreamshaper (Based on SD 1.5, Stylized, Illustration)
- https://civitai.com/models/7371/rev-animated (Based on SD 1.5, Painted, Illustration)
- https://civitai.com/models/1087/inkpunk-diffusion (Based on SD 1.5, Ink, Illustration)
- For more tips on synthetic photography models, see Realistic Synthetic Photos With Diffusion Models
Prefer to use .safetensor file type for SD model checkpoints
Try Prompt Image Editing Using GPT-3 in AUTOMATIC1111
This special model https://huggingface.co/timbrooks/instruct-pix2pix/tree/main allows editing image directly from prompt.
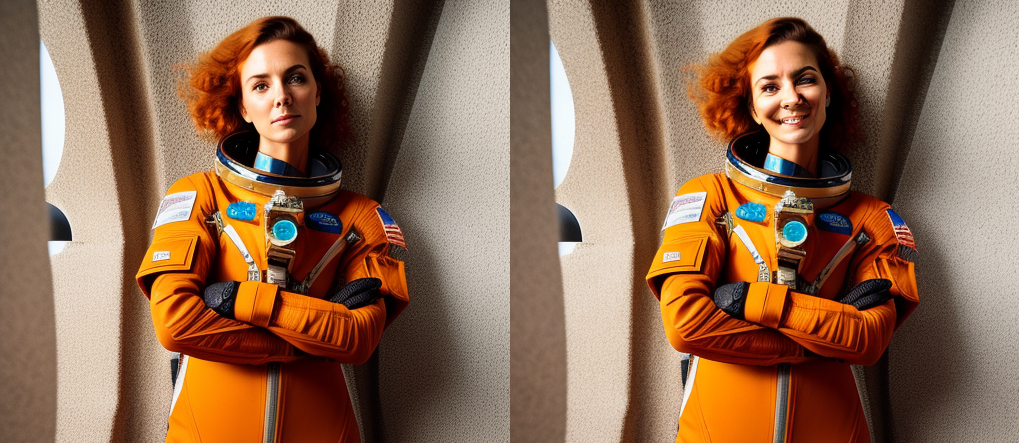
After loading the model you can use the extension automatically, just load the image to img2img and write command into a prompt like in a chat. Change the Image CFG Scale (which now appeared next to CFG Scale) to something lower (f.i. 0.5, to see the result more clearly) and push Generate. CFG Scale number depends on how dramatic the change would be, the higher the subtler change. For color changes, it could be around 0.9—experiment and try to find the balance between Image CFG Scale and Denoising strength. The next example uses DPM++ 2M Karras, Image CFG Scale 0,85 and Denoising strenth 0,35.
Prompt Image Editing is Possibly the Future of Image Editing...
Use Variational Autoencoders (VAE)
VAE is a generative model, used to control the output of the main model.
Download the .safetensors model on https://huggingface.co/stabilityai/sd-vae-ft-mse-original/tree/main into models/VAE folder.
INSTALLATION of VAE: Download and put into the stable-diffusion-webui/models/VAE folder. In UI, Settings/Stable Diffusion/SD VAE choose the VAE file, Apply settings and Reload UI. Experiment.
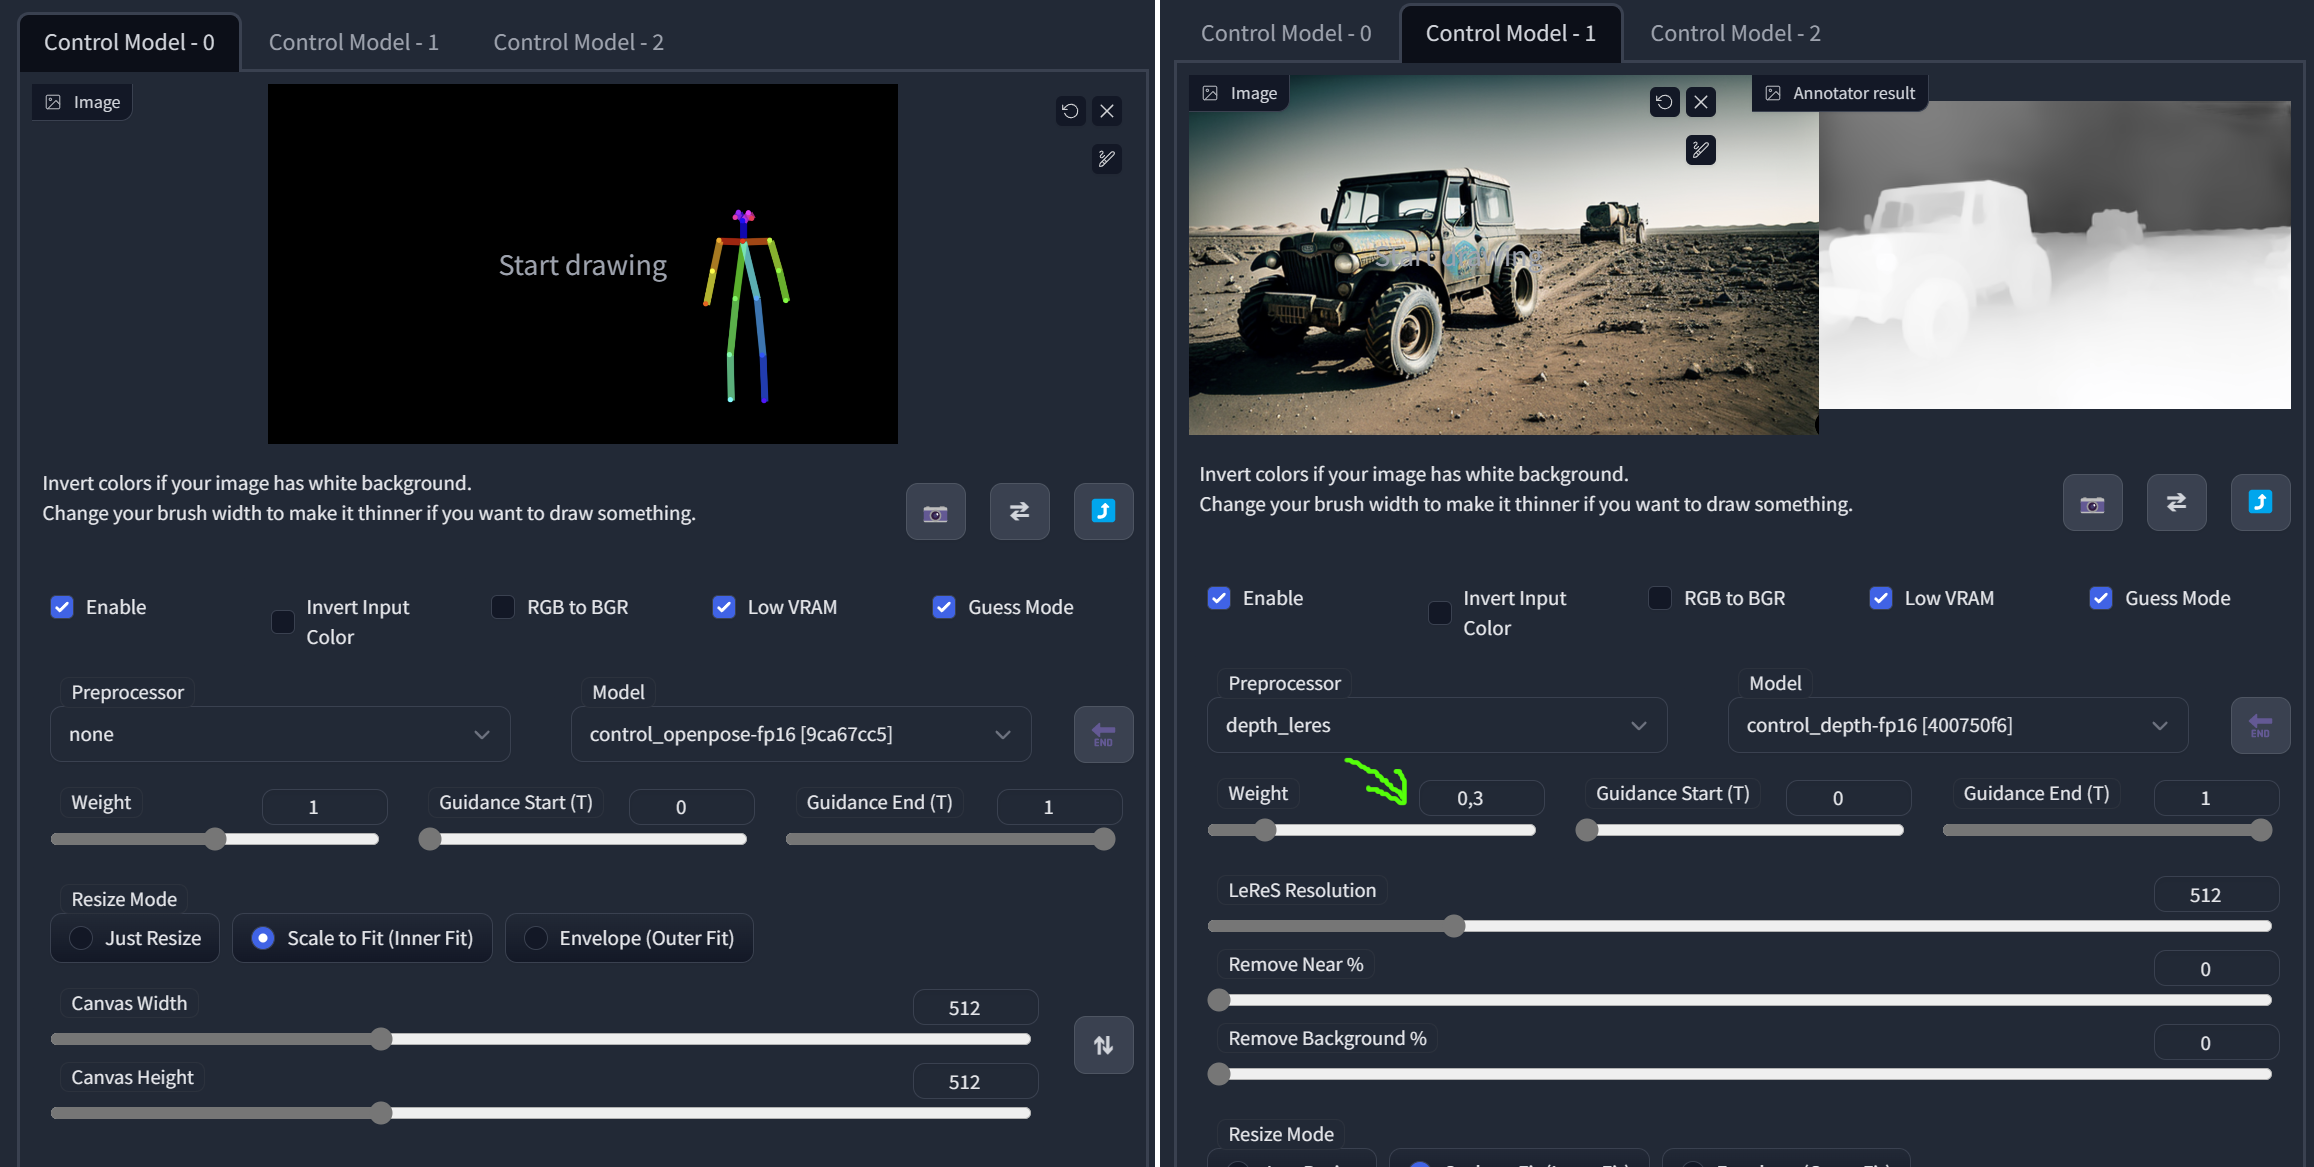
Use ControlNet and Multi ControlNet
ControlNet is an extension of SD. Multi ControlNet allows to run several ControlNet at once. You can adjust the number of ControlNet tabs in Settings/Stable Diffusion.
INSTALLATION: Extensions/Install from URL tab in AUTOMATIC1111 webgui, Install from URL https://github.com/Mikubill/sd-webui-controlnet . Download control and adapter models (reduced) at https://huggingface.co/webui/ControlNet-modules-safetensors/tree/main and put them into /stable-diffusion-webui\extensions\sd-webui-controlnet\models folder.
Models for ControlNet version 1.1 are here: https://huggingface.co/lllyasviel/ControlNet-v1-1/tree/main
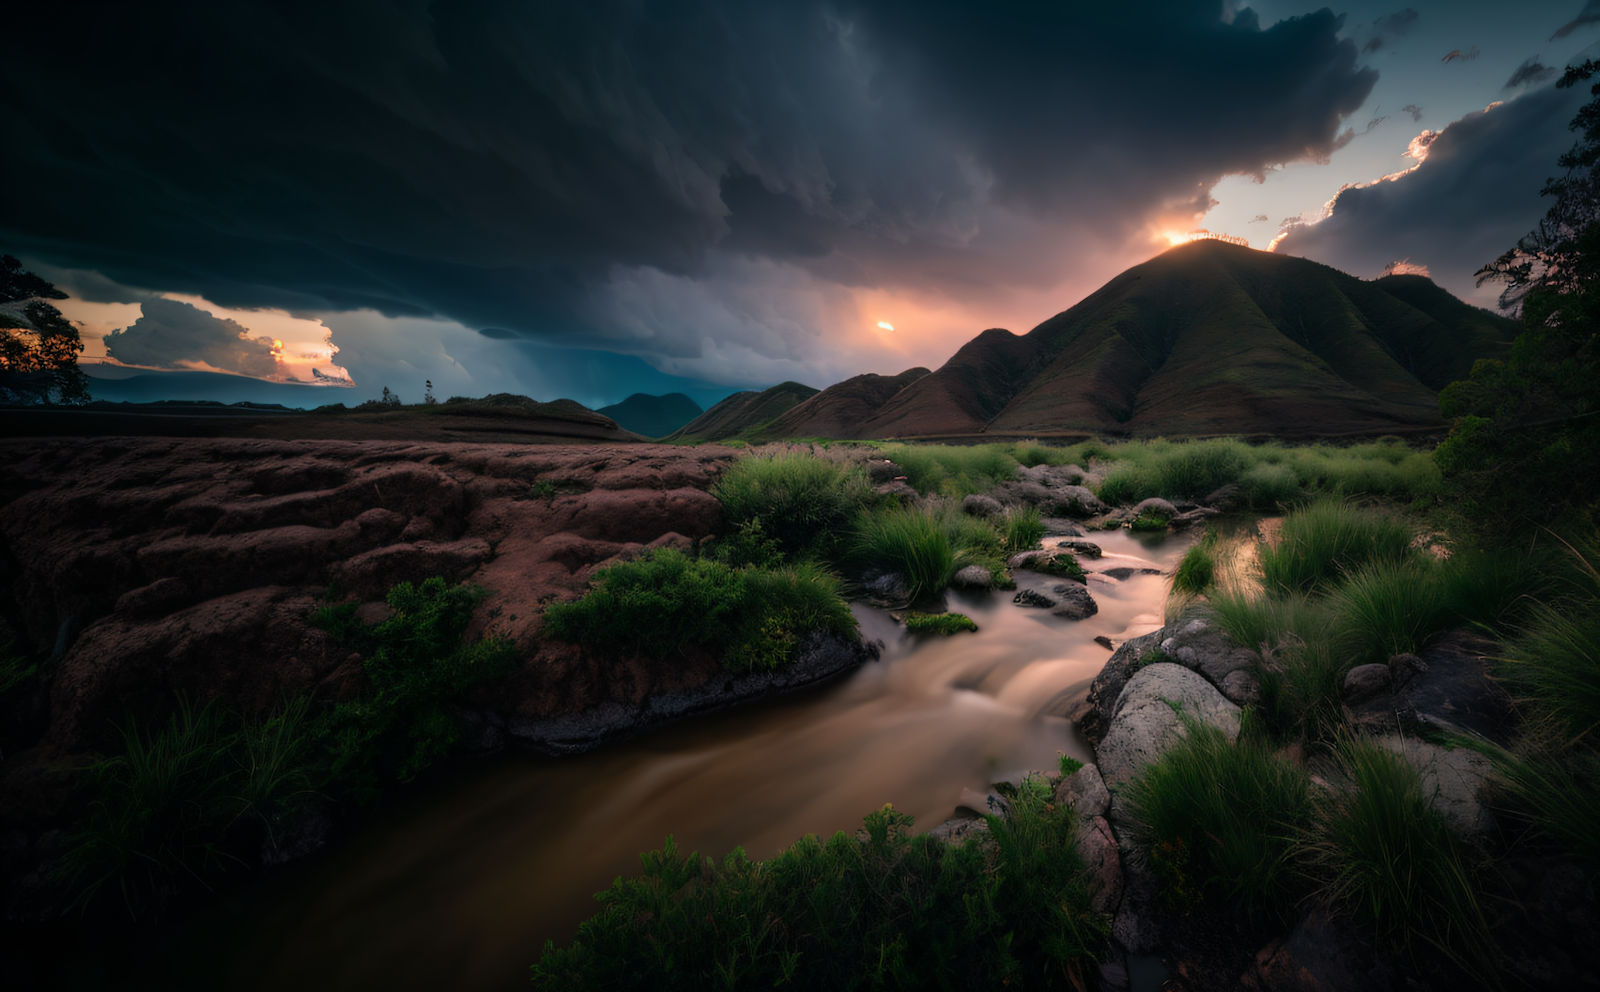
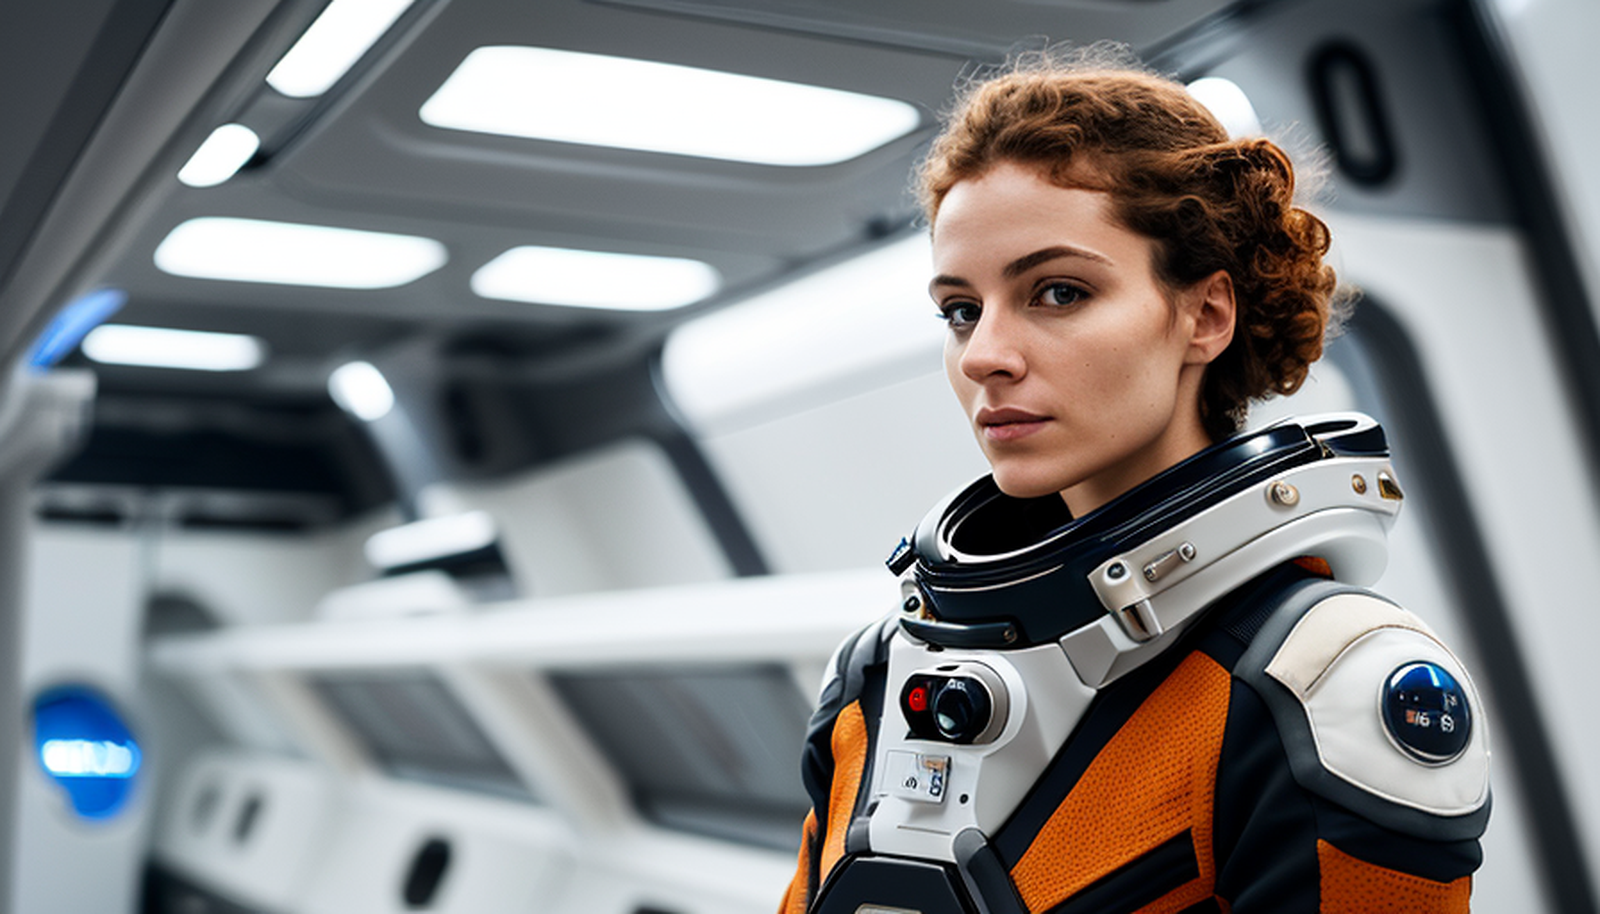
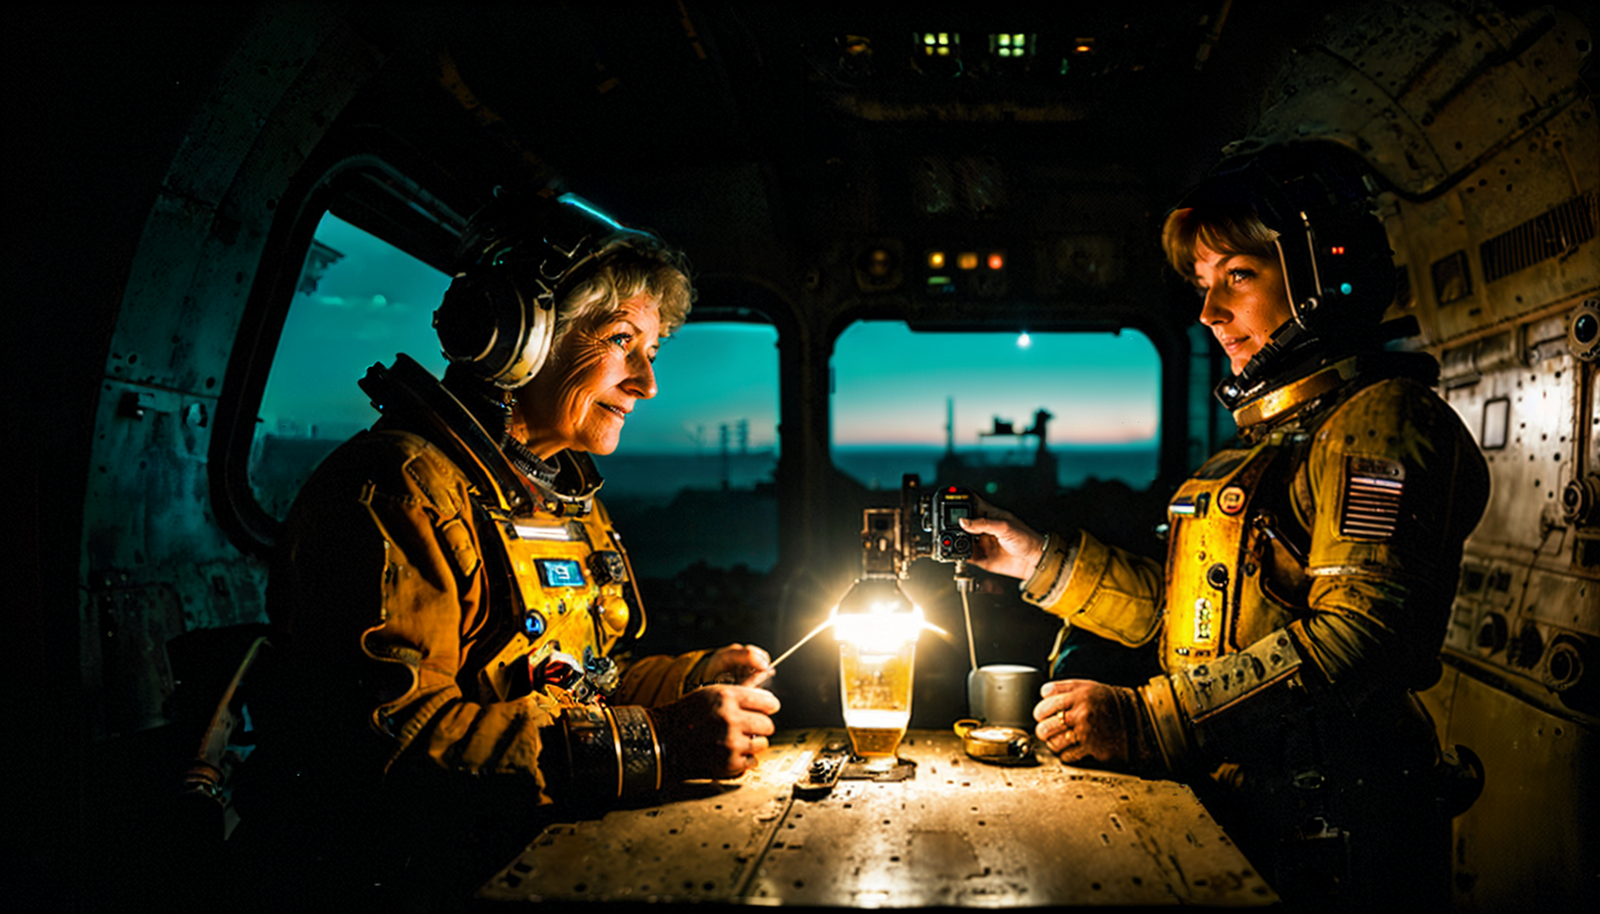
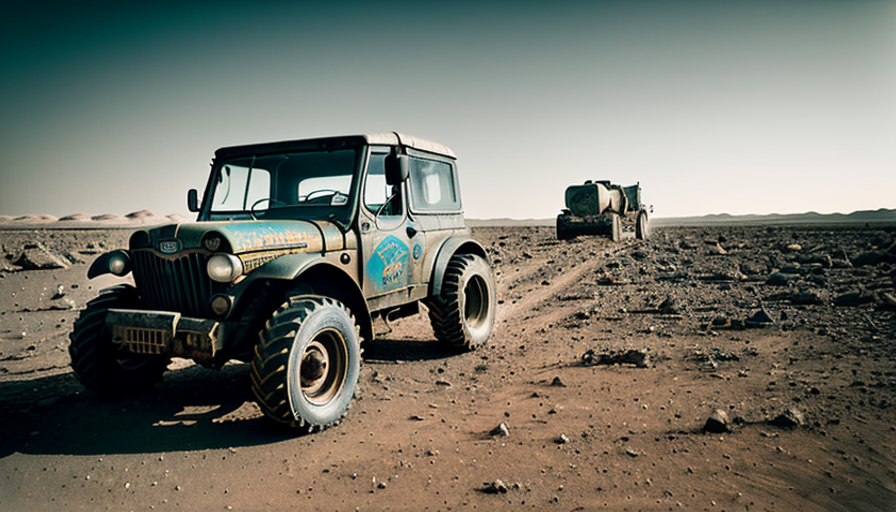
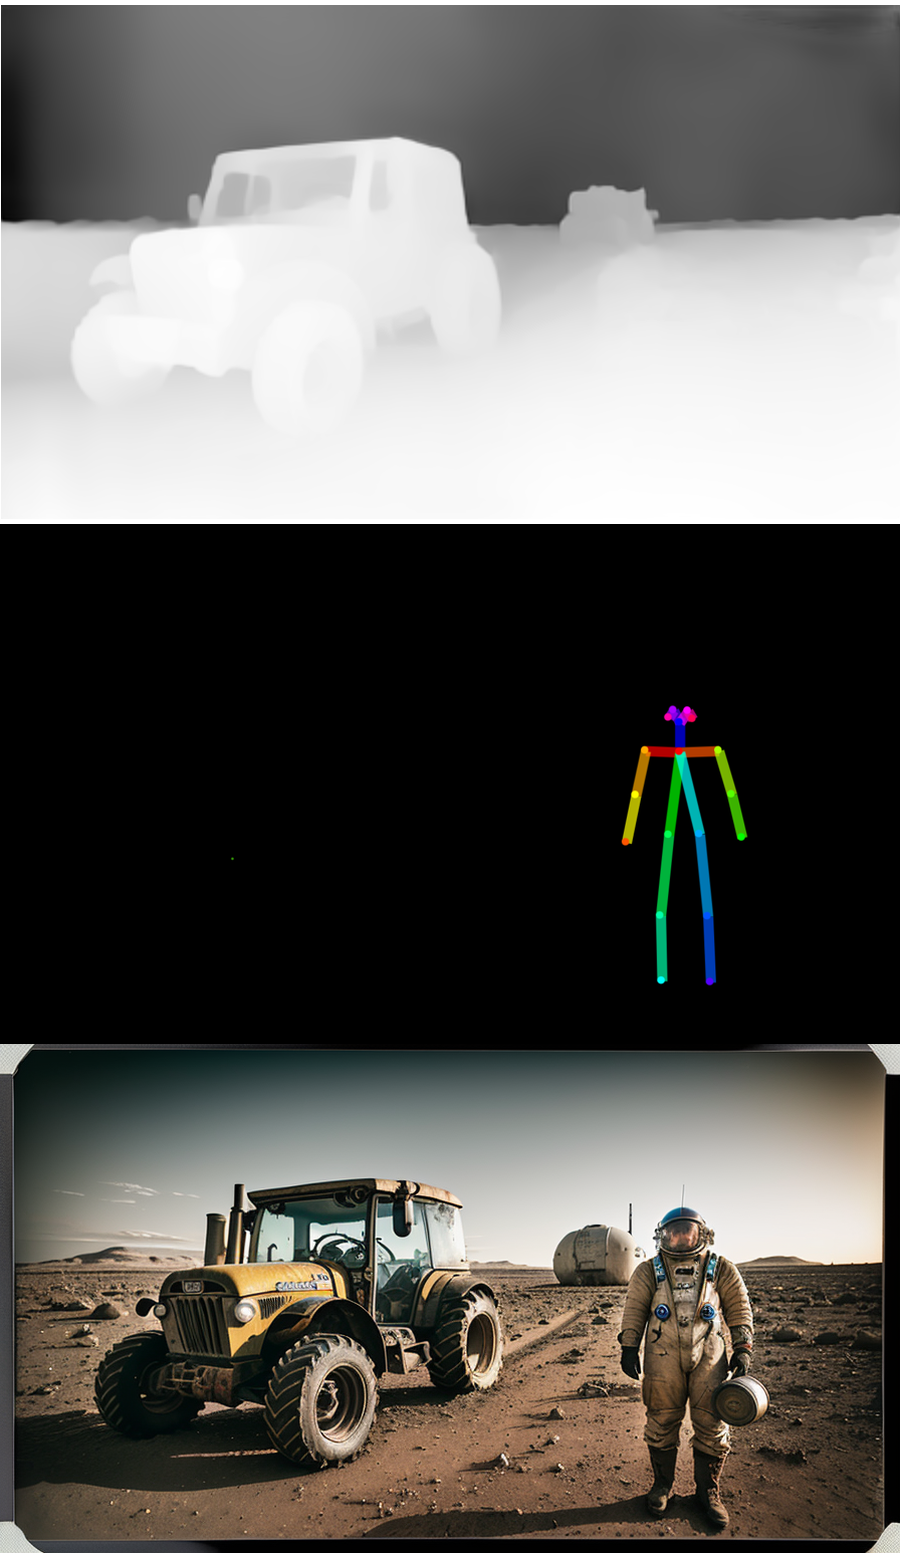
Example: Composition control with OpenPose model and depth model. The depth model will take care of the structure of the scene and the openpose model will add the character of the astronaut (depending on the prompt).
Use OpenPose for Character Posing
OpenPose is 2D human pose estimation for computer vision and machine learning (ML). You may use photos or 3D models as input. You may pose the bones in the extension or export the pose from Blender.
OpenPose Editor Extension
Install the extension Extensions/Install from URL, use https://github.com/fkunn1326/openpose-editor and restart UI.

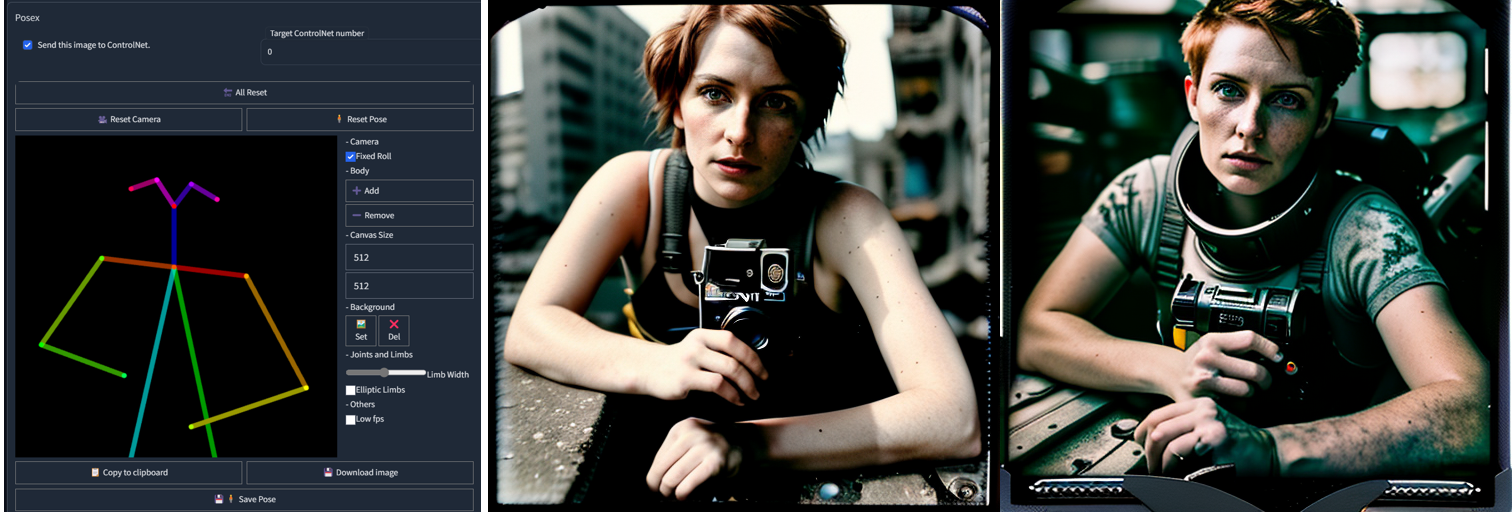
Posex Extension
Similar to OpenPose Editor, but you can move camera and limbs in 3D. Install the extension script Extensions/Available/Load from. After installation, find Posex in txt2img or img2img, an check Send this image to ControlNet to see the editor.
Github of the project https://github.com/hnmr293/posex
TIP: To move whole body, select a joint and right drag the mouse. Use the three mouse buttons to move the object or position the camera (viewpoint).
Generate Pose in DAZ Studio
Create pose and export image. Use Detect from image to load into OpenPose Editor. Adjust as needed. Save the pose as .png, which you can load into ControlNet.
Generate Pose in Blender
Blender addons and rigs for OpenPose:
- https://impactframes.gumroad.com/l/fxnyez
- https://toyxyz.gumroad.com/l/ciojz (can create hands and feet canny poses)
- Pose the rig in Blender scene (check the documentation)
- Render and Export
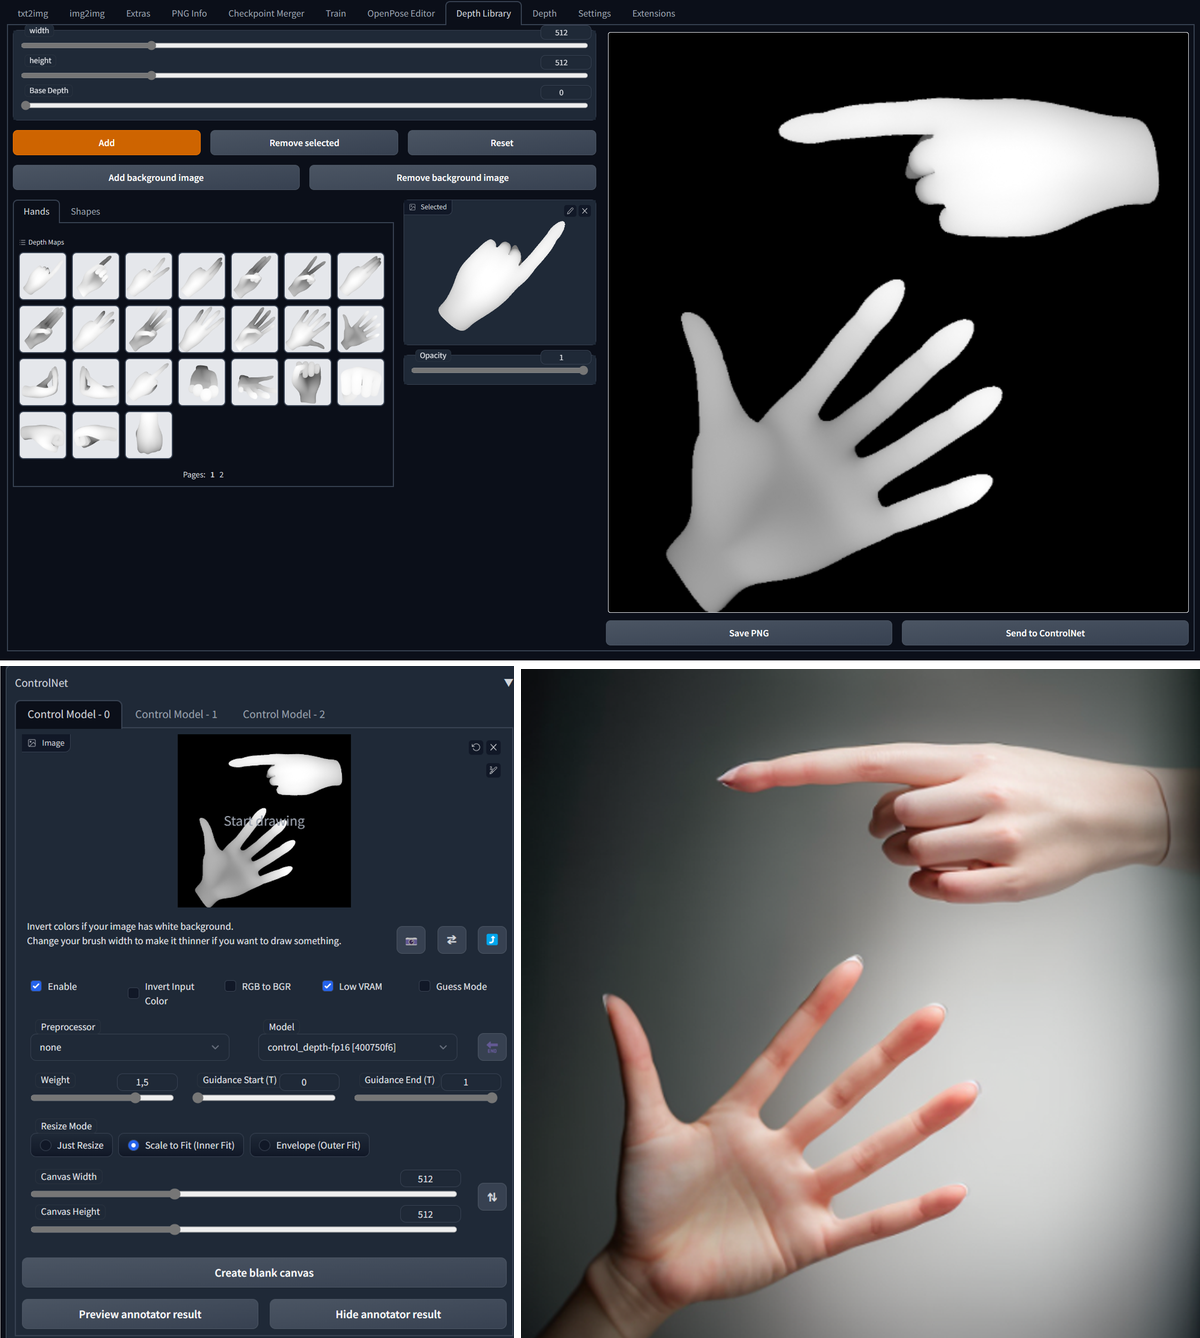
Use Depth Maps
As you have seen above, depth maps are a great way to interpret a shape in stable diffusion. You can create them with stable diffusion or import them. This extension helps with object depth library management (to install, use Extensions/Install from URL): https://github.com/jexom/sd-webui-depth-lib
Use LoRA models
Low-rank Adaptation (LoRA) is used to complement the main model and practically works as a specific style for fast fine-tuning of the output. It can be trained on a small number of images and produces a tiny file compared to full models. You can train your own or use pre-trained—which are often unfortunately working best only with a certain model. Some interesting LoRA models to try:
- https://civitai.com/models/7183/dalcefopaintinglora300 (stylized painted anime characters)
- https://civitai.com/models/13941/epinoiseoffset
- https://civitai.com/models/5042/wlop-style-lora for this model https://civitai.com/models/2968/wlop (anime painting)
Train Your Custom LoRA
LoRA models are easier to train and are much smaller filesize than full base or blended model.
Use Latent Couple and Composable LoRA
Install both in Extensions/Available/Load from. Latent Couple allows division of image space into regions where are put objects from prompt. Composable LoRA allows to use AND in prompt, which divides the objects in the prompt. You can read more in the article about Synthetic Photography.
More information about Latent Couple Manipulations and regional division is in this article about composition.
Use Offset Noise
Helps to use light effects in dark images much better. Test it with https://civitai.com/models/13941/epinoiseoffset
Use Embeddings and Textual Inversion
Embedding file goes into the /embeddings directory. Call it directly from the prompt by name of the file (without file type extension). Call the installed negative embeddings from negative prompt. Embeddings are simple but still useful.
Use Prompt Weights
Stable Diffusion in AUTOMATIC1111 supports weighting of prompt keywords. To increase weight, put a keyword in bracket, like (apple), ((apple)), to decrease it use square brackets [orange], [[orange]]. To add even more weigth, use sytax ((apple:1.3)).
Use Stable Diffusion Upscaling
For smooth image, use SD upscale script. Load image in img2img, scroll down and from the list of scripts choose SD upscale. Set Denoising strenth for the main model low (0,05-0,2). Generate the upscaled image. You may experiment with upscaling models, like stable-diffusion-x4-upscaler. For batch upscaling, use chaiNNer.
Conclusion
While there is a wrong perception that AI-generated outputs are completely random and uncontrollable, the reality is that there are many ways to control and fine-tune the output of AI models, including those used for generating images. It is also worth noting that while AI-generated outputs may not always be perfect, there are techniques for repairing and retouching the generated images, just as there are for traditional photographs and art.
By combining the strengths of AI with human creativity and ingenuity, skill, and effort, it is possible to push the boundaries of what is possible in the visual arts. Techniques for control of the image output of Stable Diffusion do offer a unique and powerful toolset for creating new and innovative art and photography.