AI Texturing: Blender 3D Workflows for AR/VR in Stable Diffusion
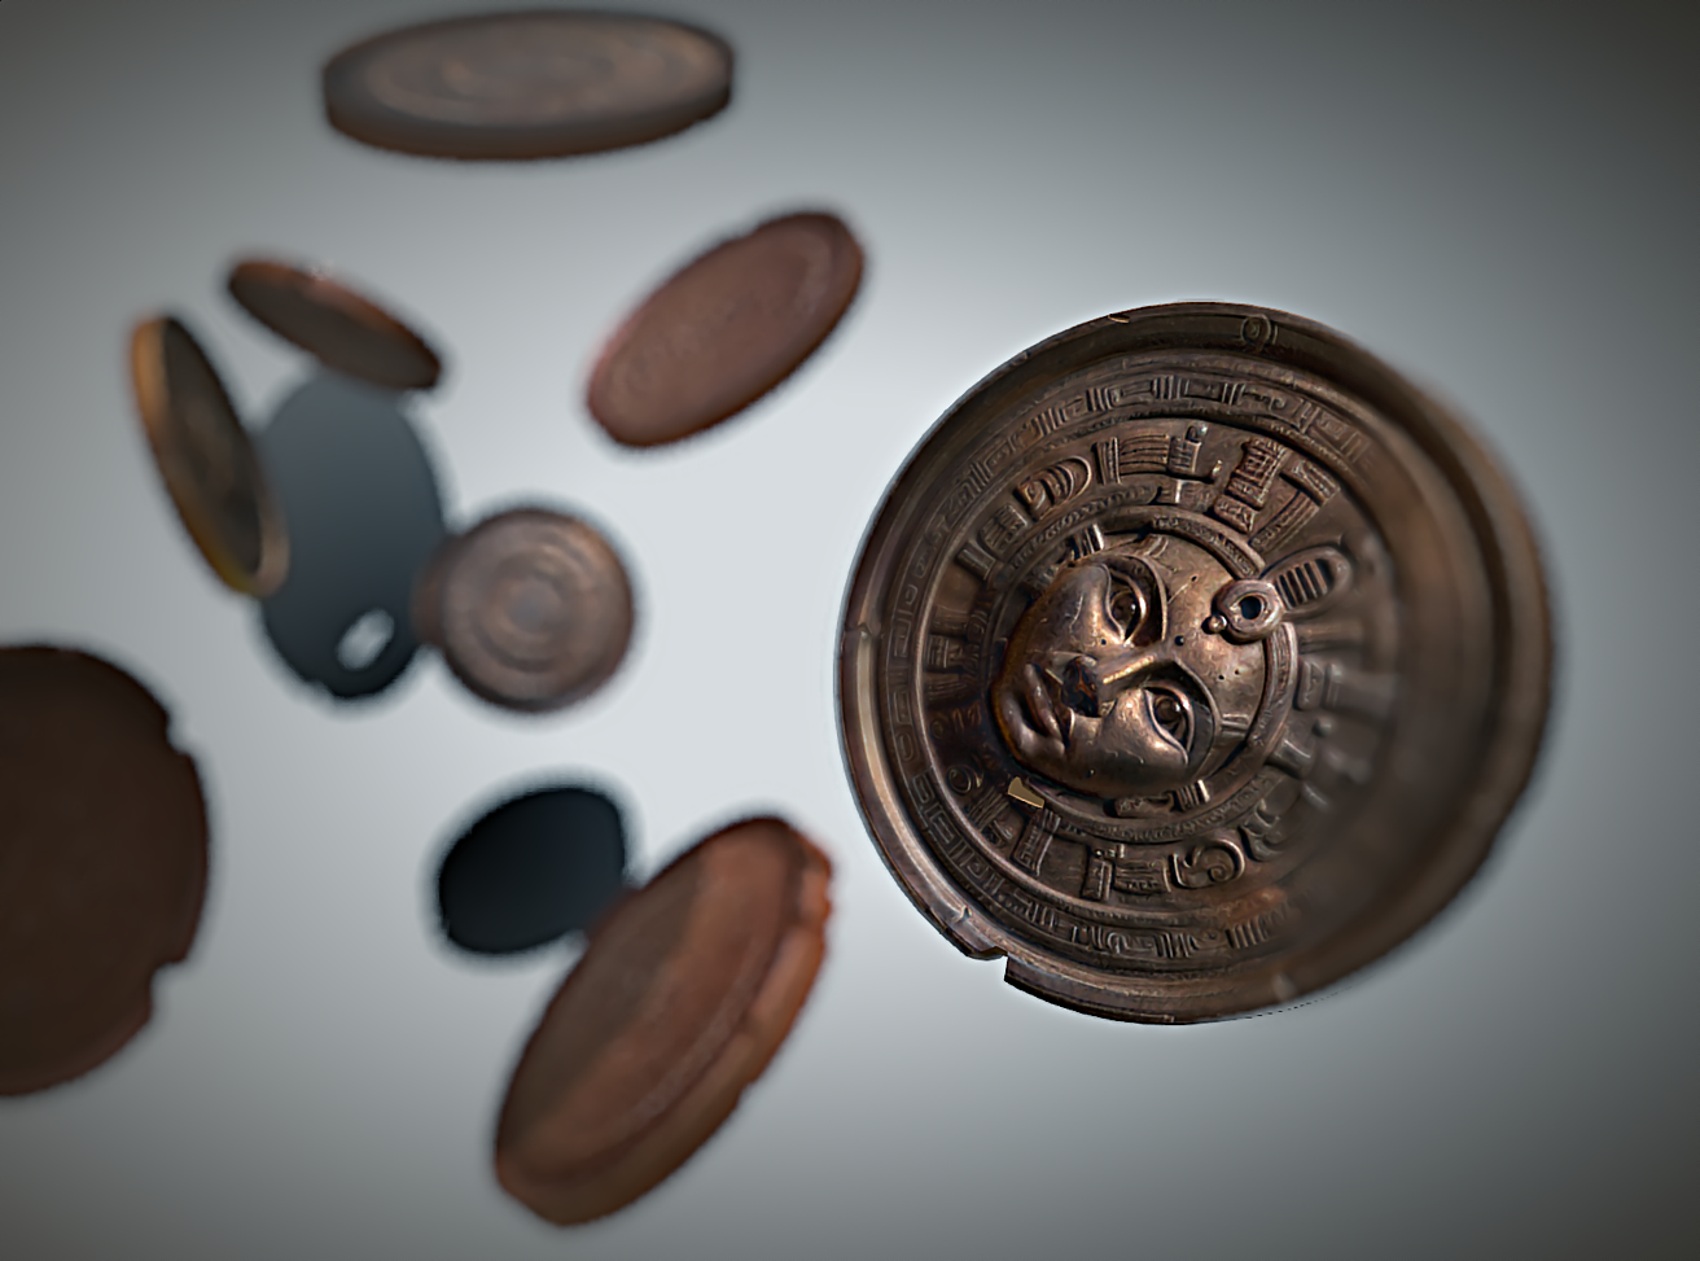
We have talked about AI rendering 3D scenes with material segmentation, effectively using SD as a render engine. What if we need to render a texture for use in AR/VR or 3D application?
In this tutorial is used the following software: Blender, Krita, GIMP, Materialize, Stable Diffusion on AUTOMATIC1111 web UI, Depth extension, ControlNet extension, and Latent Couple manipulations extension.
Prepare the 3D Model in Blender
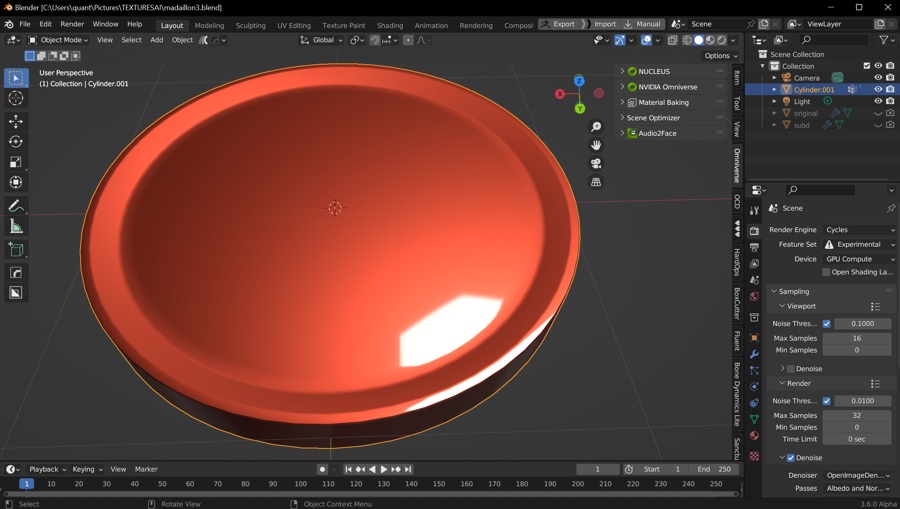
Create and UV unwrap the model in Blender. Keep in mind the overall shape and make the isles readable as a form! It will become handy later when working in Stable Diffusion.
- Model the 3D object in Blender. The method works best with well-defined forms and flat surfaces.
- Create Vertex groups with logical parts of the object, assign the selections
- Add materials to vertex groups (those will define the segments for the SD model)
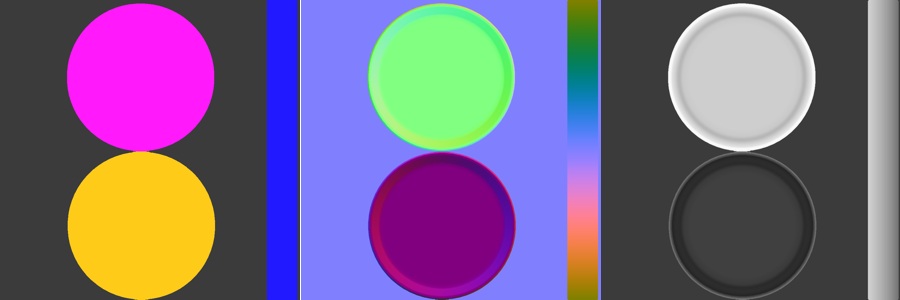
- Bake Material ID map in TexTools
- Limit Material ID map colors to remove antialiased edges. Use GIMP Filters/GMIC-Qt/, find Posterize filter, and limit colors as needed. Alternatively, you may change the mode Image/Mode/Indexed—if colors from antialiased edges are persistent and hard to remove, use the Posterize filter before.
- Bake unwrapped object normals by choosing Object Normal map in TexTools — this image will guide the main shape and relief of the object. Save the image as a 16-bit PNG.
- Bake also Paint Base map, and save all the images.
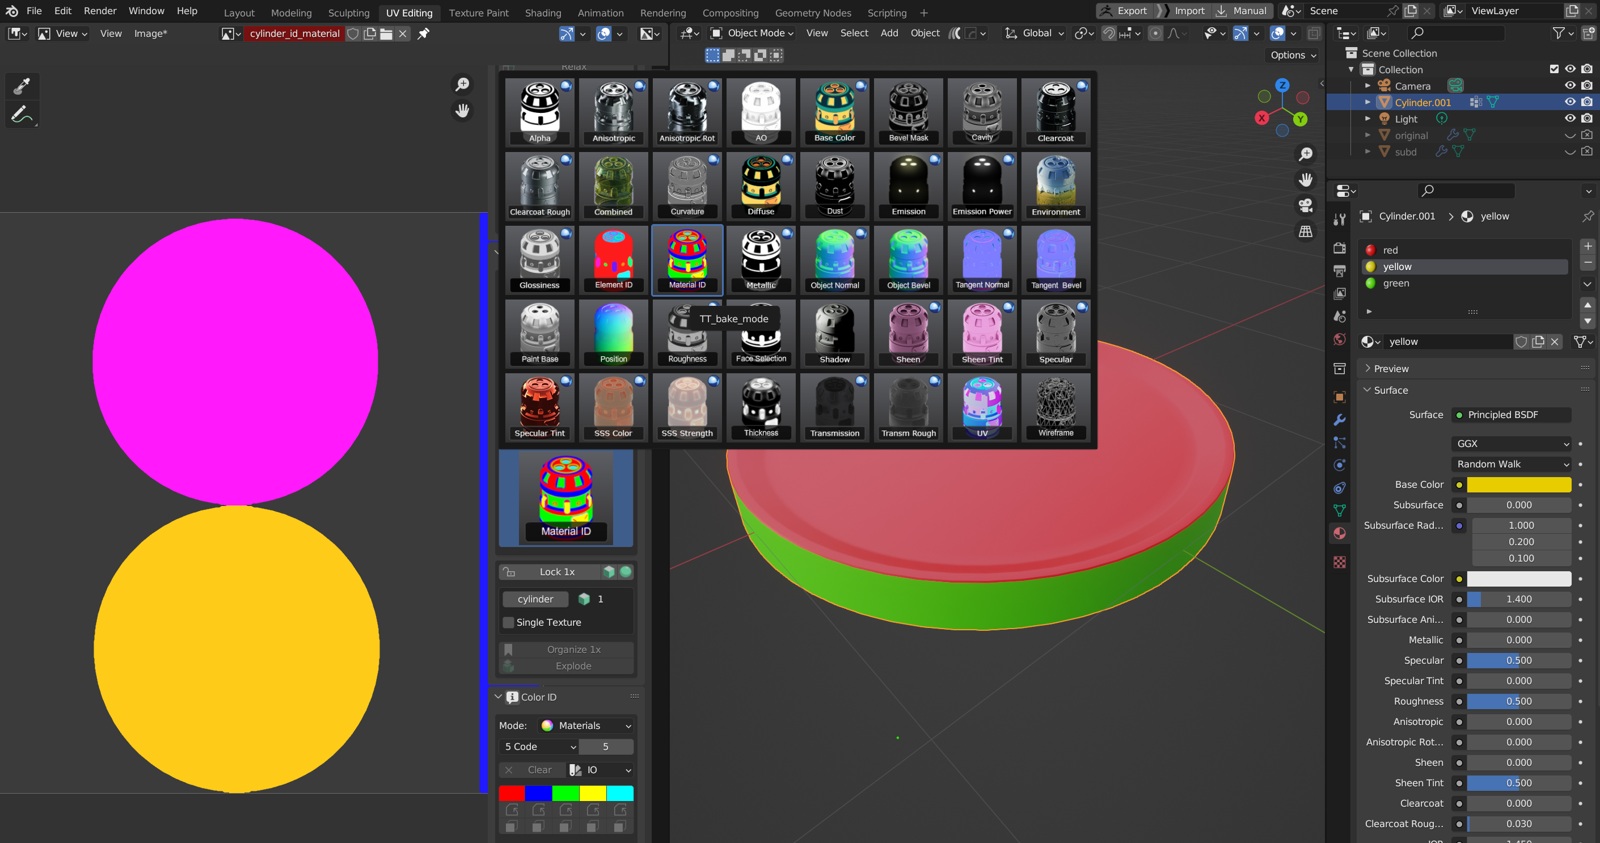
Now you have Material ID map, Normal map, and Paint Base map:
Generate Maps in Stable Diffusion
We will use the previously created maps to control stable diffusion with the ControlNet extension.
Create Base Design (txt2img)
- Set ControlNet Model to normal (in this case control_normal-fp16 [63f96f7c]), leave Preprocessor empty
- Set Enabled and Low VRAM checkboxes
- Import or drag the normalmap into ControlNet
- Set Latent Couple manipulations to enable
- Import the segmentation map (with reduced colors, as explained above)
- Set I´ve finished my sketch
- Set prompts into color coded slots, set main prompt
- Press Prompt Info Update to copy the tokens into main prompt windows
Refine the Design (img2img)
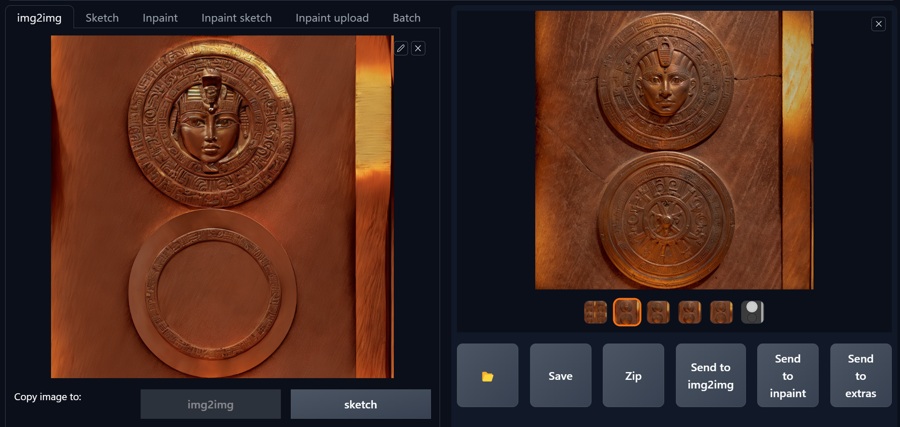
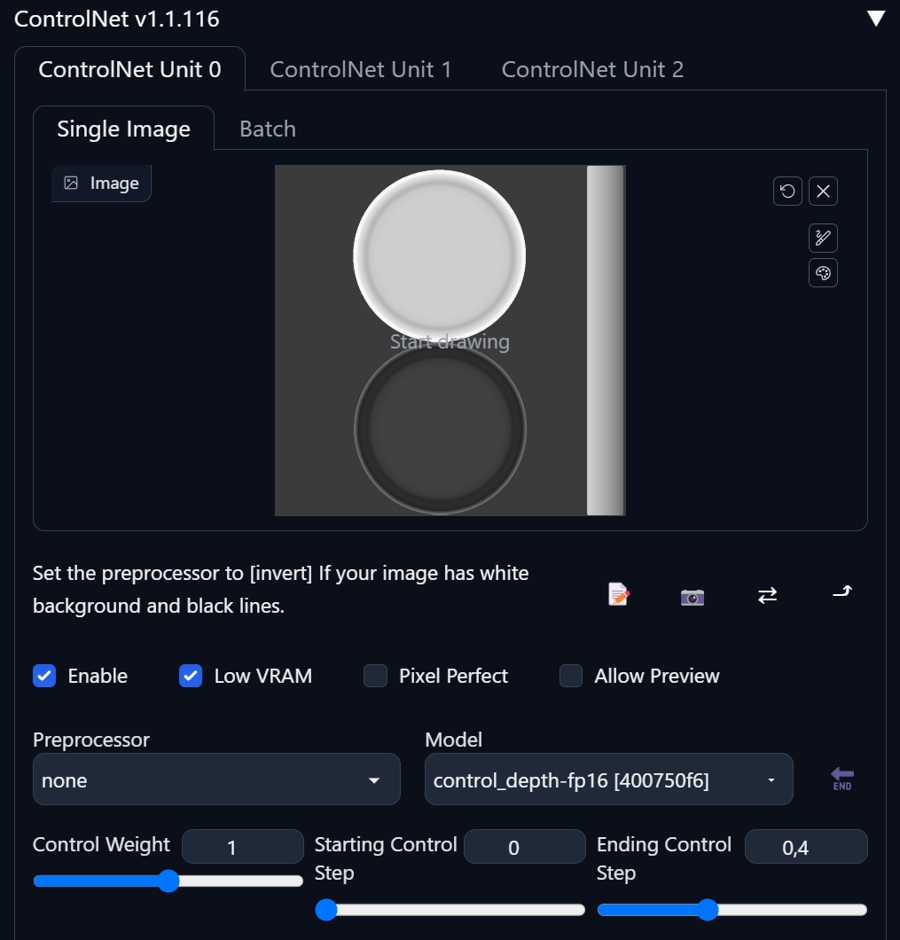
Create variants of your design and try several models if needed.
Tips:
- For symmetrical designs try to keep UVs centered
- Refine the output in img2img, constrained with ControlNet - it is faster
- You may select parts of the various iterations and edit the texture in Krita before making PBR texture from it.
Create Depth Map in SD
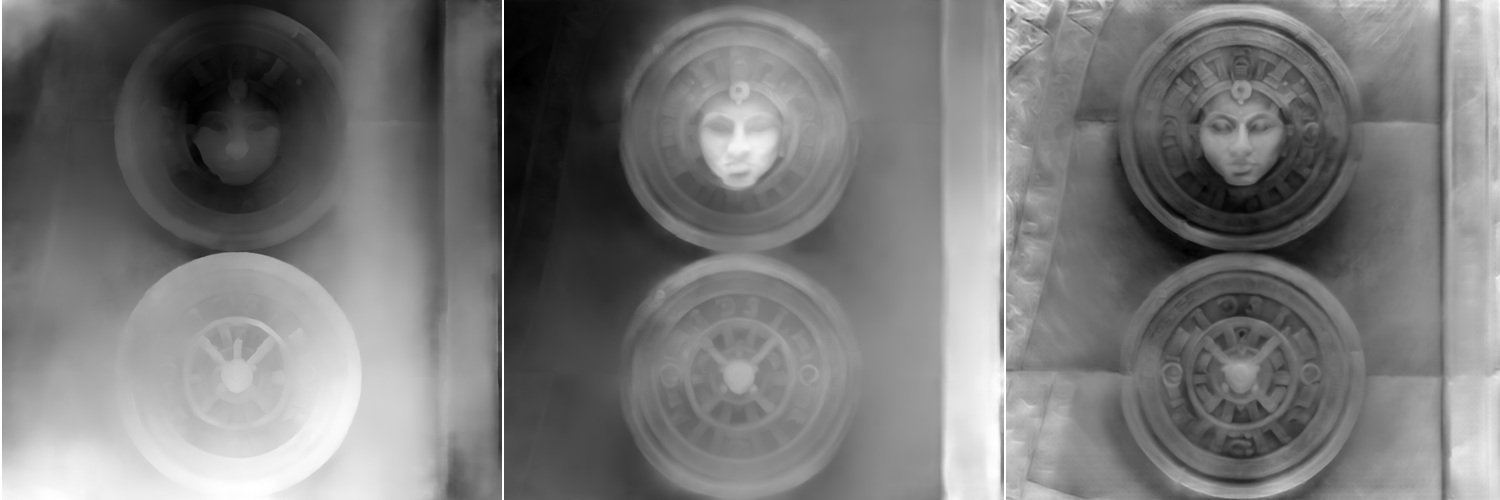
When there are prominent features in the map you want to preserve, it may be a good idea to create a depth map before creating a normal map in Materialize. Some tips:
- Use Depth extension, in web UI tabs
- Use Clip and renormalize
- Notes to Models:
- res101: fast, but usable mostly for scene blocking
- dpt_hybrid_384 (midas 3.0): fast, more pronounced relief, usable
- zoedepth_nk: (you will probably need to use CPU mode, because of VRAM memory, be prepared to wait for 45+ minutes(1024x1024) image till render finishes). If you have time or GPU with more than 16GB VRAM, I suggest this model for intricate textures.
Editing in Krita in Wrap Around Mode
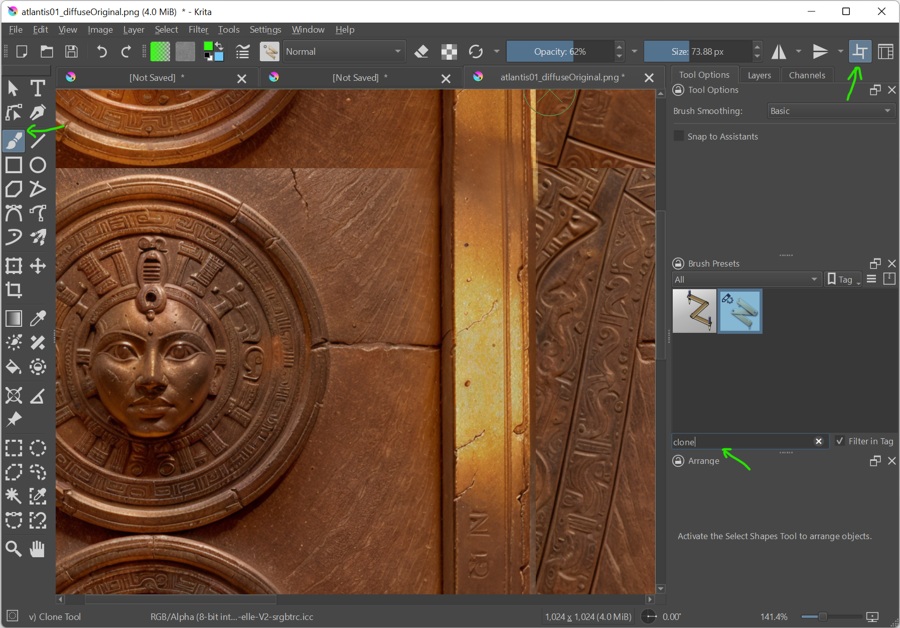
To adjust small details and issues with tiling, use Krita Wrap Around Mode (Shift+W), or icon on the top.
- Select Freehand Brush (B), and find Clone tool (you can type clone in the search in the brush docker)
- Lower the opacity
- With CTRL select part of the image you want to copy, and paint over the image with the brush
- Wrap Around mode helps immensely with retouching tileable graphics
- Repair both diffuse and depth maps
PBR Maps with Materialize Utility
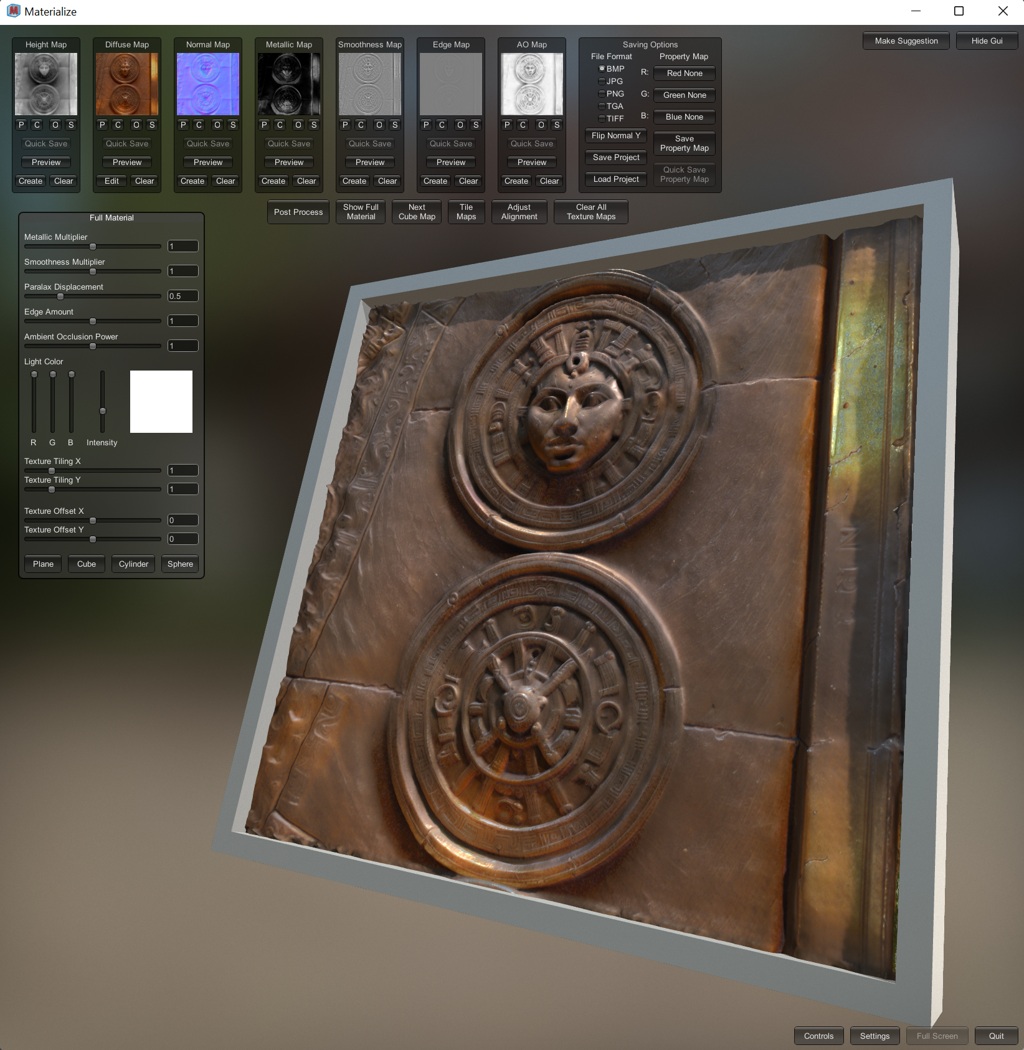
Materialize is a free utility programmed in Unity, which can help to create PBR textures. It can not rival professional pipeline packages, but it still can be useful (I think it is also not developed for quite some time). Use AI-rendered image as Diffuse color input and AI-rendered depth map as Heigth input. Generate the remaining maps with the Create buttons. You will not need all of them in Blender, but you can experiment using them for various effects.
In some cases, when the texture is very flat, you may get better results with Materialize normal map than with AI generated depth.
In Blender, create a new Principled material for your model and try to insert as many generated maps as posible—select Principled BSDF node and press CTRL+SHIFT+T and then select all the proper textures in the folder.
The material will not look like in Materialize, but try to export it ito GLTF .glb, review it, and then experiment with various settings.
Finished Model
The method is applicable also when using the Asymmetric tiling web UI extension (allows the tiling only in X or Y axes), but you need to consider your unwrapping and placement of seams carefully. This way, the output can be seamless out of the stable diffusion, without the loss of detail (if the basic tiling checkbox option would be used).
Dream Textures
Dreamtextures is progressive Blender addon which helps to texture 3D models directly in Blender. I will return to it in a future article, but for now here are some pros and cons:
Pros: Sets projections, works in Blender directly, maps to UVs, novel ideas
Cons: Skewed details, limitations, does not support .safetensors models, documentation not yet updated, hard to setup, the control is not so comfortable as in web UI, convoluted model management
The addon is in development, so the options can change in the near future. Anyway, it is a great possibility to test new approaches to texturing in Blender. I am looking forward to the next iterations of this very interesting project. At the time being I found the method with separate rendering in SD more straightforward.
Conclusion
Creating textures in Stable Diffusion is an interesting creative option. If you are well prepared you can achieve good results and quickly create many variations of the texture. For the best results I guess a dedicated model or a project (as Dream Textures) is needed to speed up the process. Also a separate solutions for Diffuse (Albedo, Color) and other specific PBR textures would be needed for a truly perfect result.
