Effective Upscaling of Digital Art and Photography in Stable Diffusion
Computer artists, graphic designers, and photographers, all face from time to time the challenge of upscaling digital images without compromising their quality. Fortunately, there are now advanced tools available that can help to achieve this goal. In this recently updated article, I was describing the use of chaiNNer UI and work with various neural network models. Now we take a look at how to effectively upscale using Stable diffusion— I will use Automatic1111 web UI in the examples.
Some upscaling techniques are particularly useful when working with generative models, but the principles are applicable to any image.
Contents
Upscaling the Resolution of the Whole Image
We have default upscalers (Lanczos, ESRGAN, ScuNET etc.) already installed, but for our experiments, get additional upscaler models from https://upscale.wiki/wiki/Model_Database and put them in proper model directories:
- 4x_RealisticRescaler_100000_G.pth goes into models/realESRGAN
- 4x-UltraScale9_V0.5 BETA.pth (you will find it under 4x-UltraSharp.pth link) goes into models/ESRGAN
- 4x-UltraSharp.pth goes into models/ESRGAN
- 8xHugePaint_v1.pth goes into models/ESRGAN
You may upscale an image using various models, or you may try Stable Diffusion x4 upscaler model https://huggingface.co/stabilityai/stable-diffusion-x4-upscaler/tree/main (download the .safetensors version).
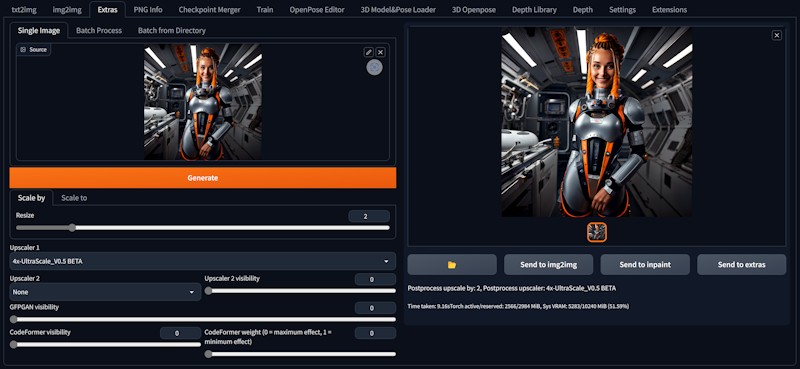
Method 1: Extras
This is the most straightforward method. Go to Extras tab, select the Upscaler 1 and Resize scale.
Method 2: img2img SD Upscale
Import the image in img2img tab. The simplest method would be just to up the resolution and rerender with low Denoising strength. Due to VRAM limitations, you can use script to help with tiling the upscale. Scroll down to Script menu and choose SD upscale script.
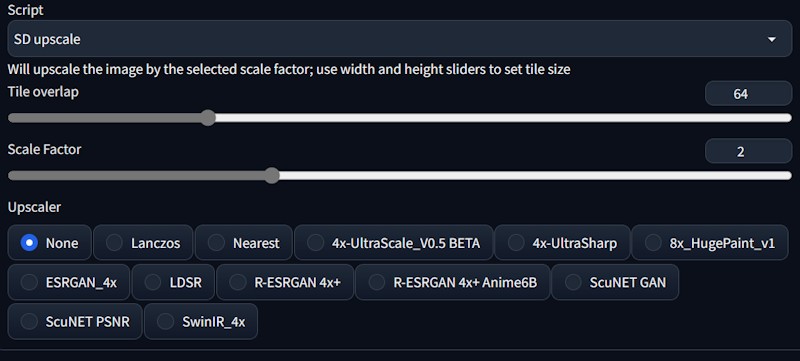
Method 3: Ultimate SD Upscale
Manipulations Extension
Install from Extensions/Available/Load from. Search for Ultimate SD Upscale
manipulations and Install. Restart UI. Now you have another img2img script Ultimate SD Upscalein the menu.
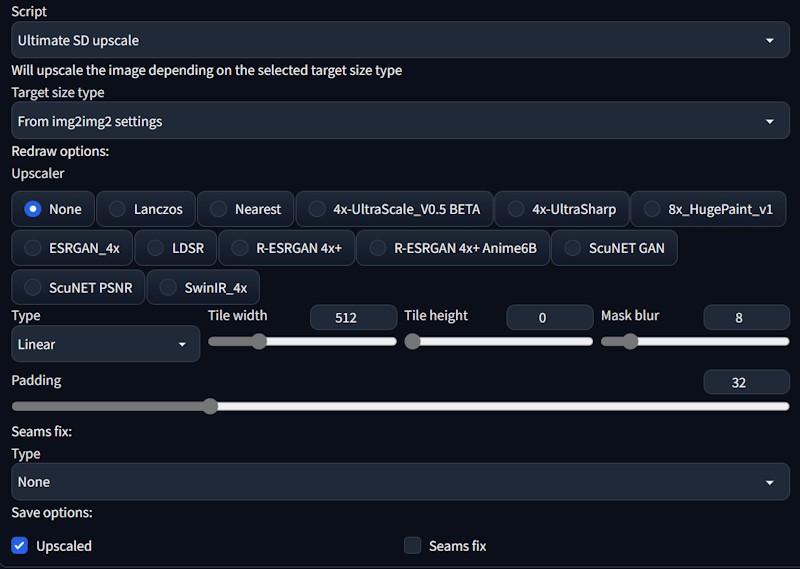
Method 4: StableSR for Stable Diffusion Extension
This method is good for very high-res and consistent results.
- Install the extension from Extensions tab and follow the instructions on https://github.com/pkuliyi2015/sd-webui-stablesr . Just to recapitulate for a quick overview:
- You will need a standard SD 2.1 EMA model (download to your stable-diffusion-webui/models/stable Diffusion folder) https://huggingface.co/stabilityai/stable-diffusion-2-1-base/tree/main (choose .safetensors version)
- Download the zipped StableSR module and VAE https://huggingface.co/Iceclear/StableSR/resolve/main/weibu_models.zip
- Unzip and put vqgan files to VAE folder (stable-diffusion-webui/models/VAE), and stablesr file to your stable-diffusion-webui/extensions/sd-webui-stablesr/models/ folder

USAGE: Select v2-1_512-ema-pruned model and go to img2img tab, from the Scripts dropdown select the StableSR script.
RECOMMENDED SETTINGS: Euler a sampler, lower CFG Scale<=2 (when using a prompt, I got good results even with 7 using original prompt for the AI generated image), Steps >= 20.
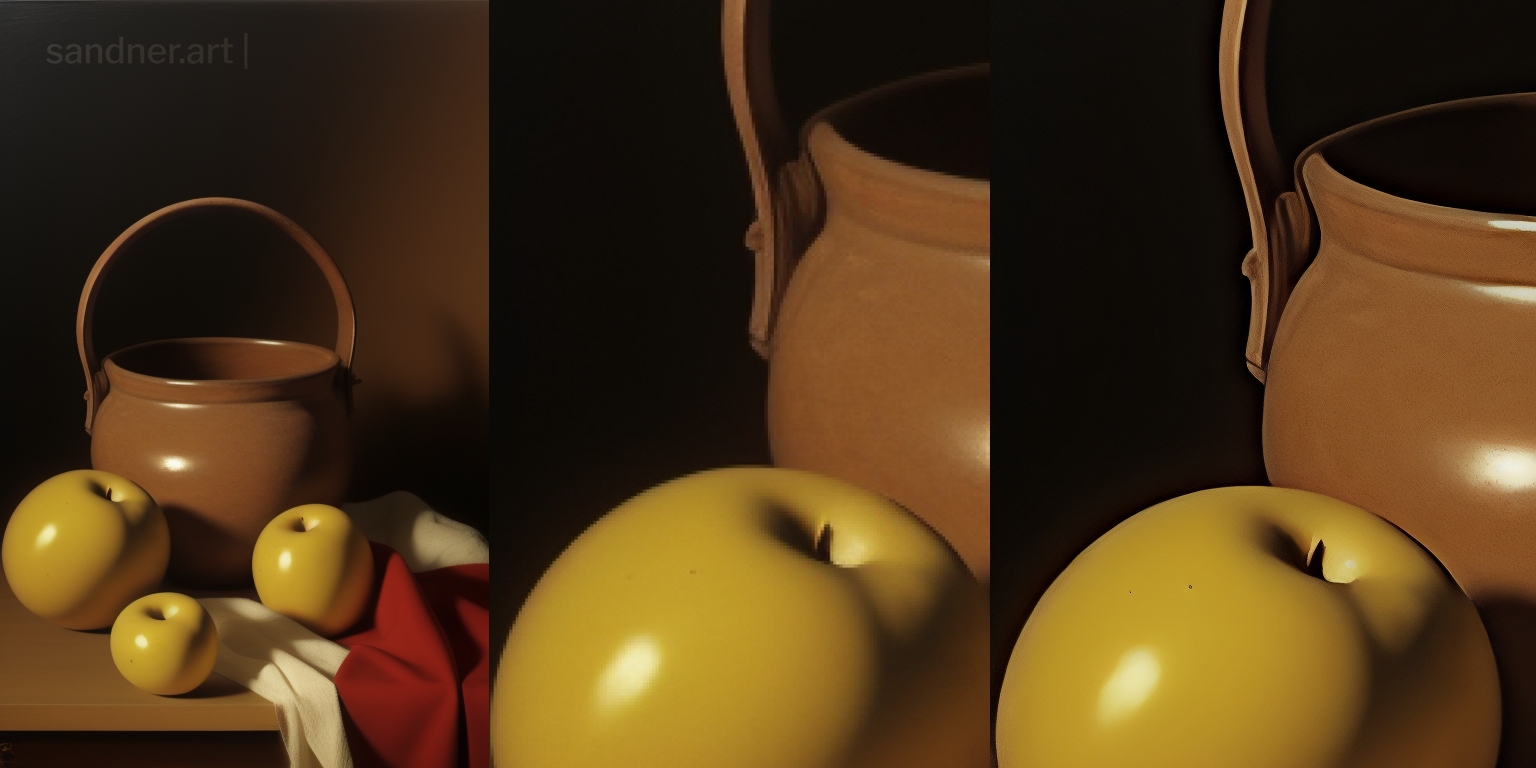
It is using the tiling approach and avoids some artifacts and limitations. Although the installation is a little bit clunky, the usage is very streamlined and fast.
Upscaling Parts of the Image and Selectively Adding Details
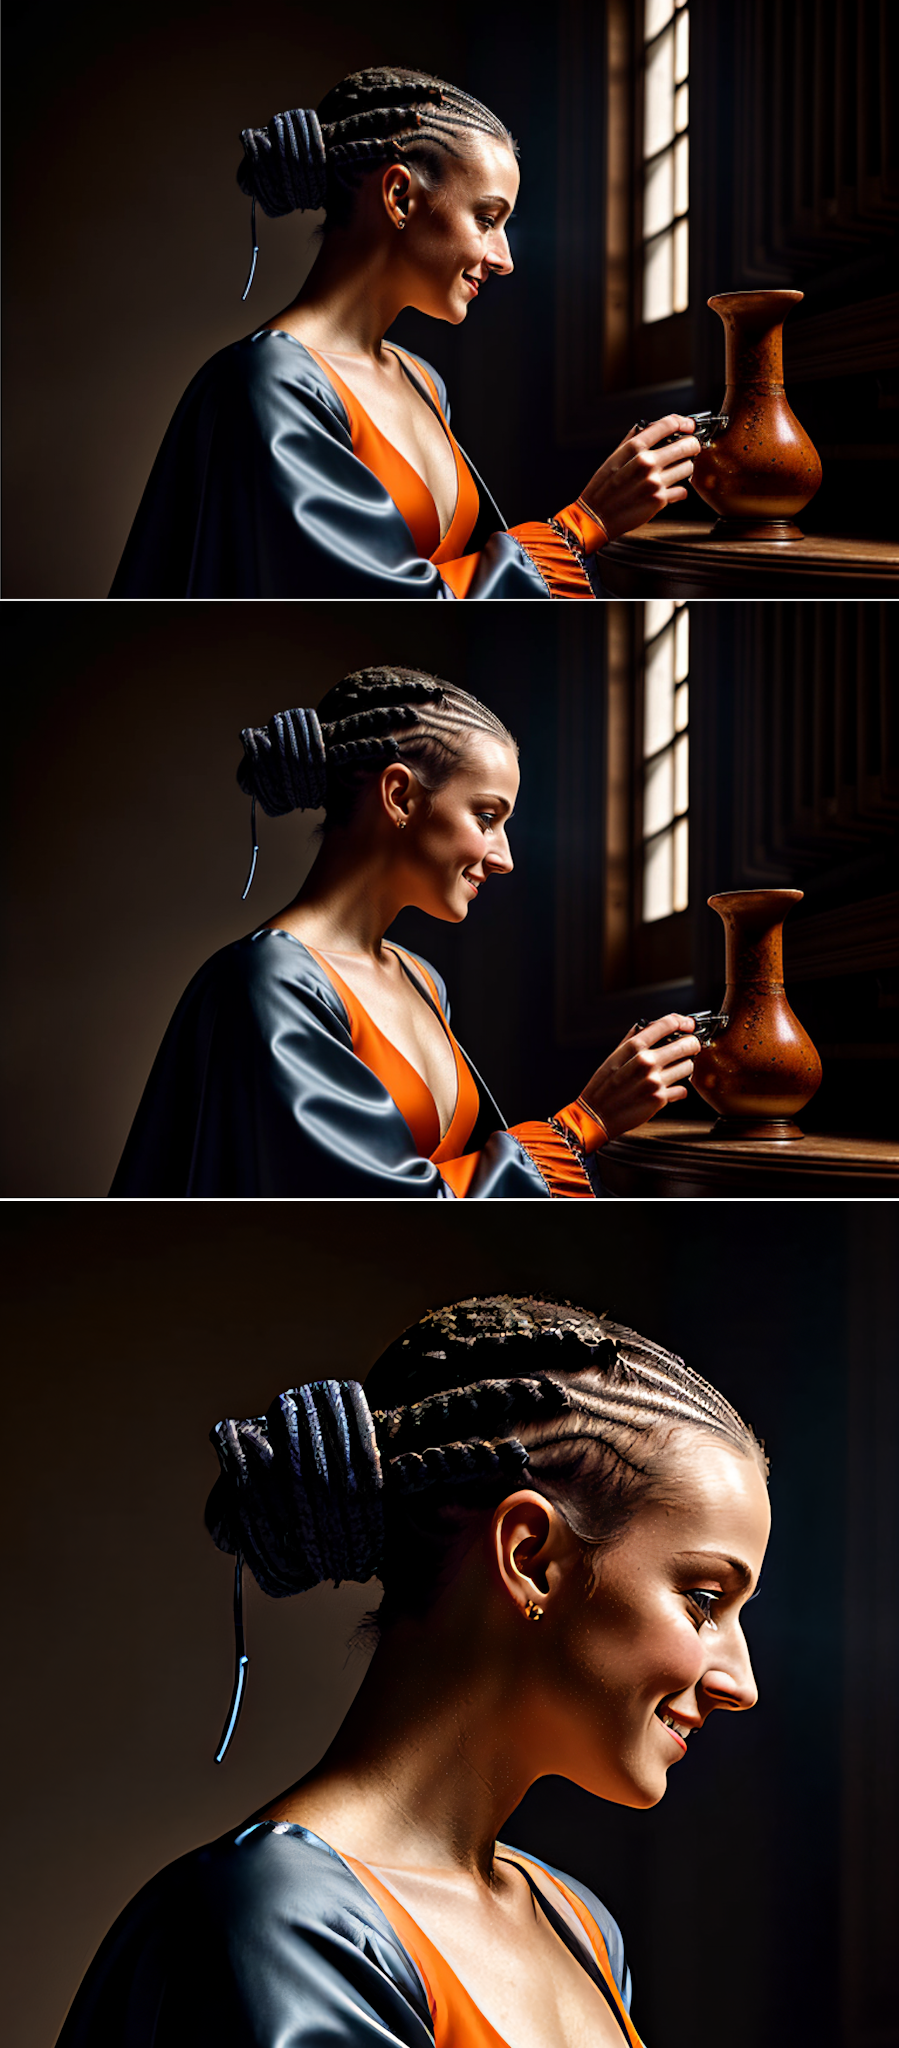
Method 1: Masking and Inpainting
This method requires manually masking parts of the image and regenerating the content on a higher-resolution image. It is useful for image repair or adding detail to an illustration.
- Upscale the image by any method (2x)
- Send to inpaint and mask an area
- Generate an image and adjust the prompt according the result
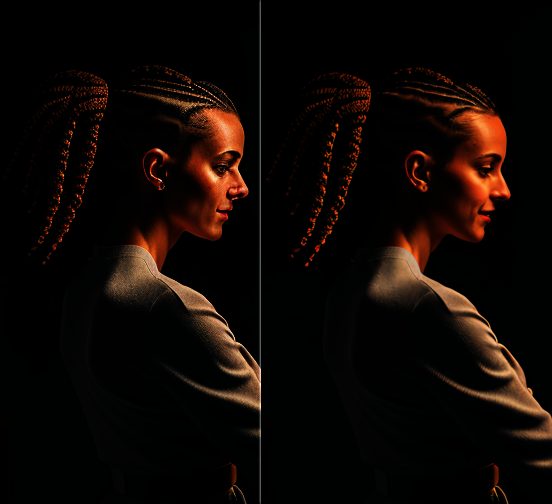
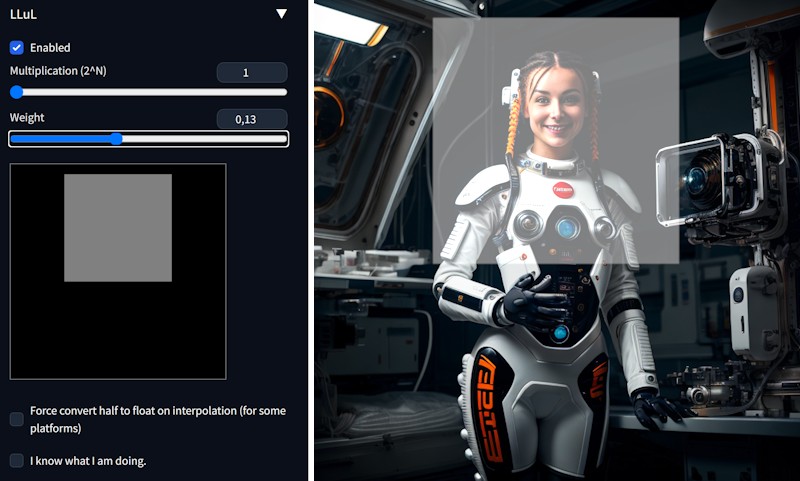
Method 2: Local Latent Upscaler Extension (LLuL)
Install from Extensions/Available/Load from. Search for LLuL - Local Latent upscaLer and Install. Restart UI. LLuL menu option appears in txt2img and img2img tabs. If the grey square does not show up, use Chrome browser for web UI. This extension is good for adding detail after upscaling.
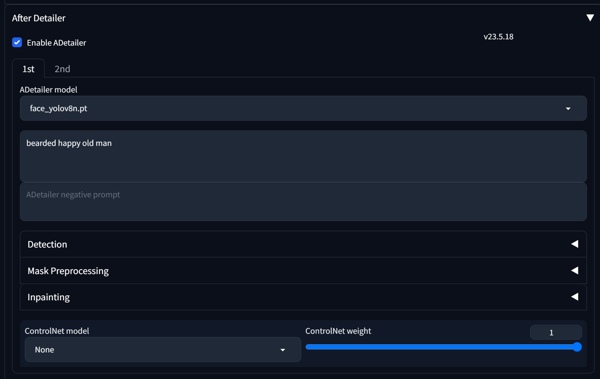
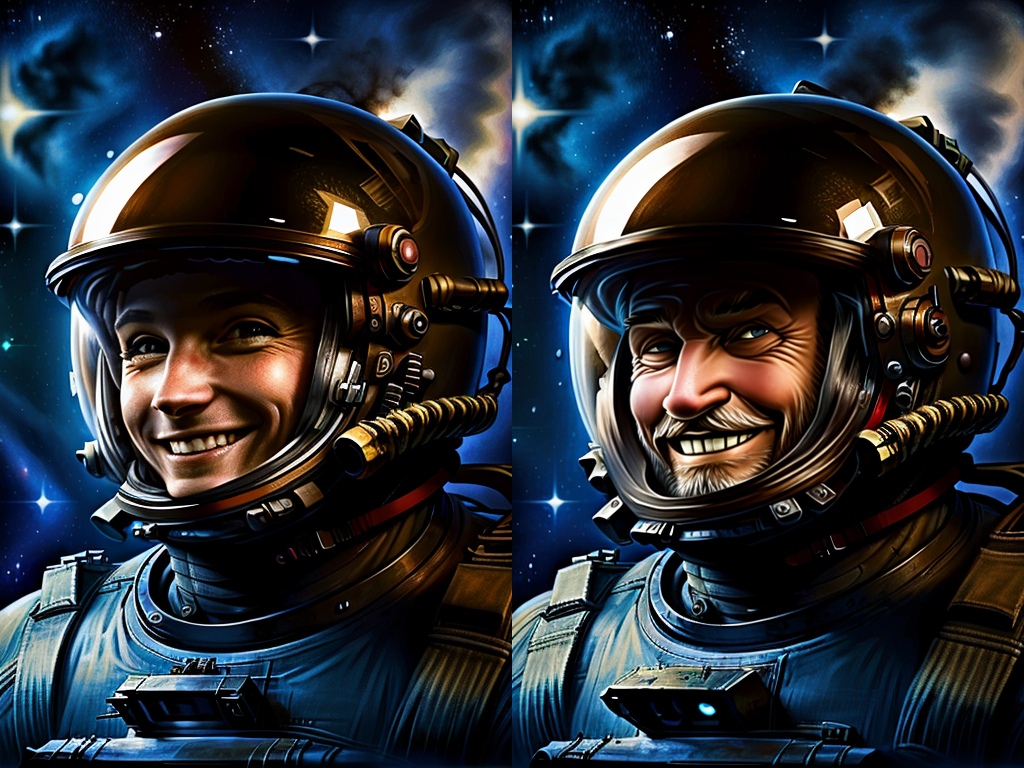
Method 3: Automatic Selective Upscale with !After Detailer Extension
This extension selects and repairs (upscales) parts of the image—faces, hands, etc. It can also effectively exchange features on such automatically masked areas.
- Install !After Detailer manipulations from Extensions/Available/Load from
- Update and apply all, then restart web UI completely (by closing terminal window and running web UI f.i. from your usual batch file). It will download required .pt models automatically during restart.
Upscaling During Image Generation Using Hires Fix and Restore Faces
This method is specific for upscaling during image generation in txt2img. It is useful when using models trained for lower resolutions and for faster generation of hires images. You will turn it on by checking Hires. fix checkbox under Sampling method selection.
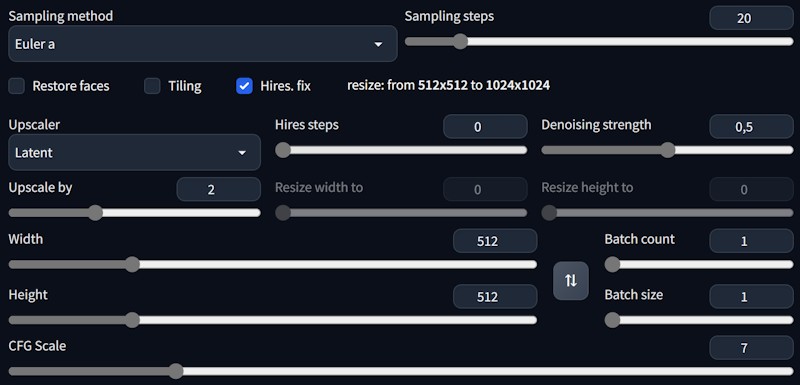
The option Restore Faces attempts to repair the faces in the image automatically (results may vary and there is not much of a control).
Working With Low VRAM
When you get errors on graphic cards with suboptimal memory, try to use unusual fractions of upscale, for instance, 1.5 instead of 2. This way you can manage a reasonable image scale even with a lower VRAM available (I was testing many SD features on as low as 5GB VRAM). You can also use the tiling methods described above. With that said, I recommend 10GB and more memory for experiments with Stable Diffusion.
Conclusion and Final Notes
Just remember, AI techniques are adding and changing data in the original image, which can be useful for an artistic effect but not for documentation purposes
Diffusion models are an excellent tool for resizing digital art, 3D renders, and photography and for generating high-quality images through AI-assisted upscaling. Upscaling digital art and photography can be a daunting task, but with the right tools and techniques, it can be done effectively and efficiently—AI-assisted upscaling can salvage old photos or improve low-resolution images. It can also save time spent on 3D rendering.
By following the techniques and best practices outlined in this article, you can take your digital art and photography to the next level and produce stunning results. So, give it a try and see what you can create with Stable Diffusion!
