How to Render Blender 3D Models in Stable Diffusion
While working with stable diffusion can be inspiring and you can get spectacular results, often you need better control over the result. Since we can not employ the technology effectively on the 3D model itself (yet), we can use the ControlNet method on the depth representation of the model or the scene with very interesting results.
By combining ControlNet features with other tricks with scene design, even with the current state of the technology you can get satisfactory results in many applications. In this tutorial, we will take a look at a manual method of how to use this technique. You will need:
- AUTOMATIC1111 setup: description, and tutorial in the article AI Image Generation: Experiment With Stable Diffusion Locally
- ControlNet Extension setup: article Advanced Control of Consistent Output for Stable Diffusion
- Blender 3D and Krita, free opensource creative software
The method in principle is usable for other 3D packages as well and does not use any Blender addons.
Render 3D Models in Stable Diffusion
Step 1: Prepare and Render the Model in Blender
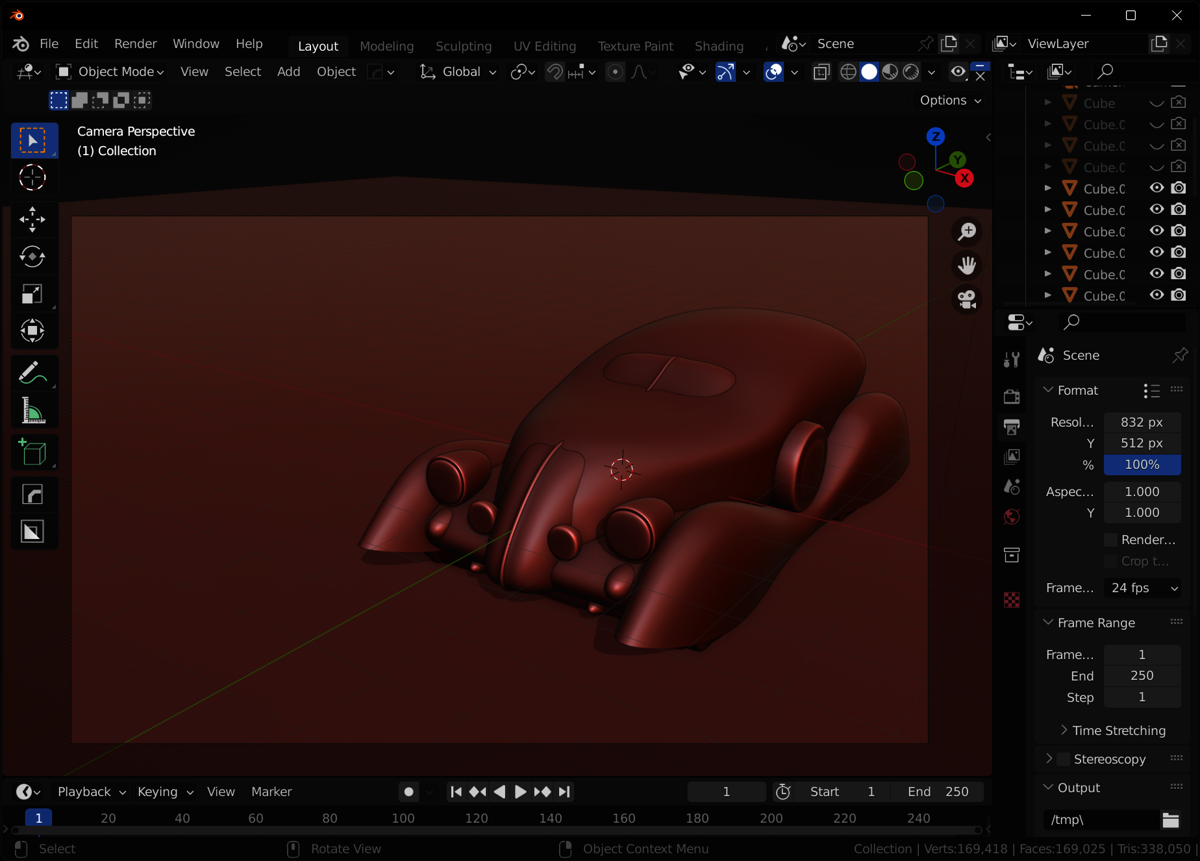
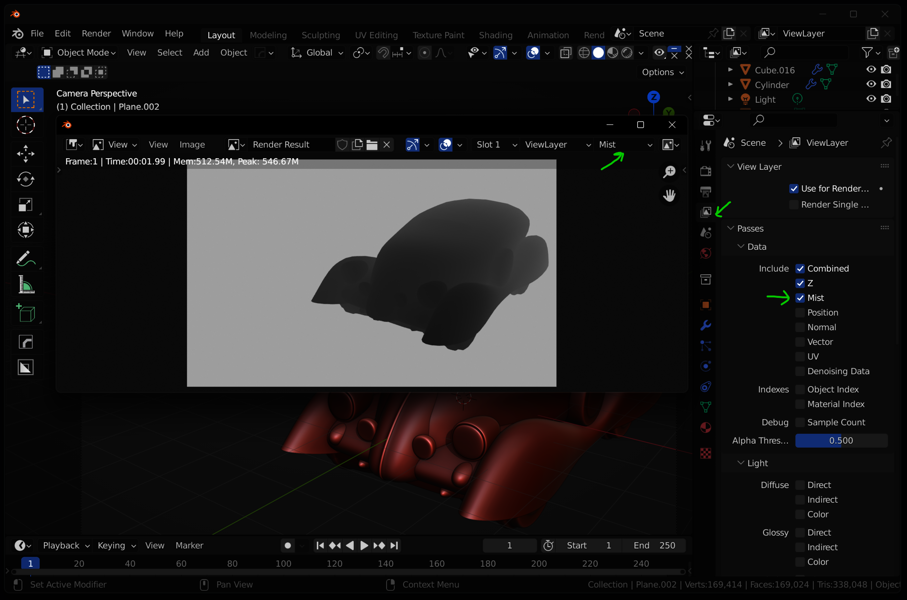
Here you can export the mist pass into 16-bit PNG. If you experience color banding, change the Color Management during export to View/Raw! Now you can use the image in ControlNet, you just need to invert the Colors (CTRL-I) and resave in Krita.
However, I suggest using the Blender Compositing node setup described in the next step to use an alpha channel with the mist pass (It can be handy for some setups and use with Depth Library). It also allows to invert the colors and adjust gamma directly in Blender.
Step 2: Prepare the Output and Alpha Channel
We will be using the Compositing workspace in Blender to adjust the output. Use 16-bit PNG RGBA as a working file (to avoid color banding), also 32-bit EXR RGBA works great for depth maps (needs to be converted in Krita into PNG, but seems to give smoother results in some cases).

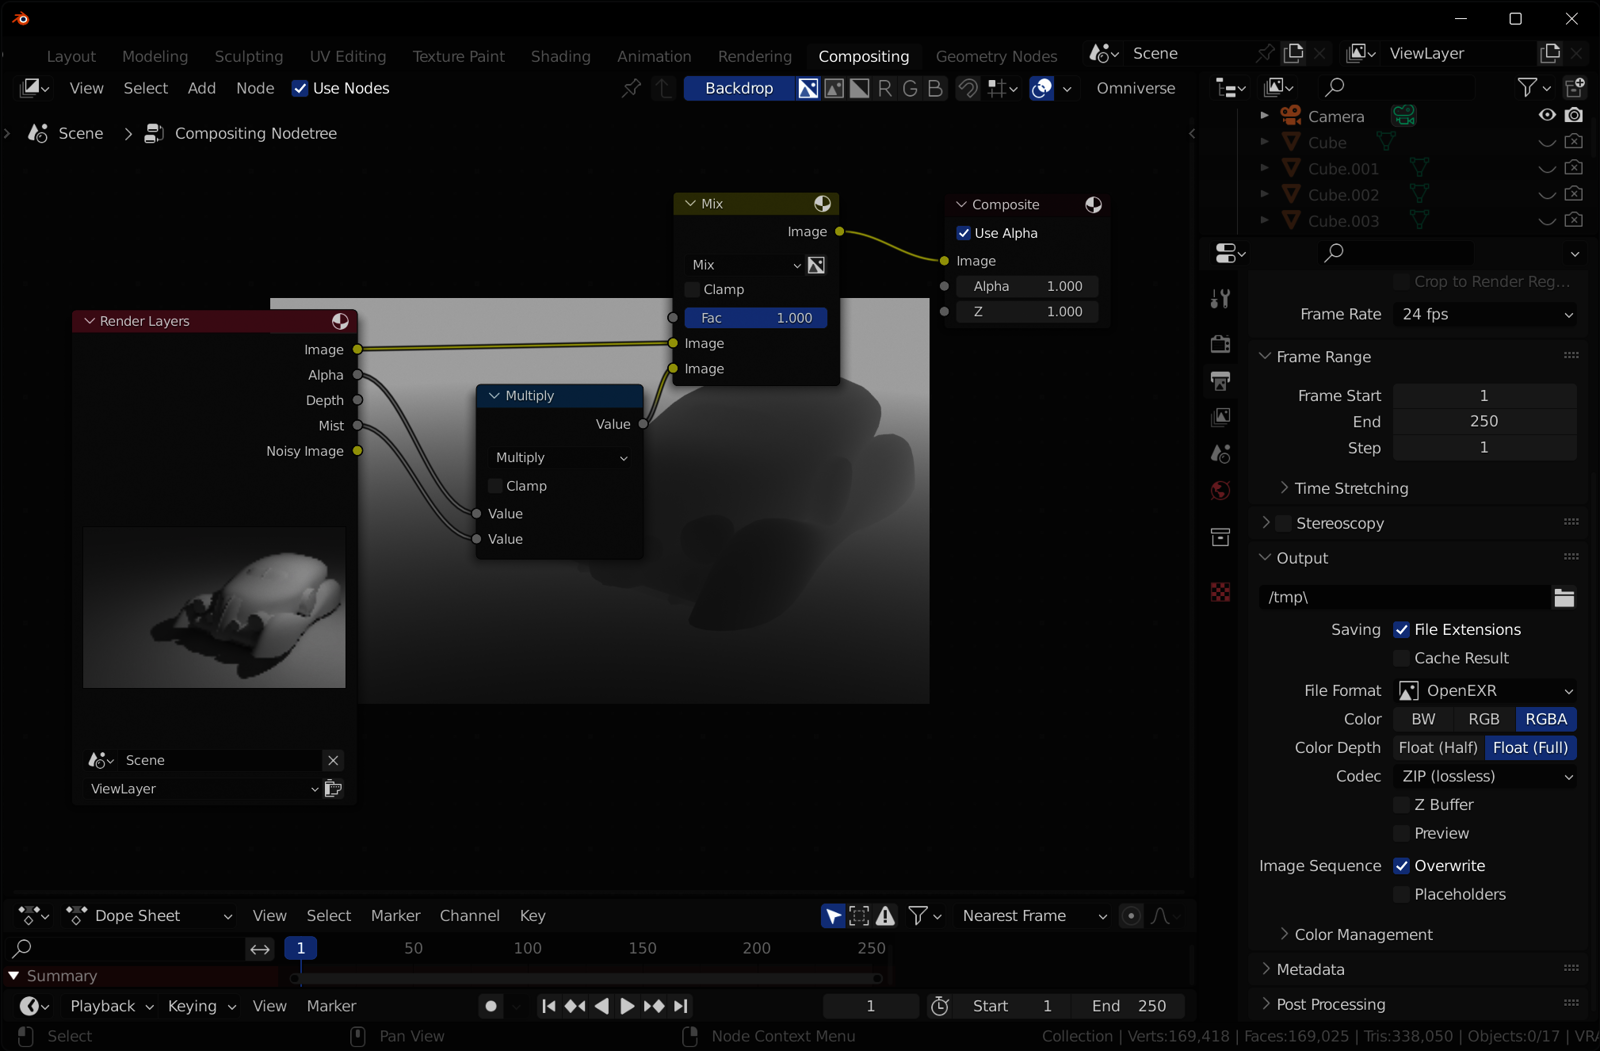
When editing in Krita and resaving as 16-bit PNG (File/Export/Export Advanced), do not forget to check Store alpha channel (transparency).
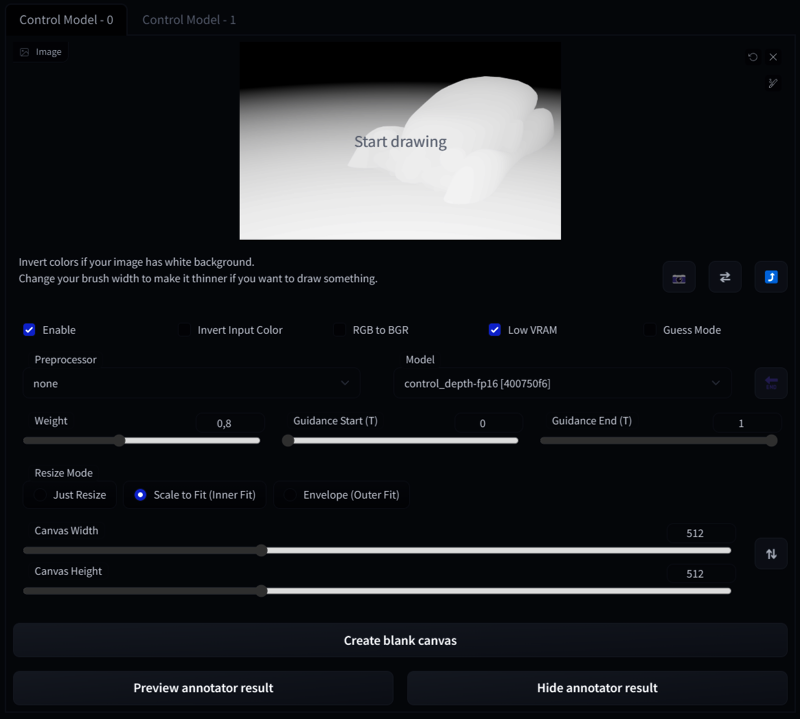
Step 3: Import to ControlNet
Import or drag and drop the depth map into the ControlNet tab and set it as on the image. Experiment with the Weight and Guidance depending on other components in the scene or ControlNet models enabled.

Working With Guidance
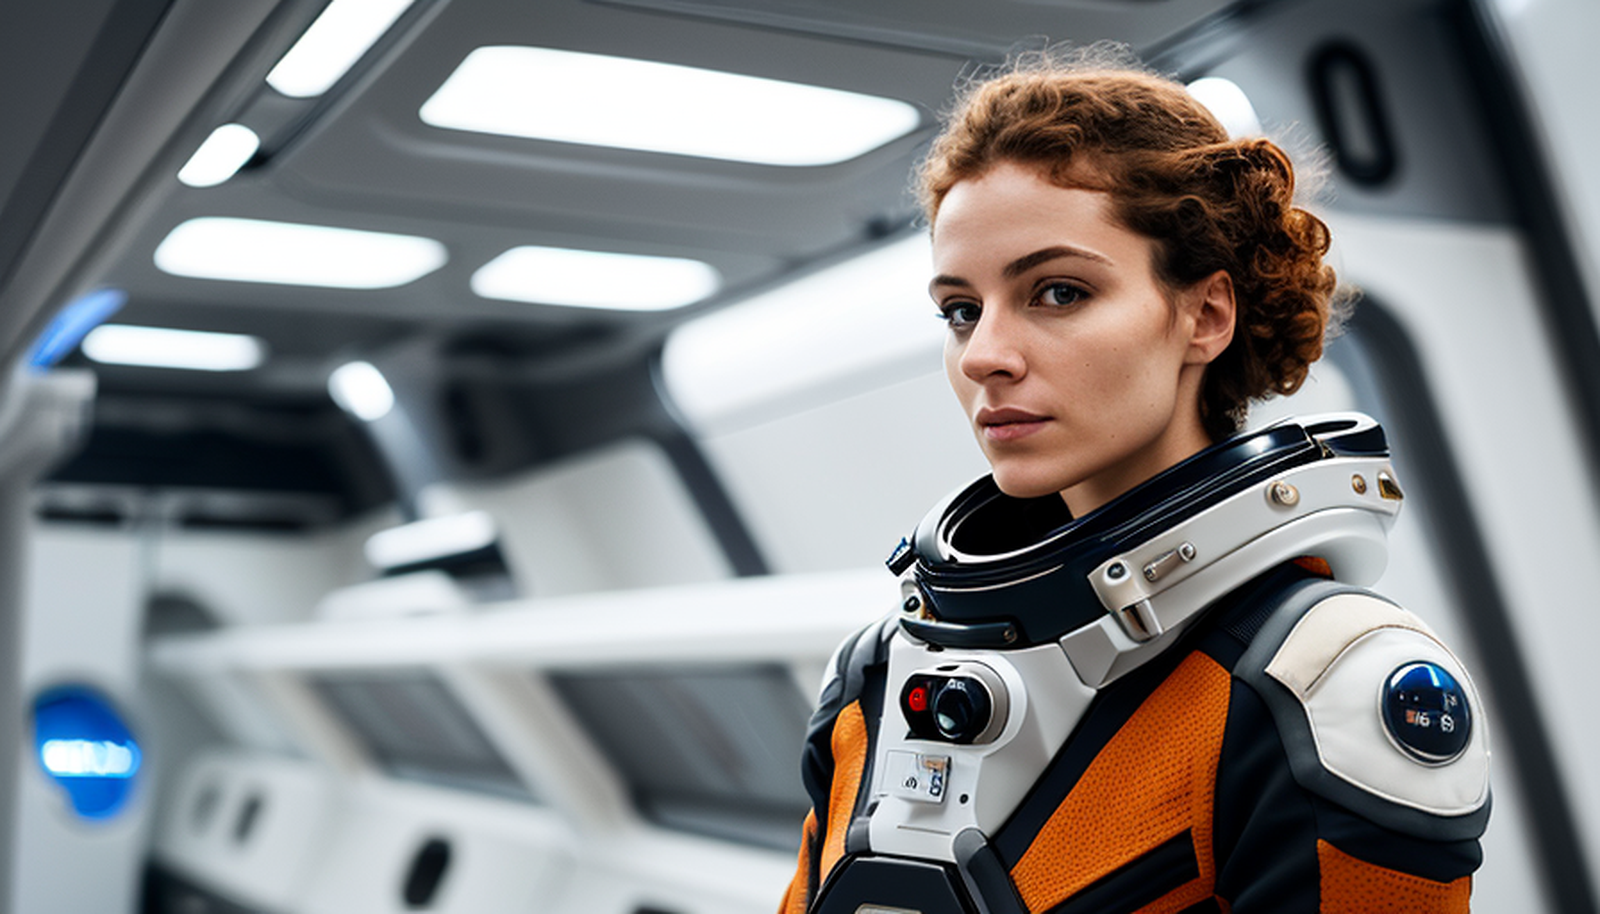
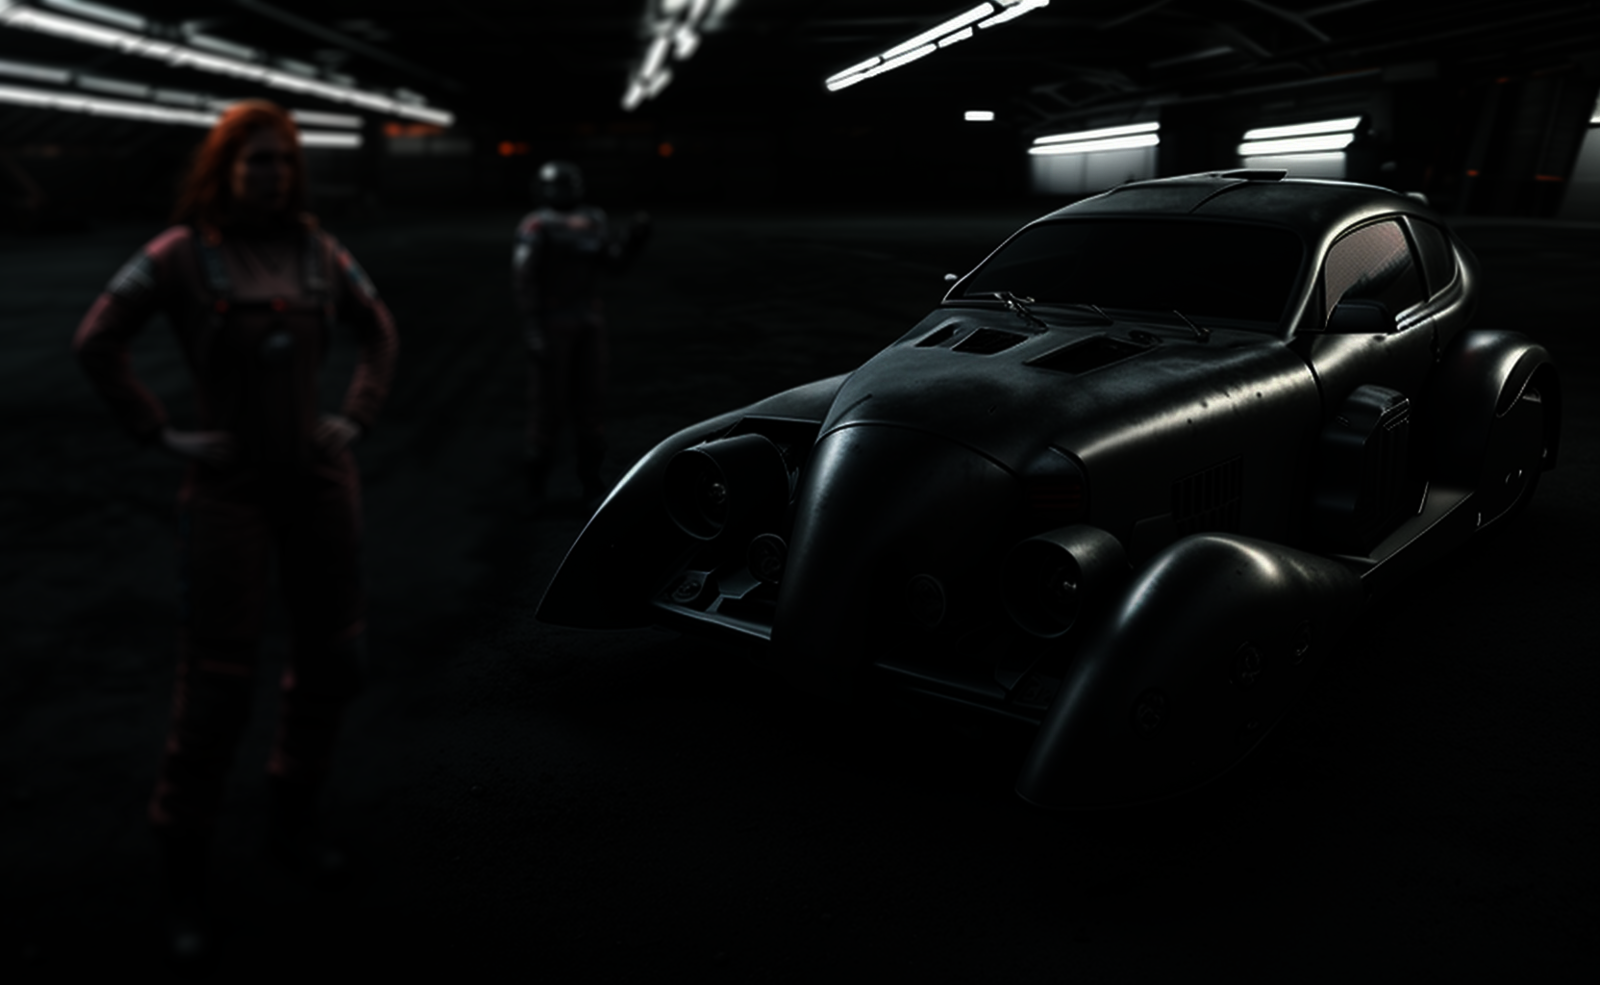
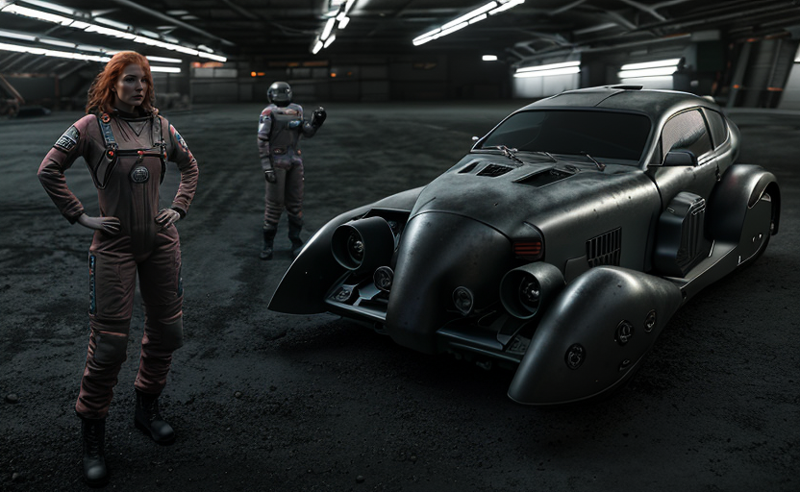
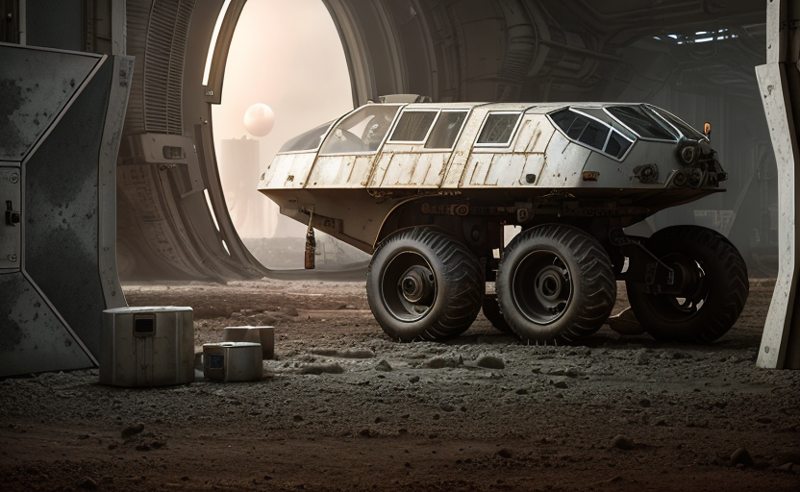
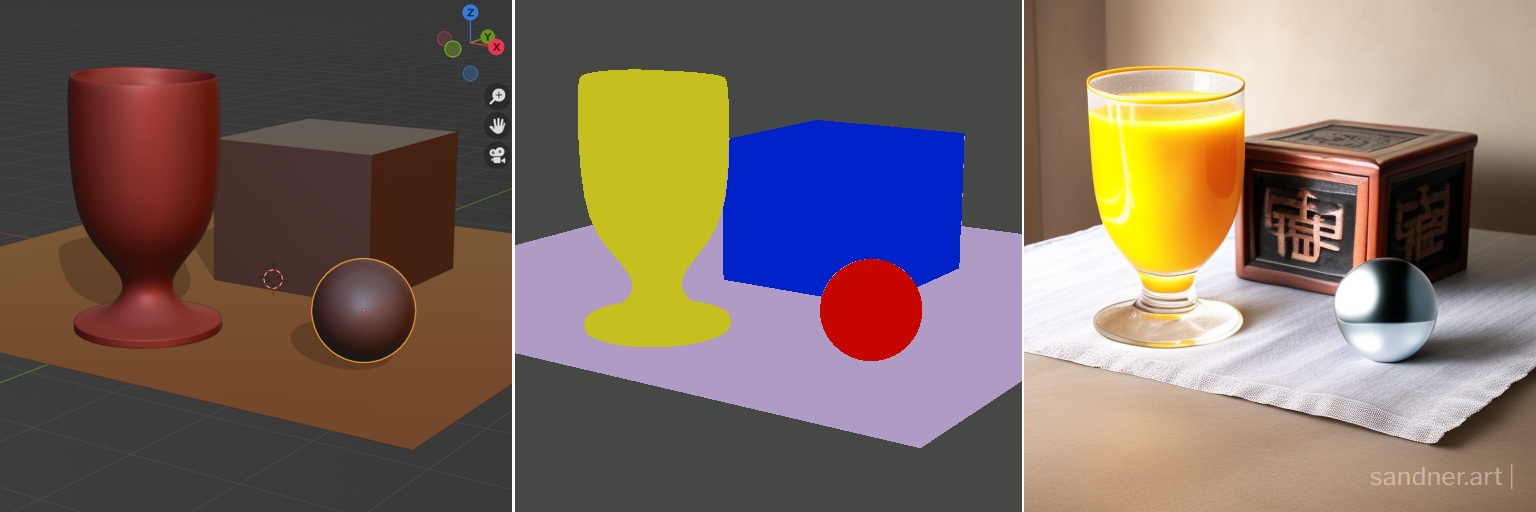
By adjusting ControlNet Guidance Start/End you control the time during the depth map (or another ControlNet model) is affecting the stable diffusion render. You can also experiment with Weight in combination with Guidance Start/End. By this technique (and a smart prompt), you can use a depth map of the model as a composition layout, with quite creative results:
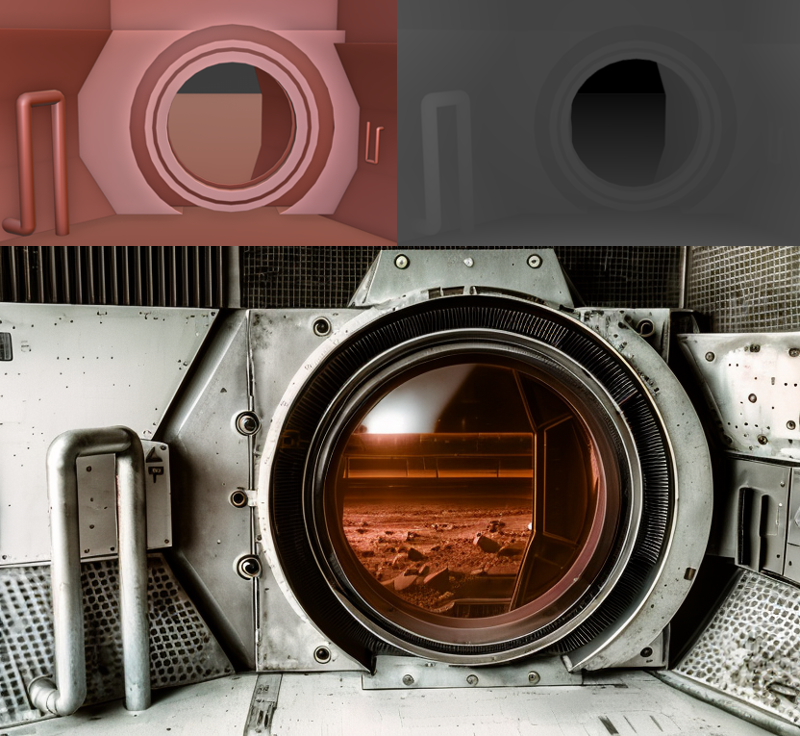
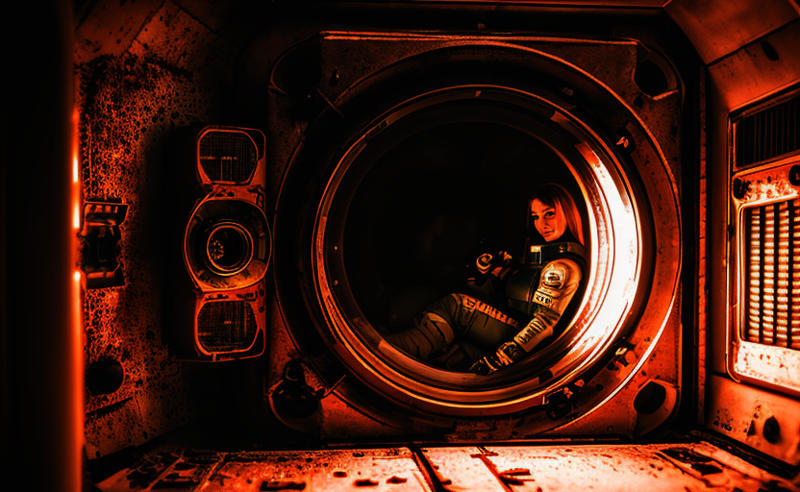
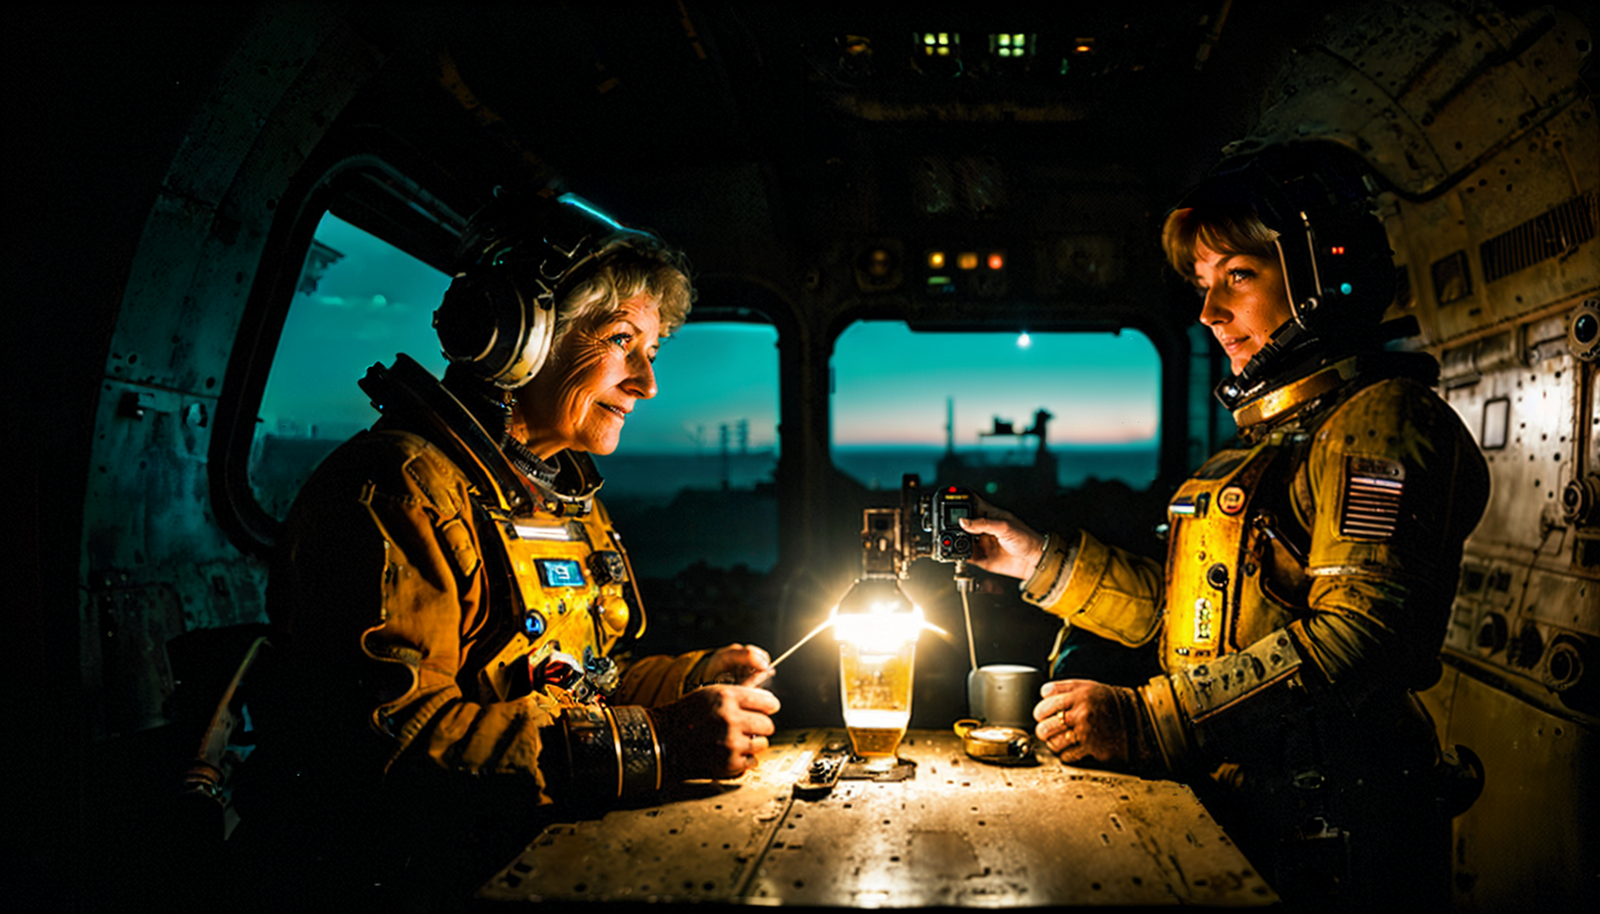
With clever use of a combination of blocking, ControlNet models, and prompting you can achieve remarkably different results based on the same depth map:


Learn more about setup and effective work with Z-buffer and depth maps in Blender, Krita, and Stable Diffusion in this article.
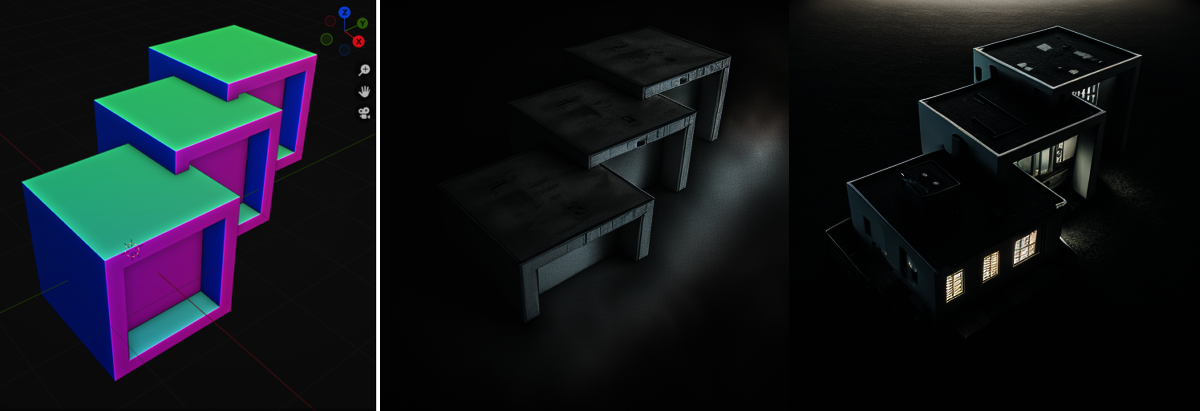
Blocking and Using Depth Library
This method is suitable to create complex environments by blocking simple shapes and forms. Always aim for the readability of your designs, it will help the processing of the image and final result. It is a good design habit too.
Depth Library extension helps with object depth library management. To install, in AUTOMATIC1111 UI use Extensions/Install from URL and insert https://github.com/jexom/sd-webui-depth-lib
You can create custom libraries created from 3D models. Copy depth maps into folder /extensions/sd-webui-depth-lib/maps (new folders create a new tab in Depth Map UI).
Rendering Selected Materials
Similar technique allows to render specific materials and details on objects. It is using segmentation model in ControlNet and Latent Couple manipulations masks to control the scene.
You may learn more about this process (using Blender, Gimp, and A1111 web UI) in the upcoming article.
Using Stable Diffusion in API
The future of this method is to use API connection to Stable Diffusion from Blender itself. Meanwhile, you may experiment with the script https://github.com/coolzilj/Blender-ControlNet.
Conclusion
Rendering 3D models in stable diffusion can be a highly rewarding experience for artists and designers going for visually stunning results and experimenting with variants of the scene details and mood. As with any artistic endeavor, control over the final output is crucial to achieving the desired outcome.
With the ControlNet method, it's possible to achieve greater control over the representation of the model or scene, leading to even more fascinating results. It can also fit in existing creative pipelines when rendering elements of a scene to achieve high level of realism and detail.