Realistic Synthetic Photos With Diffusion Models
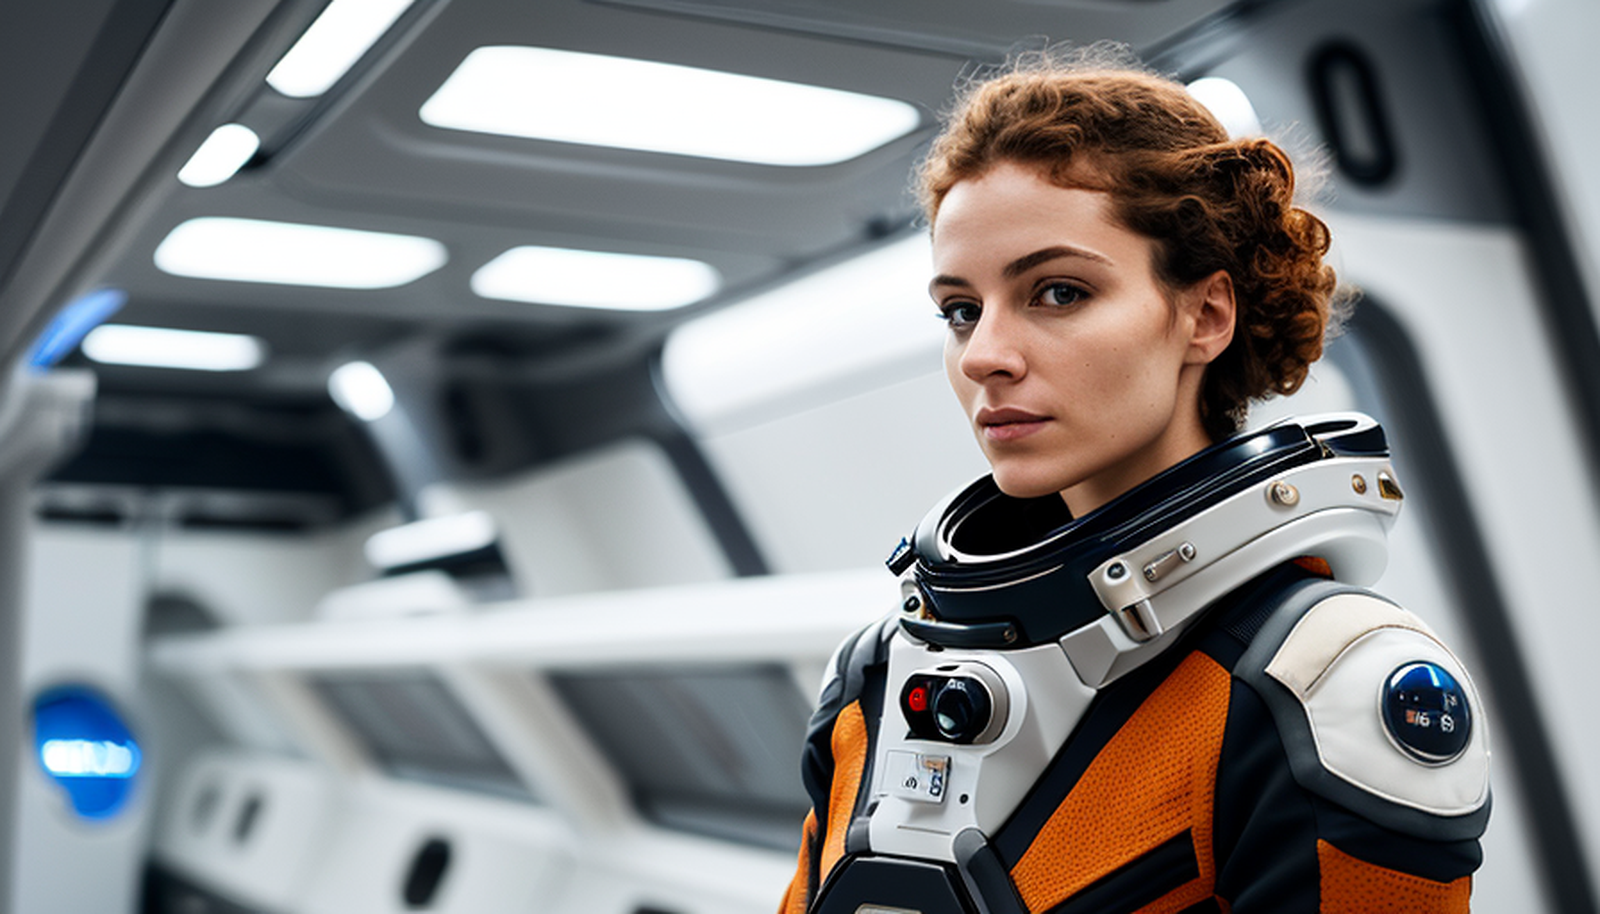
Diffusion models have shown significant progress in generating realistic synthetic photos that can pass as real images. These models are trained on large visual photographic datasets, which ensures that they learn the characteristics of real images such as texture and lighting. Additionally, the use of advanced techniques such as ControlNet, OpenPose, and Offset Diffusion (not to mention img2img or inpainting strategies) allows for better control over the composition of the images.
In this brief tutorial, I will show some options for synthetic photography using Stable Diffusion. You will need AUTOMATIC1111 installed, OpenPose Editor Extension, and ControlNet Extension (check my recent tutorial on Stable Diffusion and image output control via the links).
Diffusion Models for Photography
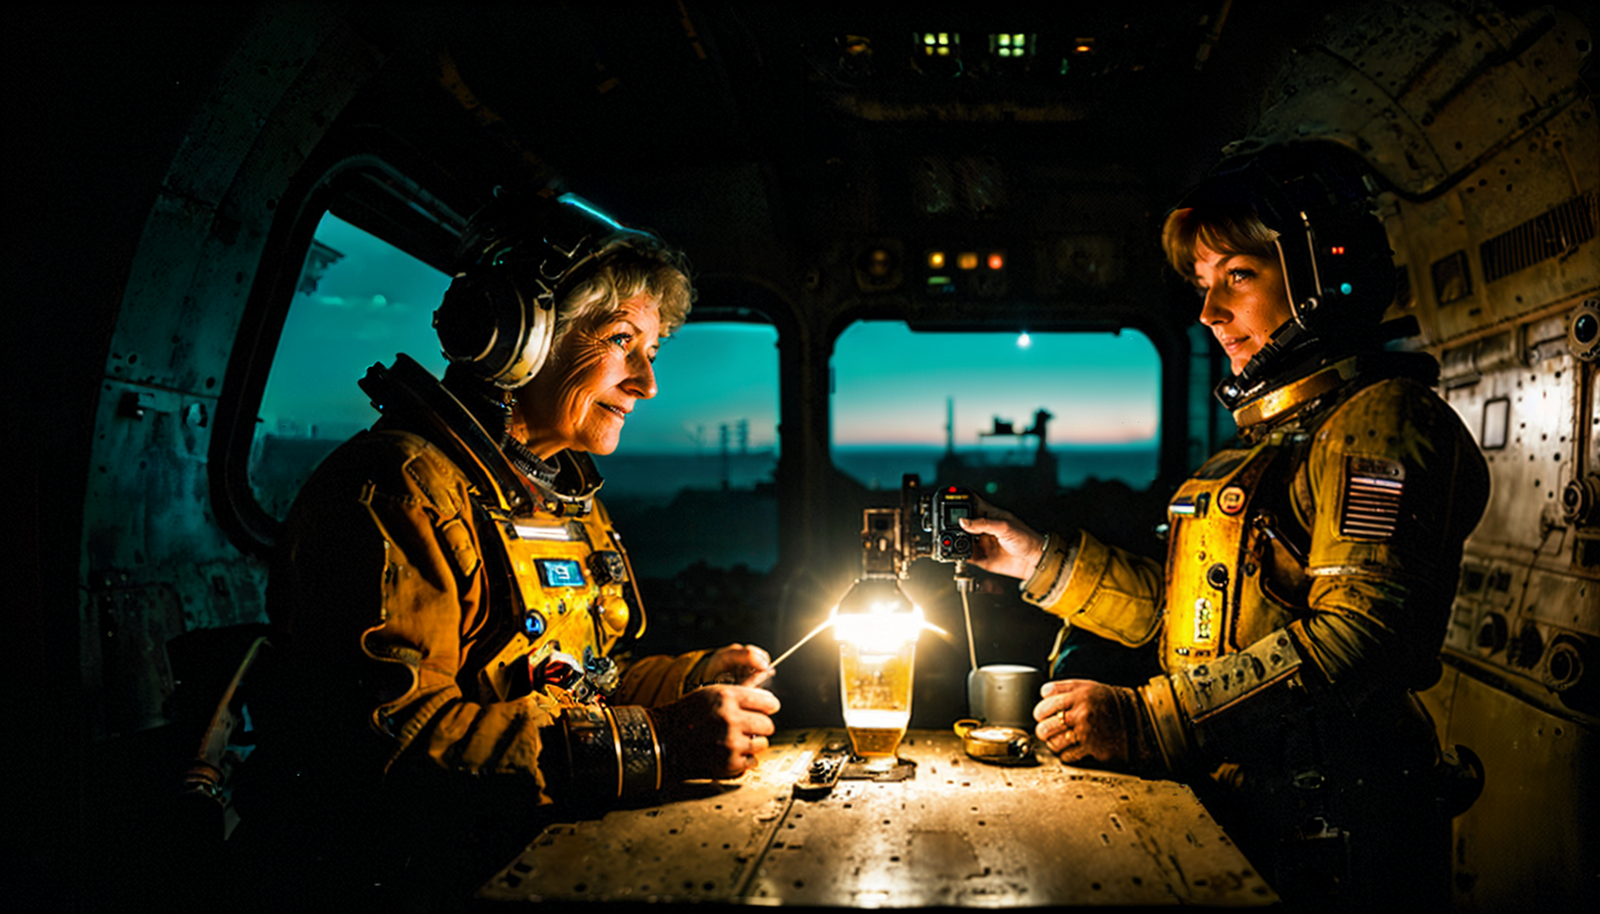
"Space Age", AI Digital Art Photography by Daniel Sandner, 2023
Here is a selection of test models I suggest to try for experiments with synthetic photography (always choose the .safetensors version of the model checkpoint):
- https://civitai.com/models/13020/avalon-truvision (base model SD 1.5)
- https://civitai.com/models/106055/photomatix read more about Photomatix
- https://civitai.com/models/4201/realistic-vision-v13-fantasyai (base model SD 1.5)
- https://civitai.com/models/4201/realistic-vision-v20 (base model SD 1.5)
- https://civitai.com/models/4823/deliberate (base model SD 1.5)
- https://civitai.com/models/6431/hardblend (base model SD 1.5)
- https://civitai.com/models/17277/realism-engine (base model SD 2.1)
Specific model https://civitai.com/models/11193/illuminati-diffusion-v11 (base model SD 2.1) needs to install three negative embeddings nfixer, nrealfixer, nartfixer—links to download are on the model card page (note: does not work with ControlNet yet). After the installation, you can call a negative embedding by writing its name in negative prompt:
Negative Embeddings
Negative Embeddings (Textual Inversion) are used to avoid a set of image's distinct features. Download pre-trained embeddings into
\stable-diffusion-webui/embeddings. Use them in the negative prompt as tokens by typing their file name or by inserting with Networks icon button in UI. Other negative embeddings for synthetic photography to download:
- https://civitai.com/models/15432?modelVersionId=24385 (for SD 1.5, versions for 2.1 choose from the tab on the top)
- https://civitai.com/models/4629/deep-negative-v1x
- More general negative embeddings here: https://huggingface.co/nolanaatama/embeddings/tree/main
Variational Autoencoders (VAE)
Models comes with a default VAE, but you can install specific or improved versions. These are using Mean Square Error (MSE) and Exponential Moving Average (EMA) metrics for slightly differing results:
- https://huggingface.co/stabilityai/sd-vae-ft-mse-original/tree/main (vae-ft-mse-840000-ema-pruned.safetensors)
- https://huggingface.co/stabilityai/sd-vae-ft-ema-original/tree/main (for experiments vae-ft-ema-560000-ema-pruned.safetensors)
INSTALLATION: Download and put into the stable-diffusion-webui/models/VAE folder. In UI, Settings/Stable Diffusion/SD VAE choose the VAE file, Apply settings and Reload UI.
Sampling Methods and Sizes
You may freely experiment with these, I suggest DPM++ 2M, DPM++ 2M Karras, or Euler for adequate realism. Some models have better results with a specific sampling method. You will get decent result even with sampling steps around 20.
Basic recommended sizes: 512x512, 512x704, 512x896 (specific recommended sizes may differ for a model, always check model card for info)
Control the Composition With Multi ControlNet
ControlNet allows several layers of additional controllers and adds many parameters to control the output, it is needed for advanced methods.
Posing With OpenPose
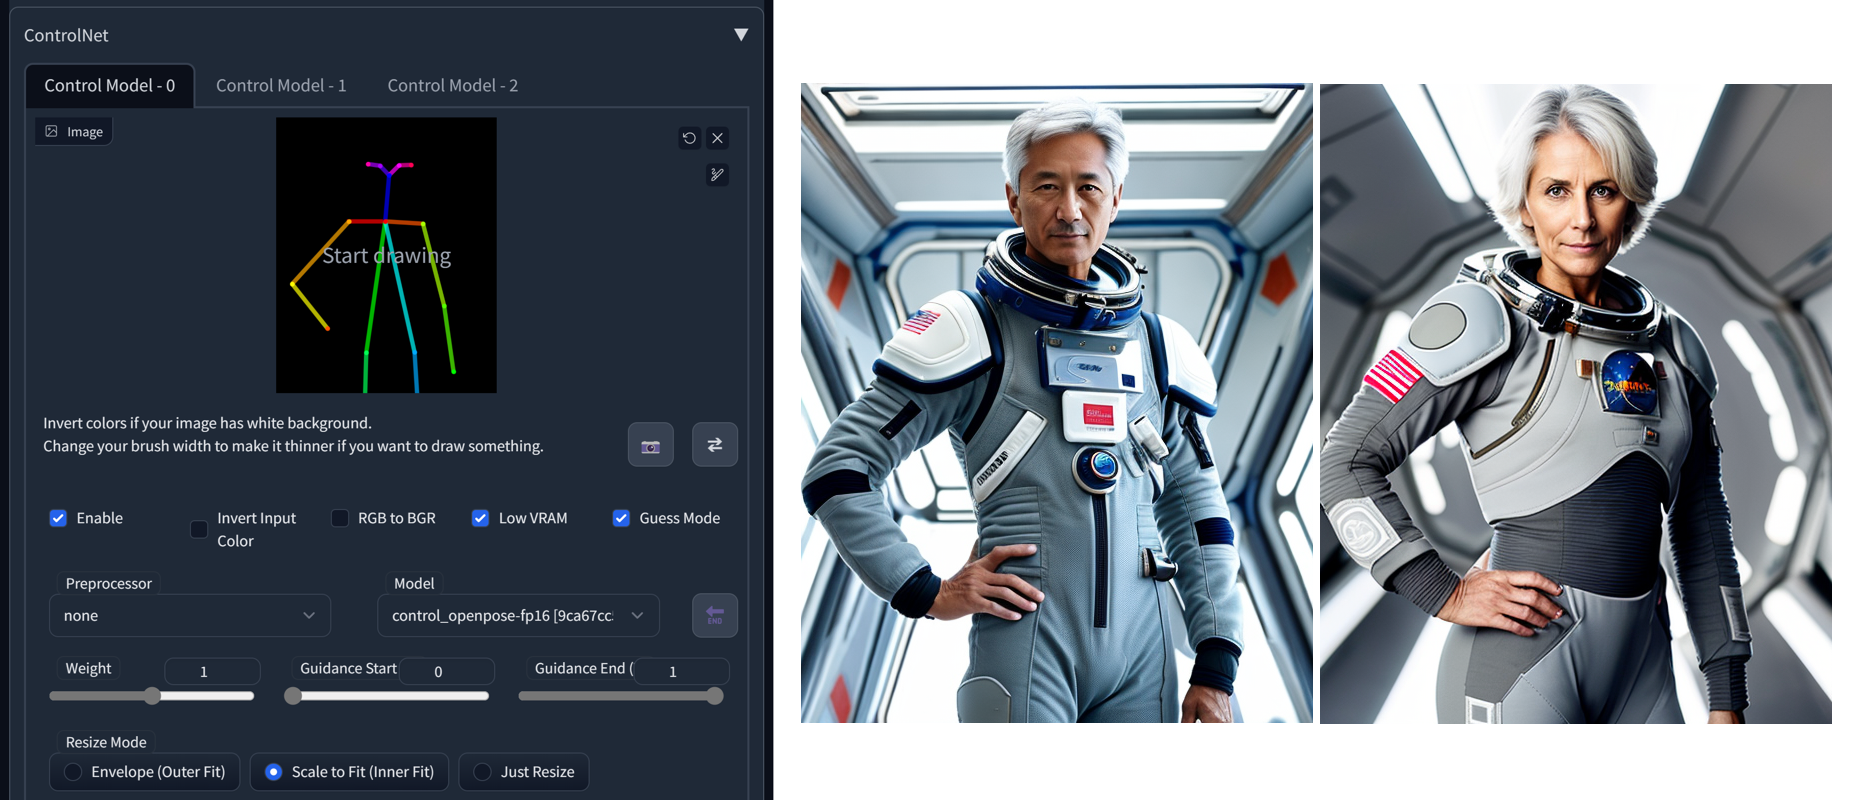
You may use OpenPose exported from Blender, or create it in OpenPose Editor Extension (you can also use the function Detect from image to infer the pose from a photo)

Inpainting
In inpainting, stable diffusion can be used to fill in missing or damaged parts of images, or parts we want to change. For previous example, we can change the astronauts in the picture. We will use Send to inpaint button, mask the head of the astronaut and change the prompt slightly. Also, because we want more changes to happen,we will change Denoising strength for Inpaint to 0.85 (keep the sampling method and steps the same). We will check Inpaint area/Only masked.
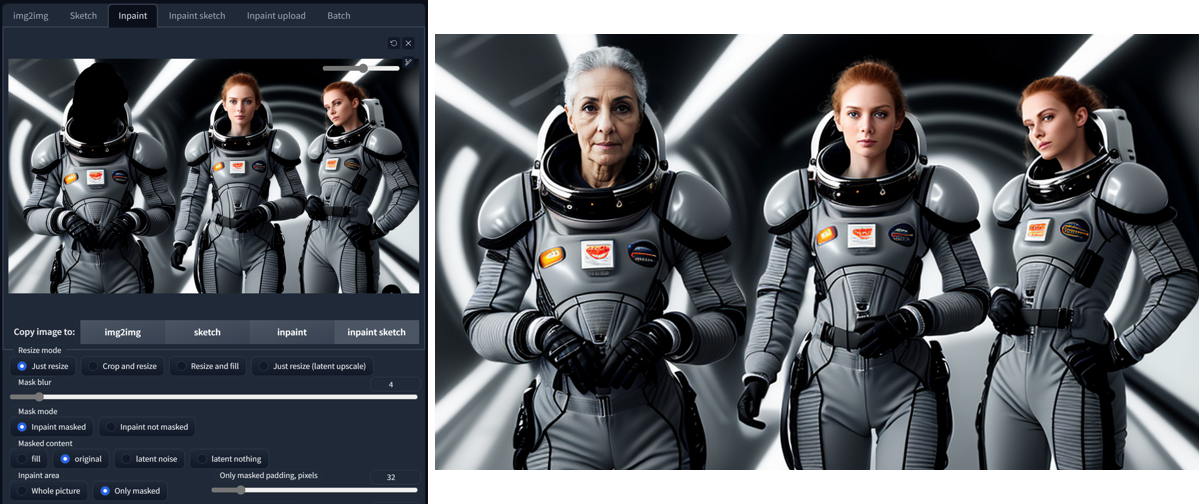
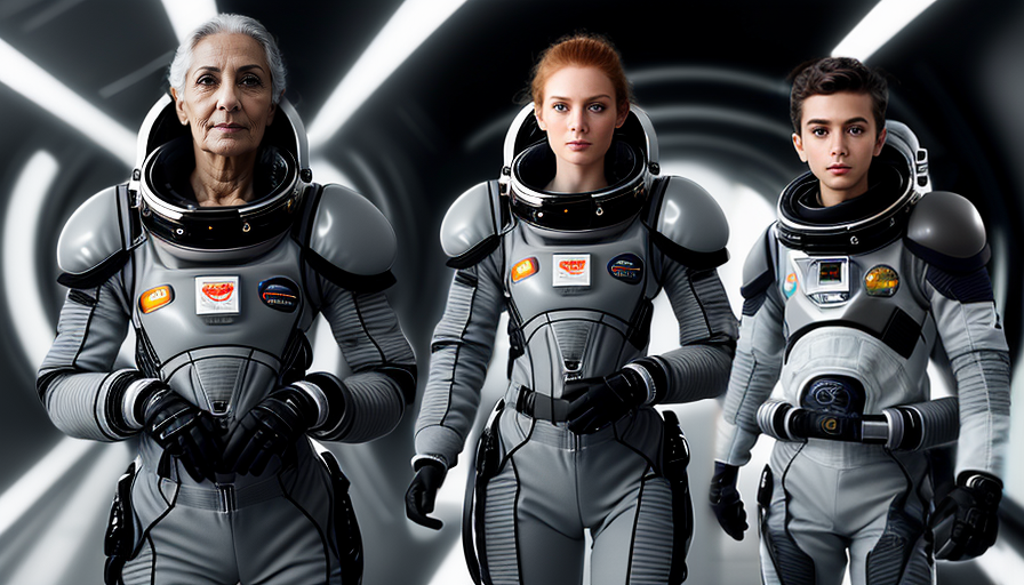
An alternative advanced method for posing multiple characters in the scene is the Latent Couple extension.
Latent Couple Composable LoRA Technique
Creating organic compositions with characters in Stable Diffusion used to pose a complicated problem. We can try another strategy than inpainting and retouch now.
Install Latent Couple in Extensions/Available/Load From. Choose it from the list and Install. Do the same with Composable LoRA (you will need it for Latent Couple to work as expected). Restart UI.
Use AND to divide the prompt with overall scene with characters description and separate characters description:
Alice and Bob in environment AND character Alice AND character Bob
Latent Couple divides image into section and apply the prompt depending on set Weights for Region. If the character descriptions are structurally similar, it seems to help the result.
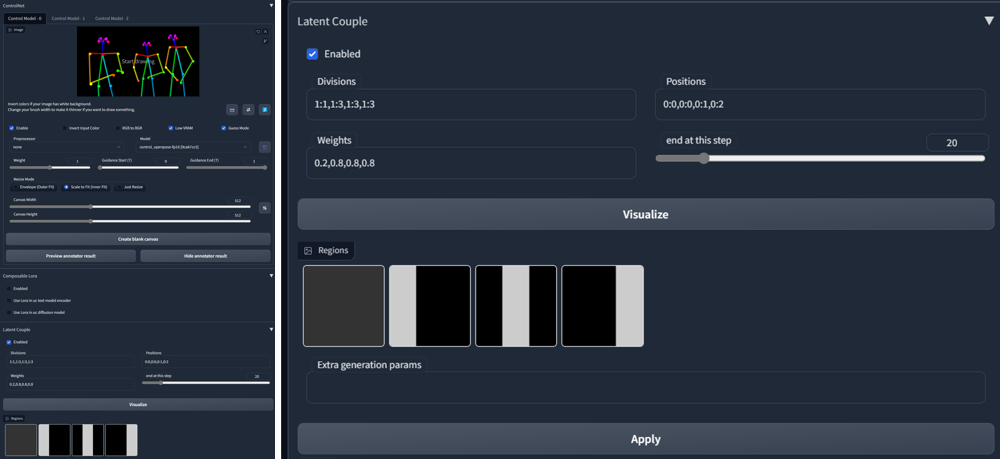
The full potential is revealed in connection with OpenPose and ControlNet. It takes its time, but the result is often almost seamless.

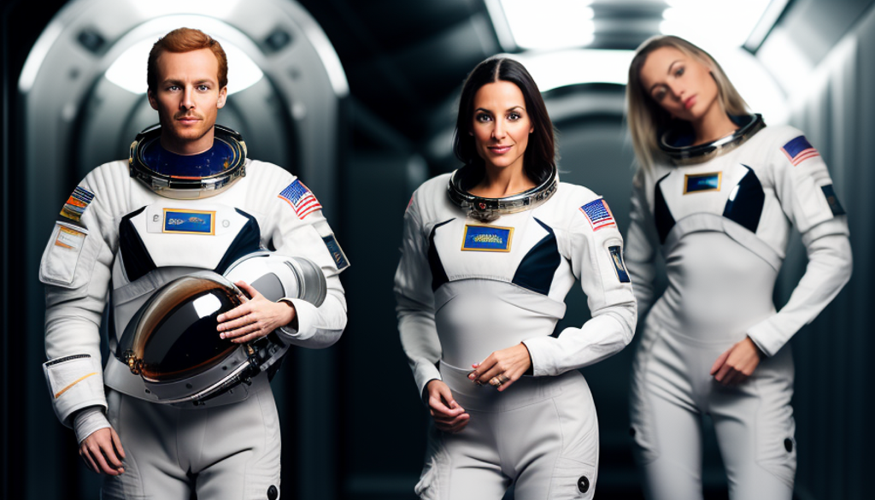
Latent Couple Manipulations and Regional Prompter
Latent Couple Manipulations is an expanded Latent Couple extension, allowing painted color mask which define a prompt region. You may read more about these techniques in an article on composition with Latent Couple Manipulations and Regional Prompter.
Noise Offset With LoRA
LoRA (Low-Rank Adaptation of Large Language Models) extends standard models. It is a fine-tuned diffusion model. You may think of it as an additional option to adjust the style or feeling of the image.
Try this LoRA model for noise offset function, usable for dark photos, or the second one for better contrast.
- https://civitai.com/models/13941/epinoiseoffset
- https://civitai.com/models/8765/theovercomer8s-contrast-fix-sd15sd21-768 (both SD 1.5 and 2.1 versions)
- https://civitai.com/models/15879/loconlora-offset-noise
Download the files to models/Lora folder. Choose additional networks (1) and choose Lora (2) from the tab. Refresh (3) the list if needed. Choose the LoRA file and it will insert the code into the prompt. Use keywords like: dark, rim lighting, lowkey, dimly lit etc. to test these specific models.
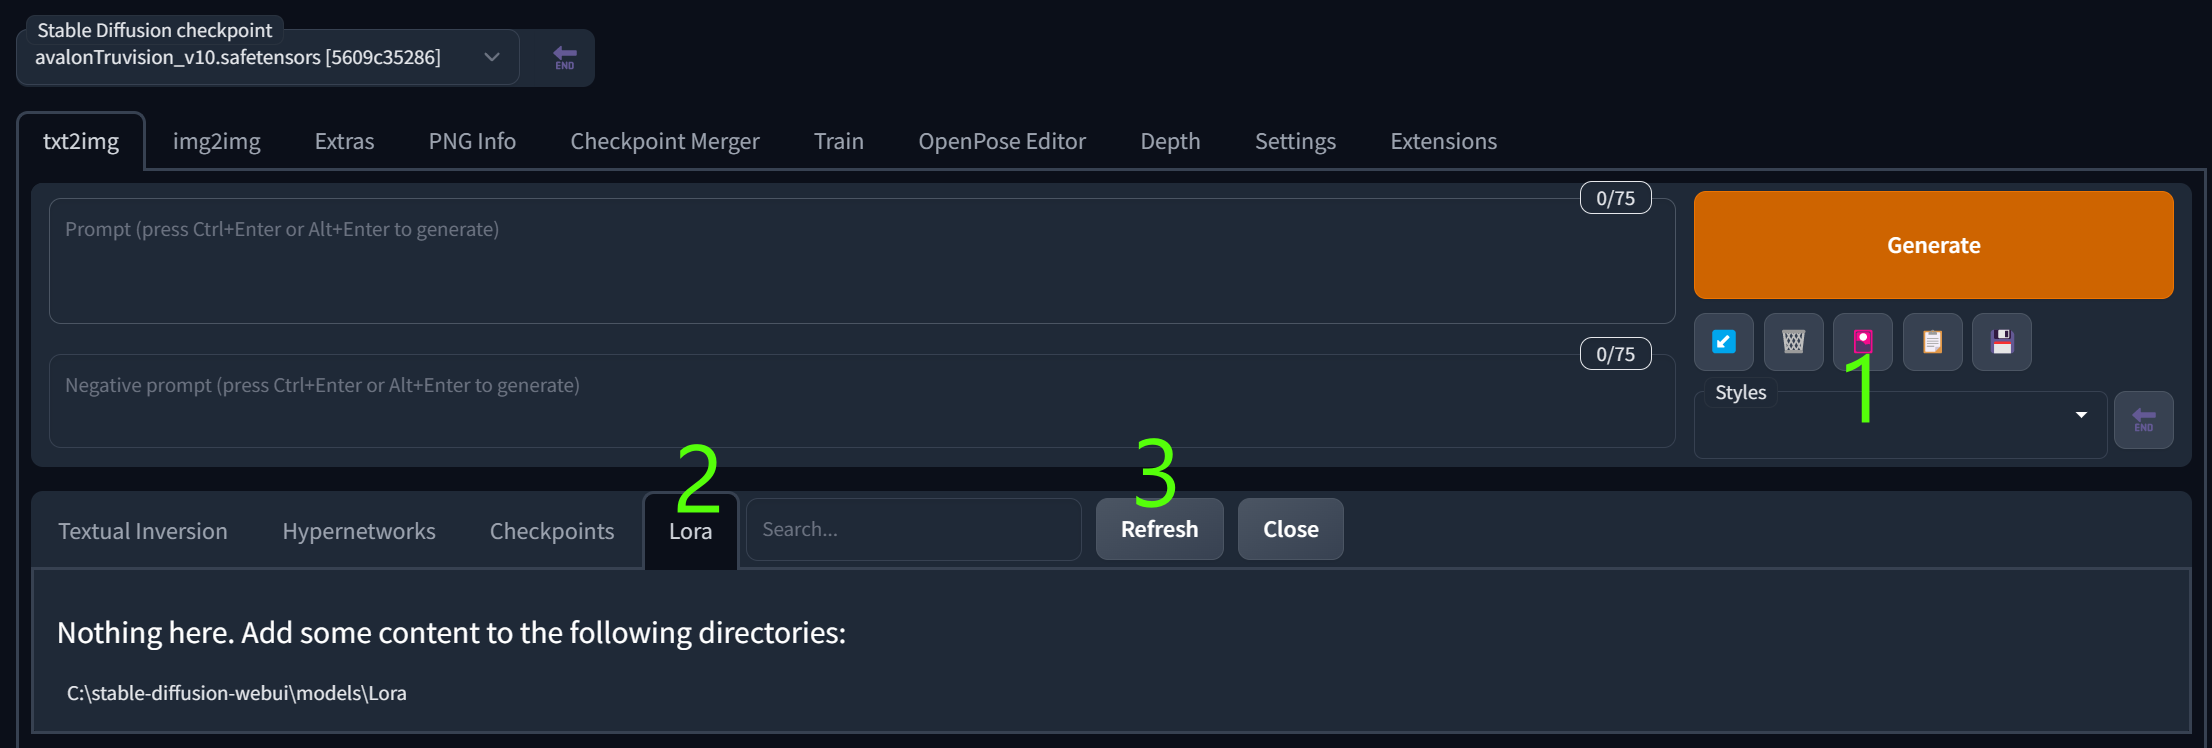
You may control the effect by changing inserted Lora fraction number in a prompt, f.i. <lora:LORANAME:1>, <lora:LORANAME:0.5> etc. Depending on a pre-trained model the effect can affect the tone and/or composition.
You may use several Loras in your prompt to achieve various effects on composition and image content. Generally start with <lora:LORANAME:0.7> to experiment with the effects.
Stylistic Choices with Clip Skip
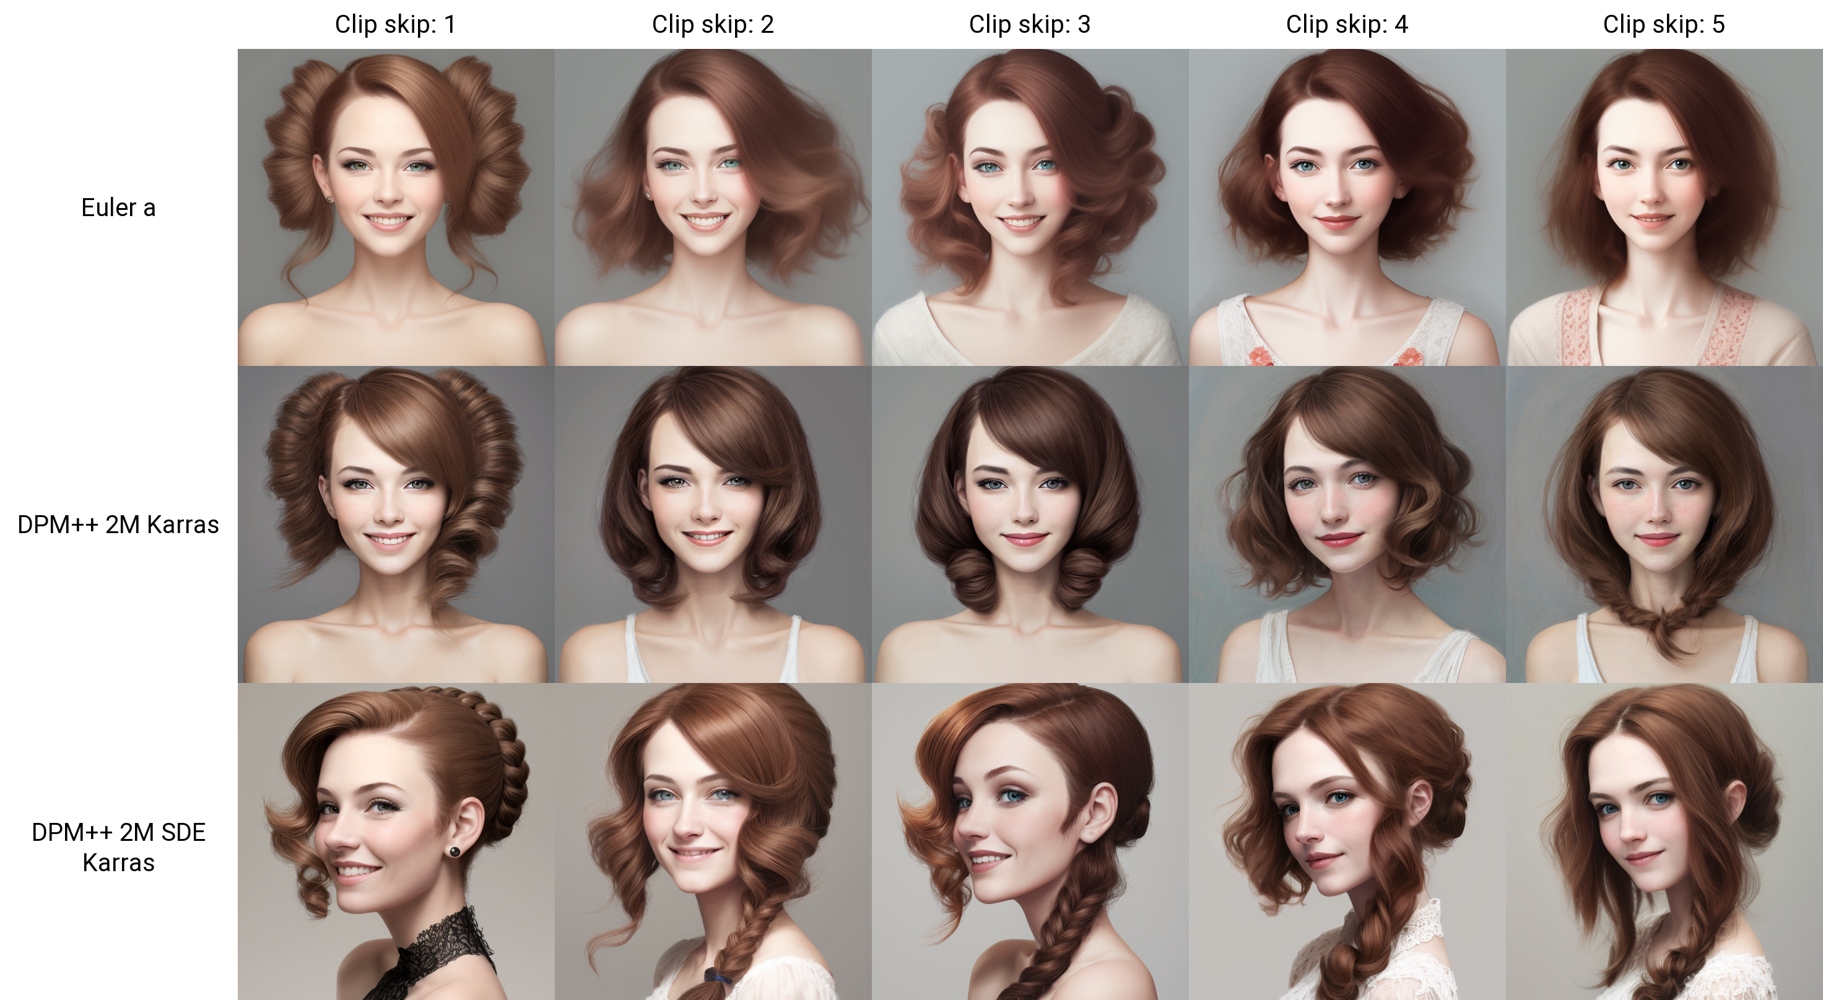
Clip skip practically controls, how accurate you want the text model to be (or how the output image conforms to your prompt). You can add the control into GUI in Settings/User interface/Quicksettings list, by adding CLIP_stop_at_last_layers.
Sampling Steps and CFG Scale
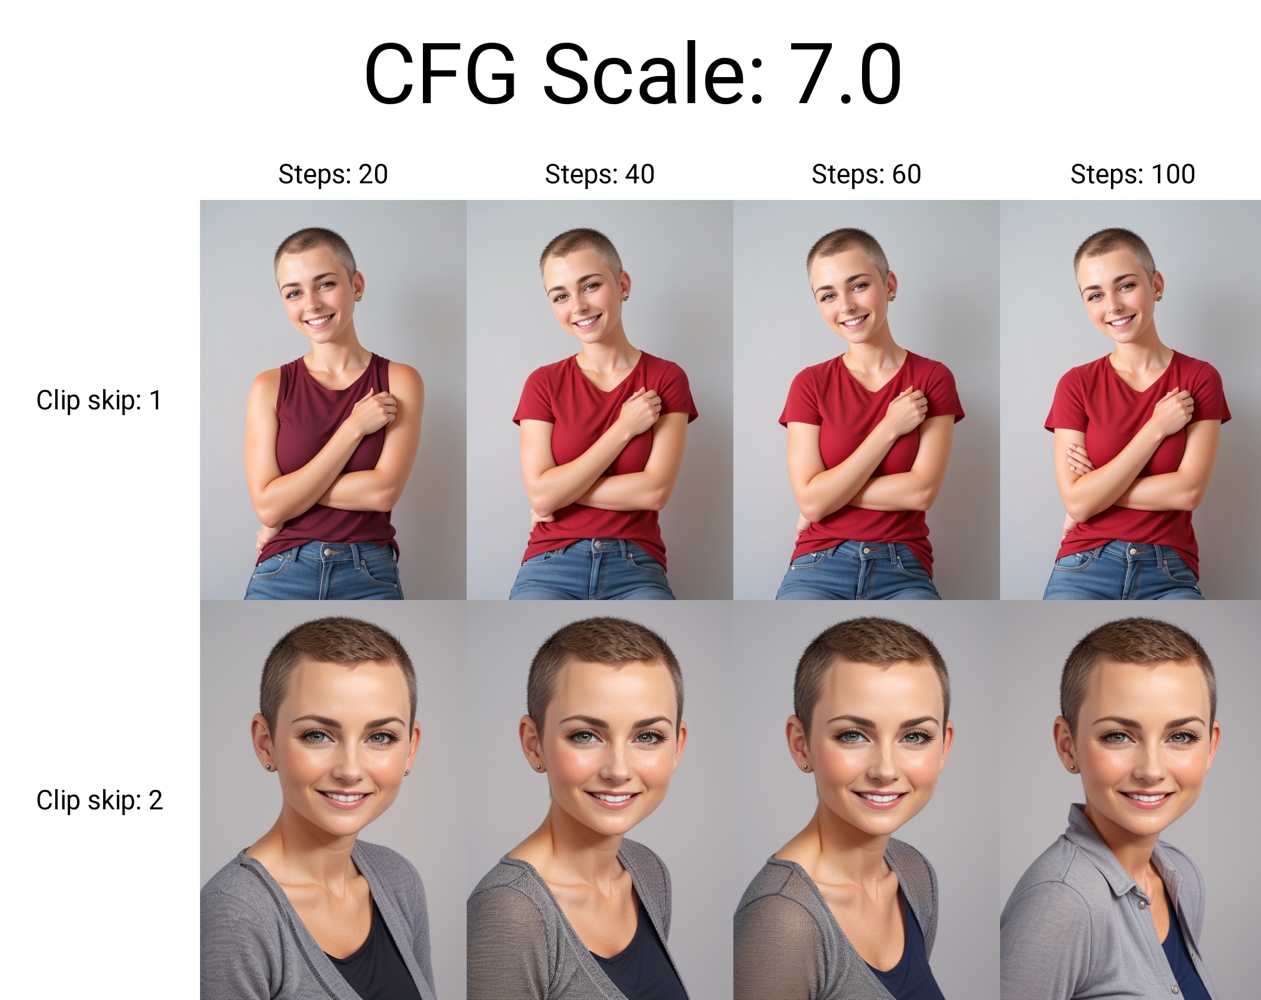
Usually steps around 20-30 are the best choice for the recommended samplers (Euler a, DPM++ 2M Karras). You may experiment with different settings depending on the model and Lora used since the image composition can differ slightly.
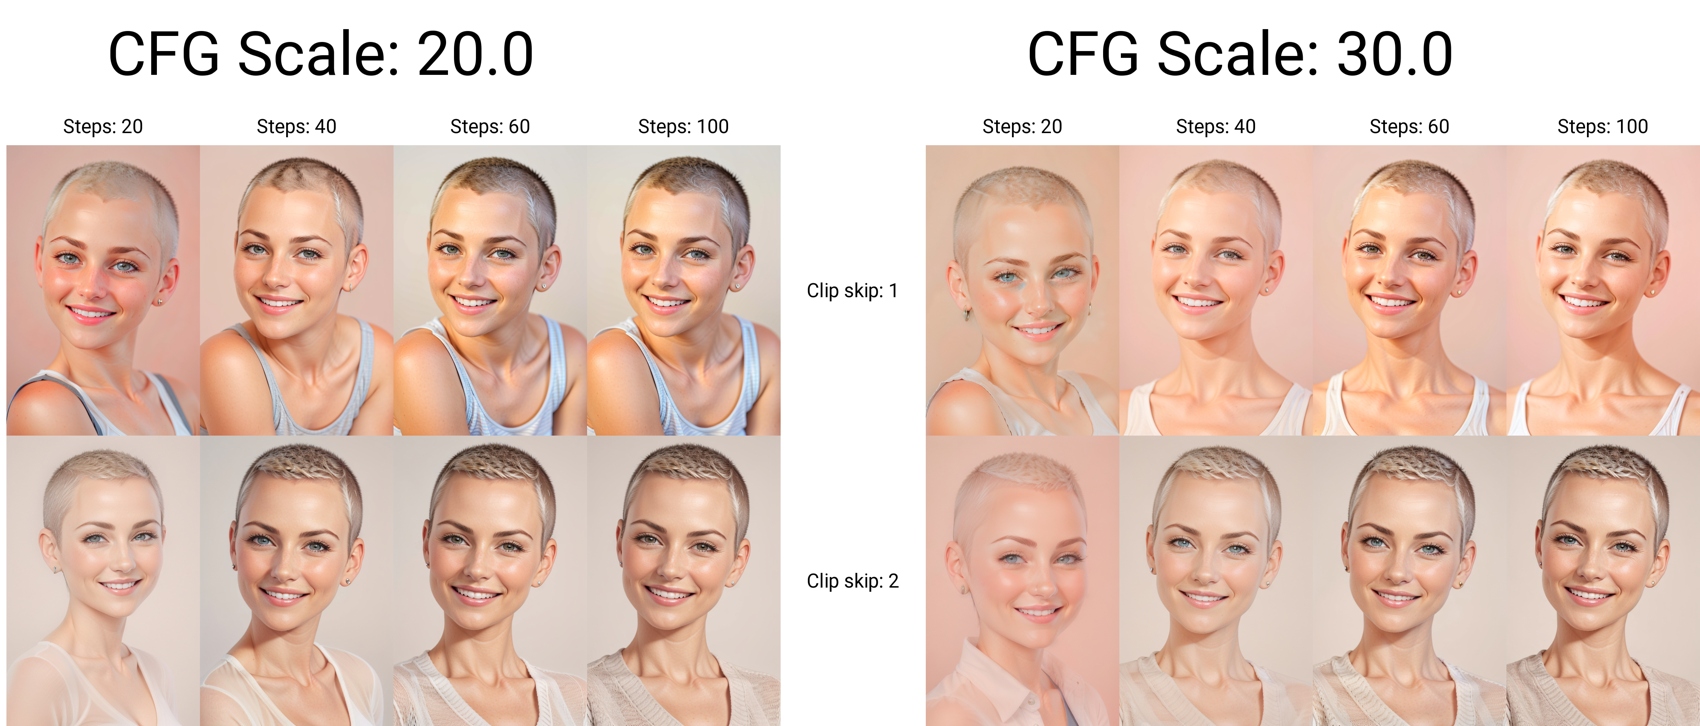
CFG scale 6-11 is generally recommended, however you may use Dynamic Thresholding (CFG Scale Fix) extension to experiment with high CFG scale without overbaking:
Upscale the Details
If you have enough VRAM, you can perform inpainting on upscaled image for better details. Send image to Extras and upscale with basic Lanczos upscaler. Send to inpaint and continue as described in section Inpainting, using the same or modified prompt. There are many strategies to upscale the whole image or just some selected parts. There is an article on upscaling the whole image in Stable Diffusion which you can check for more info.
Conclusion
There are some typical issues with the use of diffusion models in generating realistic synthetic photos, like artifacts or distortions in the images, which can result in unrealistic or inaccurate output. The models may also struggle with certain types of images, such as those with highly complex, abstract, or specific compositions.
Despite these challenges, the use of diffusion models in generating realistic synthetic photos represents a significant breakthrough in the field of generative artificial intelligence and computer vision. Even in the current state of technology, with creativity and with using the right tools, we can control the output to create highly realistic and visually stunning synthetic images.


