Ultimate Guide to SD 1.5 Photorealism
Although SDXL 1.0 has many benefits, I think SD 1.5 models will run side by side for some time. I have prepared this article to summarize my experiments and findings and show some tips and tricks for (not only) photorealism work with SD 1.5. I will use the Photomatix model and AUTOMATIC1111 GUI, but the principles will be the same for most SD 1.5-based models.
In this article, I suppose you have A1111 installed and you have basic knowledge on how to work with models and extensions.
- What We Are Trying To Achieve
- Basic Scene Setup for Photorealism
- Negative Prompts and Negative Embeddings
- Scene Description and Prompt Engineering
- Efficient Large Language Model Adapter (ELLA)
- ADetailer
- ControlNet
- Regional Prompter
- Latent Couple Manipulations
- TiledDiffusion (Multi Diffusion) with Tiled VAE Manipulations + Region Prompt Control
- Semantic Guidance
- Roop and ReActor
- Color Manipulations With CD Tuner and VectorscopeCC
- Inpainting
- Workflows
- Noise Tricks in Latent Space and Variations
- Adding Details with Hires fix
- LoRAs
- Prompt Engineering Experiments and Wildcards
- Conclusion
What We Are Trying To Achieve
The methods and techniques described here are valuable for creating synthetic glamour photos, illustrations, and concept art. Our goal is to achieve a passable level of anatomical correctness, while also focusing on effective composition, lighting, and mood to enhance the visual appeal. Additionally, we will explore ways of creating and managing visual noise to further elevate the artistic quality of the final results.
Basic Scene Setup for Photorealism
You may use photographic terms or descriptions of visual features. The most photorealistic models should react to general or specific tokens like:
- matte beige sphere, dramatic lighting, camera f1.6 lens ,rich colors ,hyper realistic ,lifelike texture
- matte beige sphere, (hard sharp spotlight light:1.4), camera f1.6 lens ,rich colors ,hyper realistic ,lifelike texture
- matte beige sphere, (three point studio light:1.4), camera f1.6 lens ,rich colors ,hyper realistic ,lifelike texture
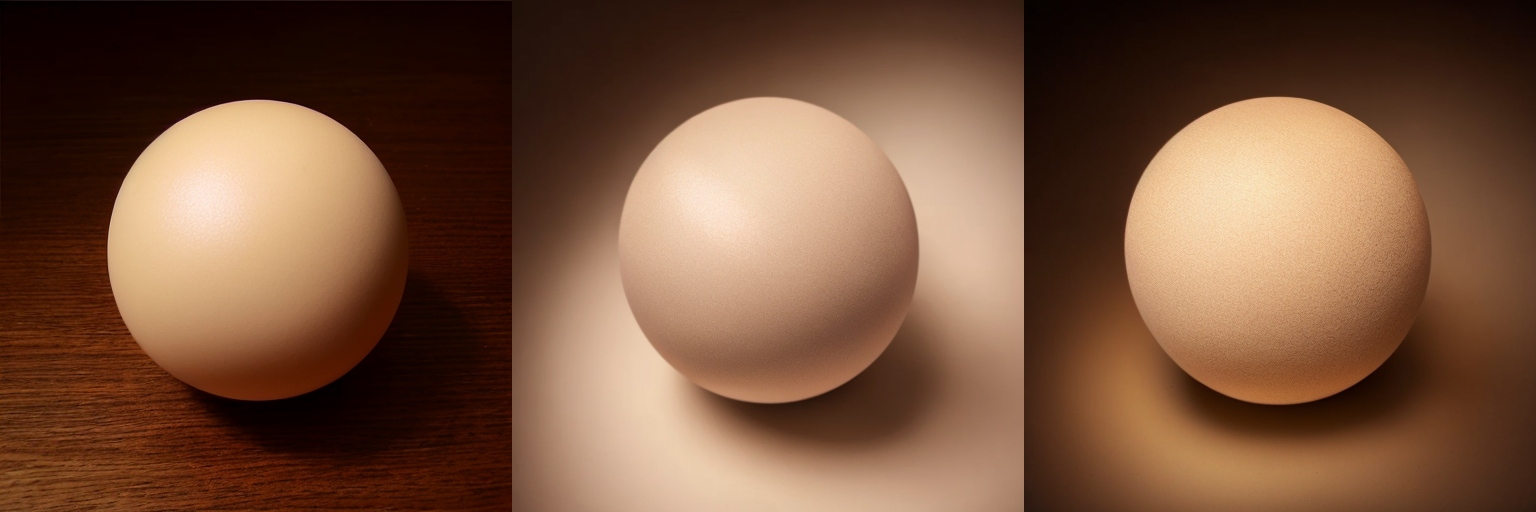
In portraits, studio settings (rimlight, dramatic, scenic light) and tokens describing the picture and mood are more effective (unless you have a model specially trained for studio lights)
Sampling methods DPM++SDE and DPM++2M SDE Karras are good starting point for synthetic photography
You need to experiment with how vague or exact you need to be in your prompt. Experiment with camera brands and settings, and create styles for various scenes. The output depends on the model quality.
Negative Prompts and Negative Embeddings
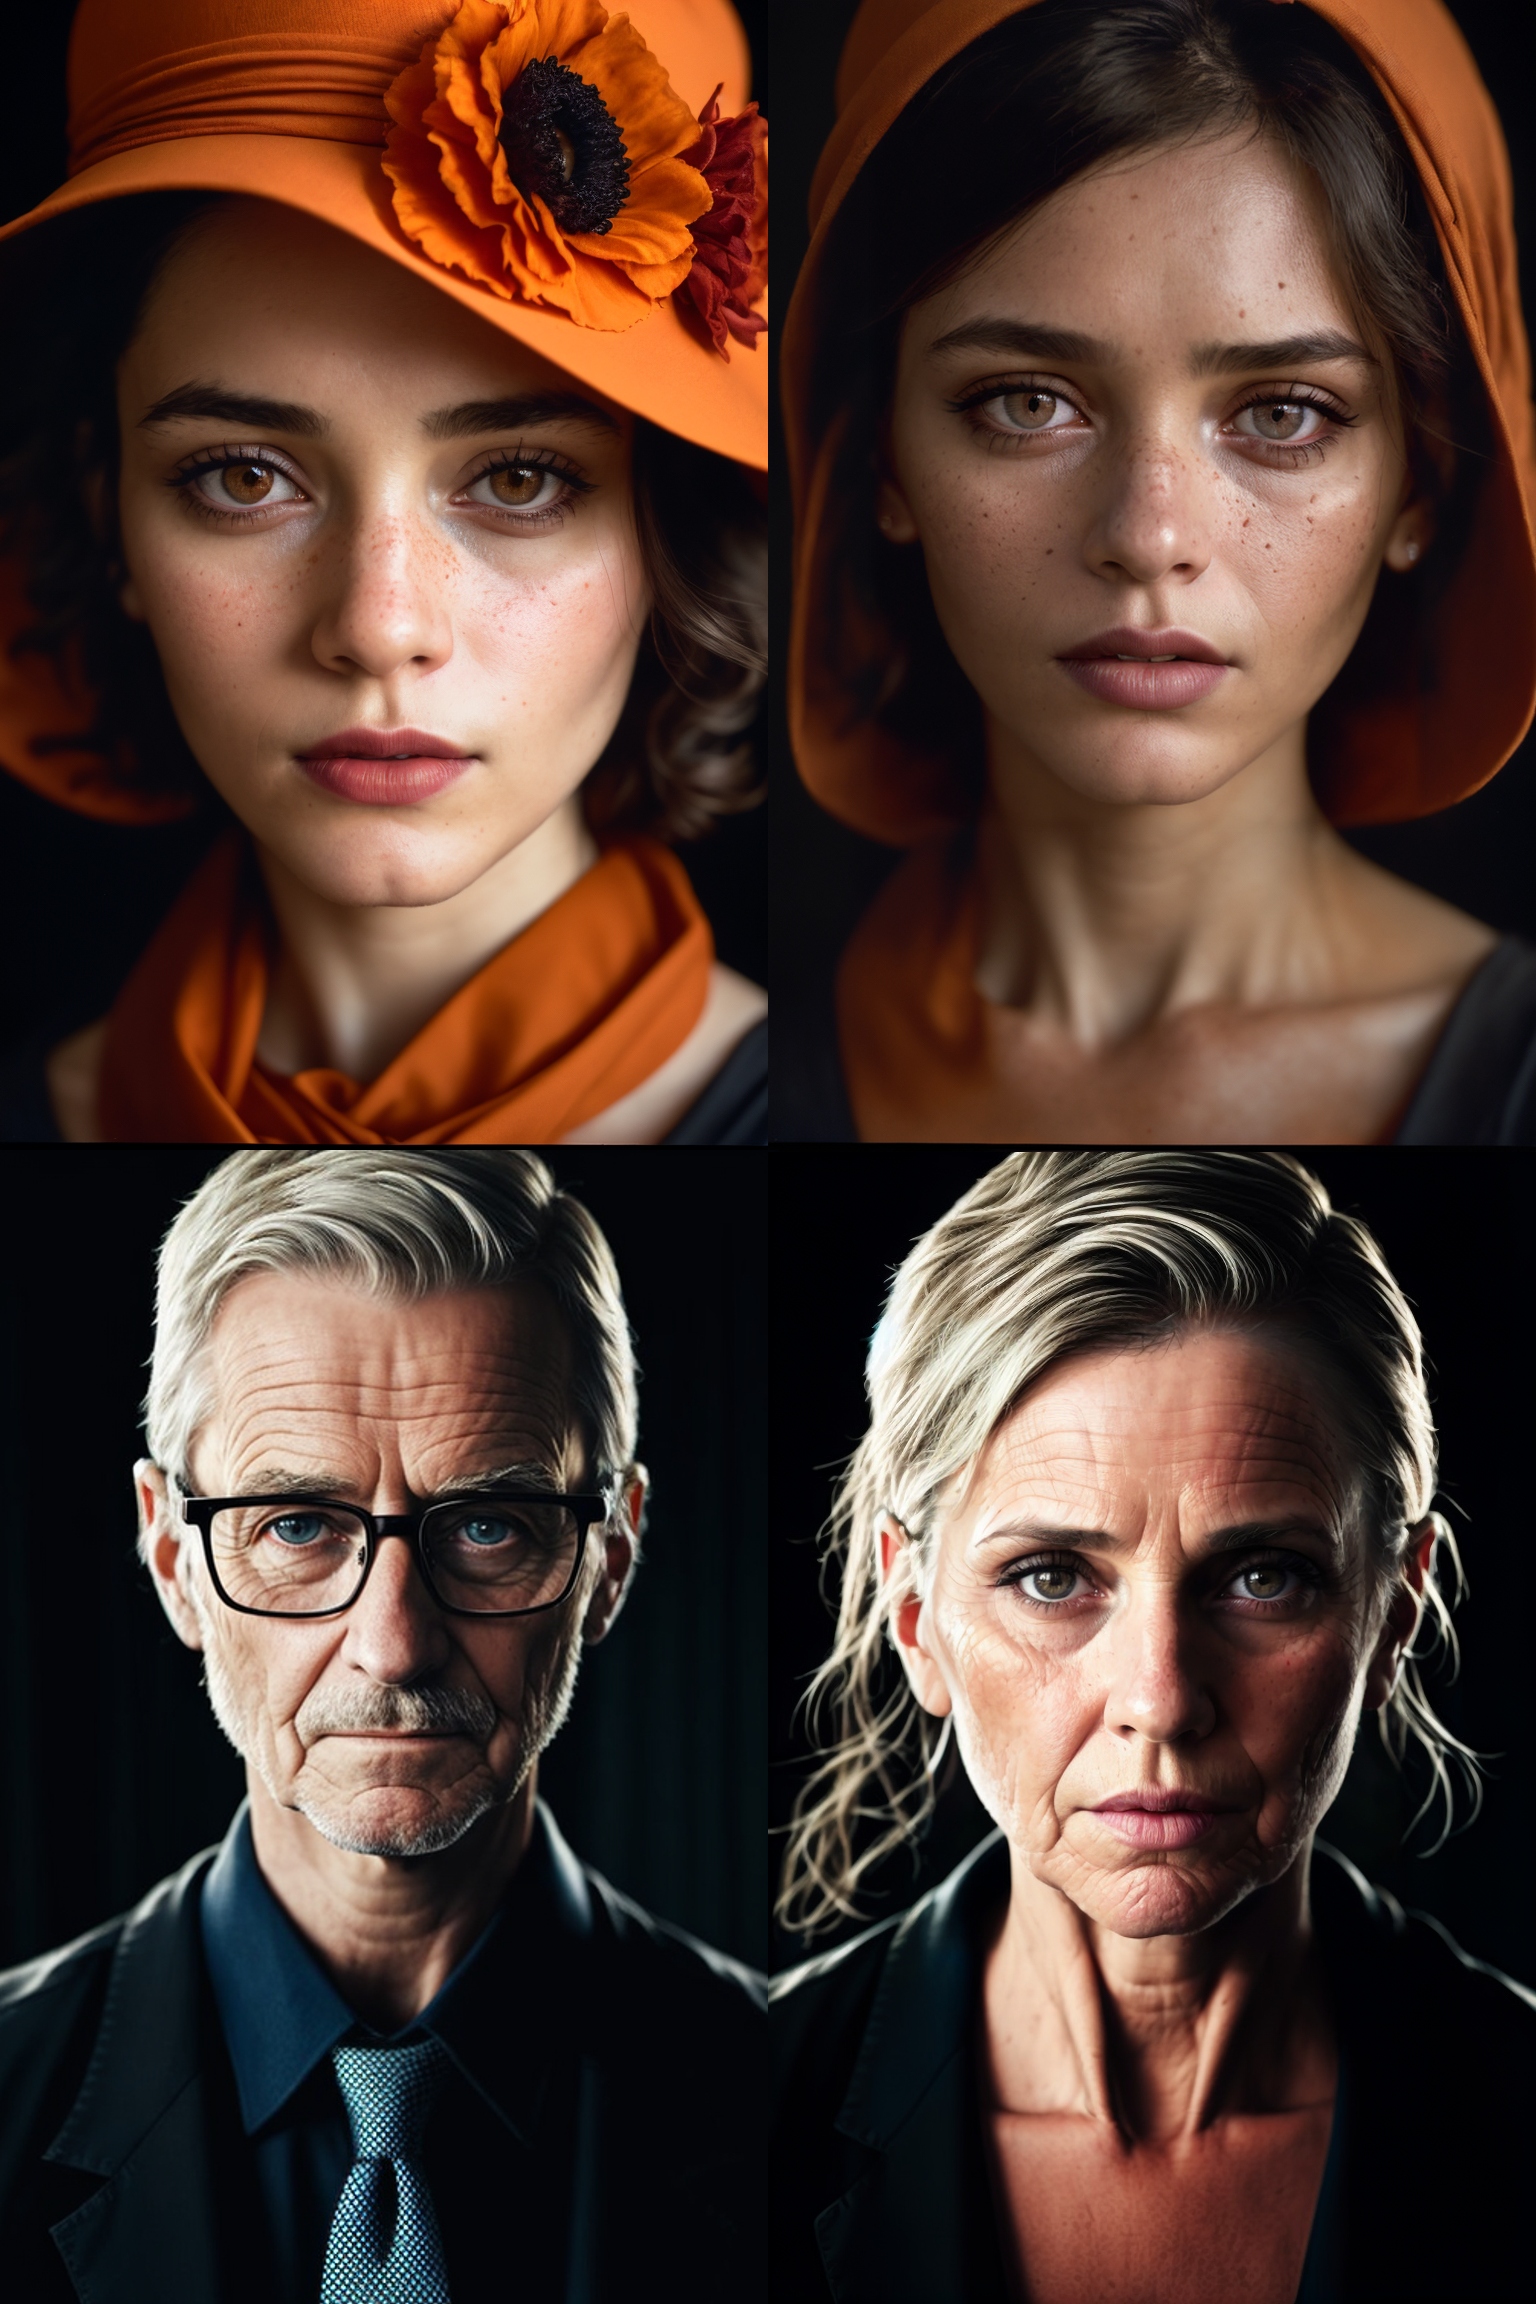
The object you do not want to see in the scene, you put into the negative prompt. If you get stuck with a model (and weights in the negative prompt still seem to have no effect), try to put the opposite tokens into both prompts, f.i. ((no cars)) in a positive prompt and ((cars)) into negative prompt (f.i. clean-shaven/mustache, barefoot/shoes, and so on). With a negative prompt, you can shape a scene very effectively. Negative embeddings are textual inversions (TI) trained or made by token merging, performing the function of a complex negative prompt (and more).
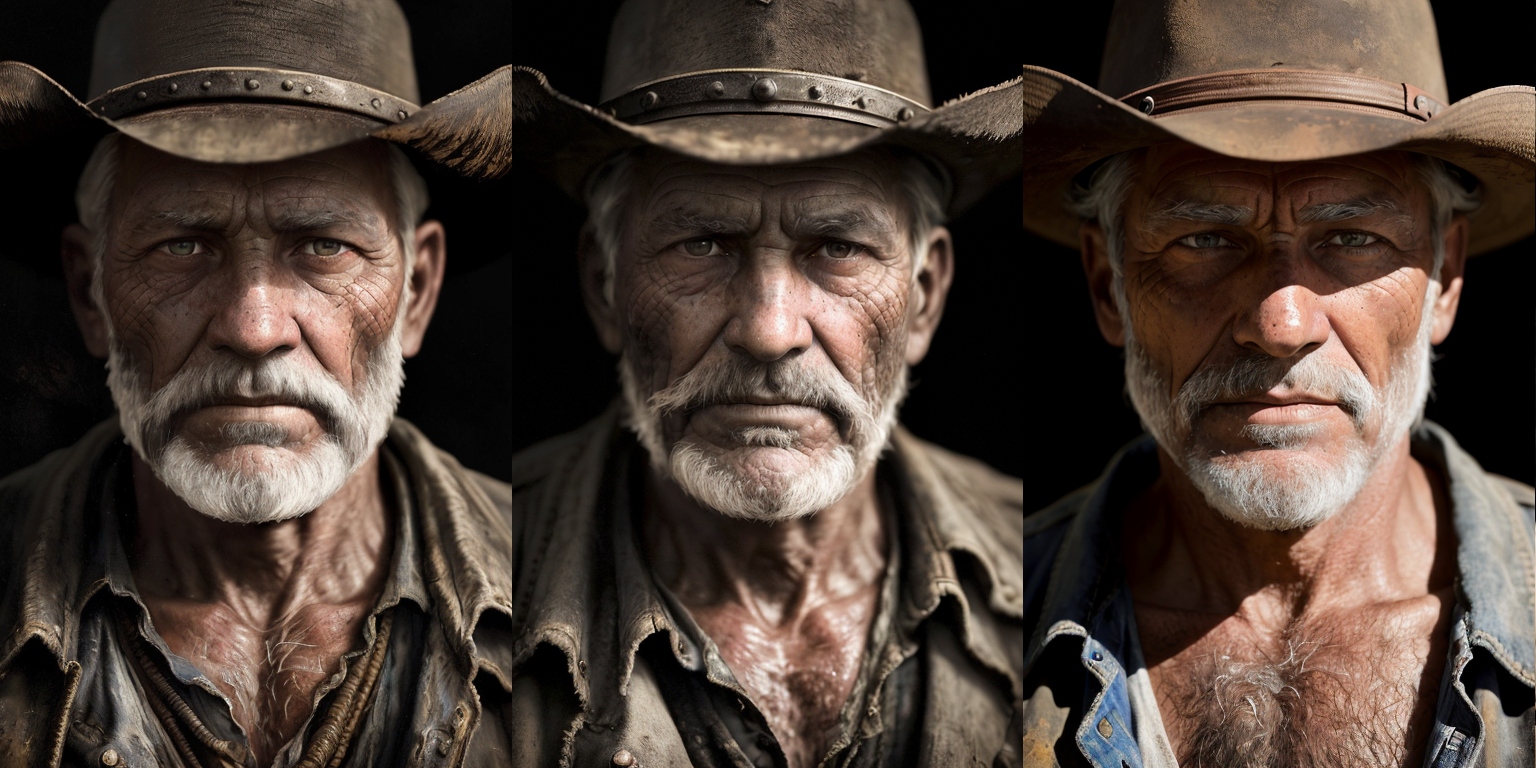
Illustration: No negative prompt, Dangerhawk, FastNegativeV2
Download the embeddings into the stable-diffusion-webui\embeddings folder, and insert them into the negative prompt by Show/hide extra network button below Generate button (refresh the list first). Try several of them (list of NE on Civitai), and experiment with combinations.You can also start with a realistic workflow, based mostly on a negative prompt, here is a starting point:
Negative prompt: (semi-realistic, cgi, 3d, render, sketch, cartoon, drawing, anime:1.4)
Scene Description and Prompt Engineering
Working with SD models brings unique workflows. The scene is described in natural language (as you know) and there are several tricks to make your work easier.
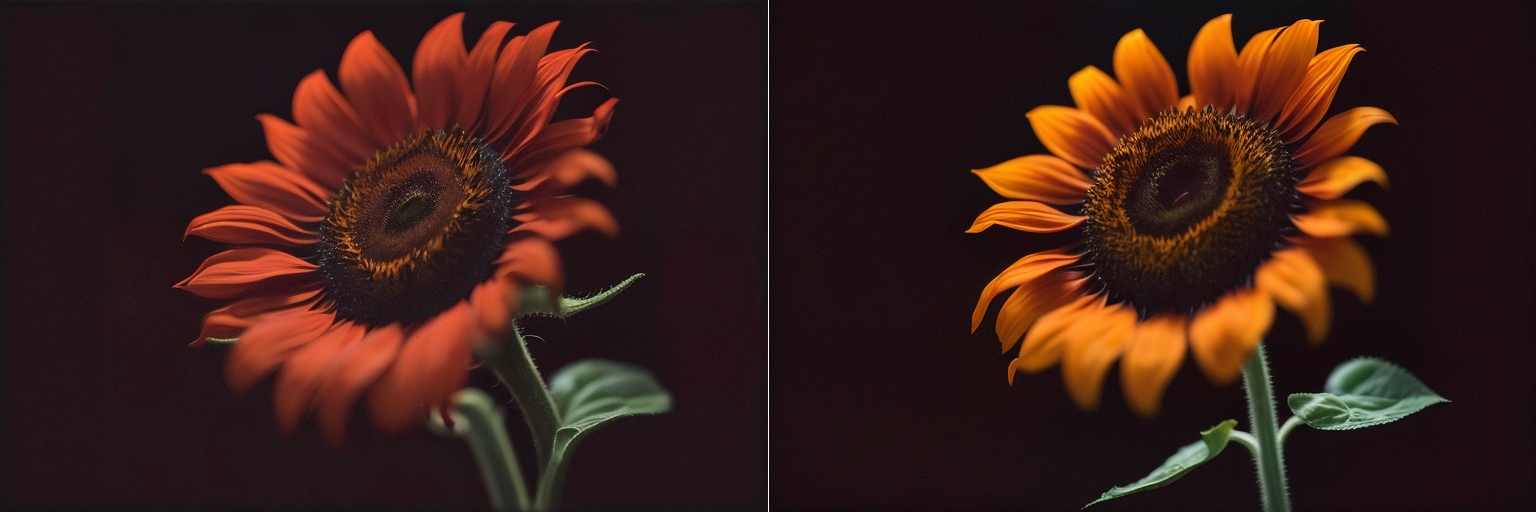
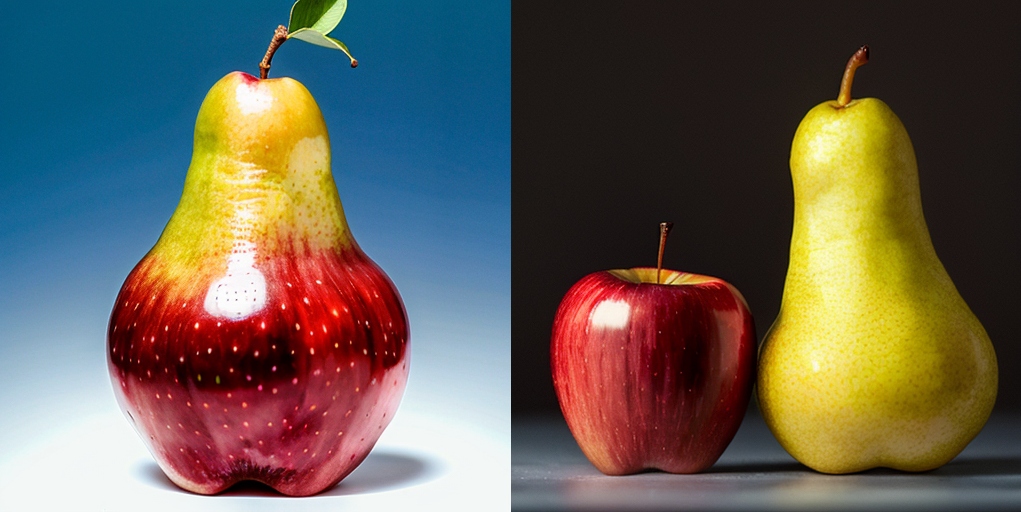
Use weights. Every token (you may think of it as a descriptive word) has its weight in the training of the model. You may adjust it, strengthen or weaken it by using the bracket syntax or just selecting the word/s and pressing CTRL+UP/DOWN (move elements in prompt with ALT+LEFT/RIGHT). See the results for (red:1.4) sunflower and (red:-1.4) sunflower
You may also see such syntax ((sunflower)) for weights, or you can nest the brackets ((sunflower) on field). Read more about using brackets for effects and morphing here.
With several objects with different colors in a prompt (like fruits, garments), use the syntax color-object. However, with many such specific objects, the colors will get often mismatched or blended in the image (the same goes with objects with a similar shape). You need advanced techniques and segmentation to deal with this and the other cases of "token spilling", using extensions like Regional Prompter (read more about this down below).
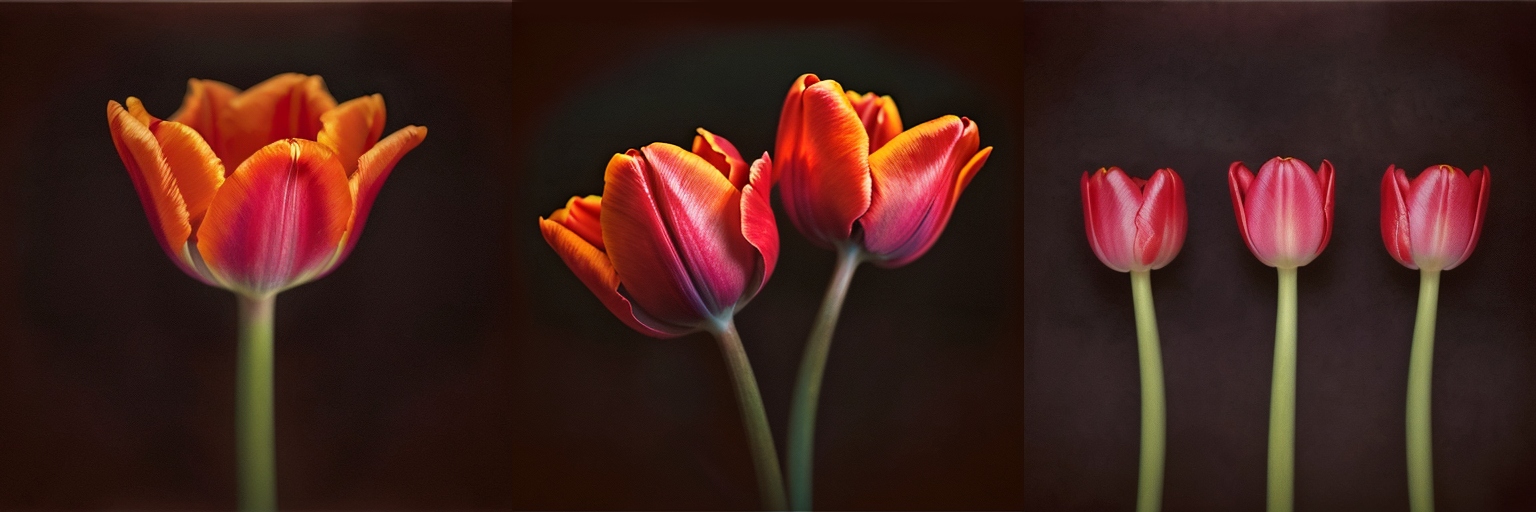
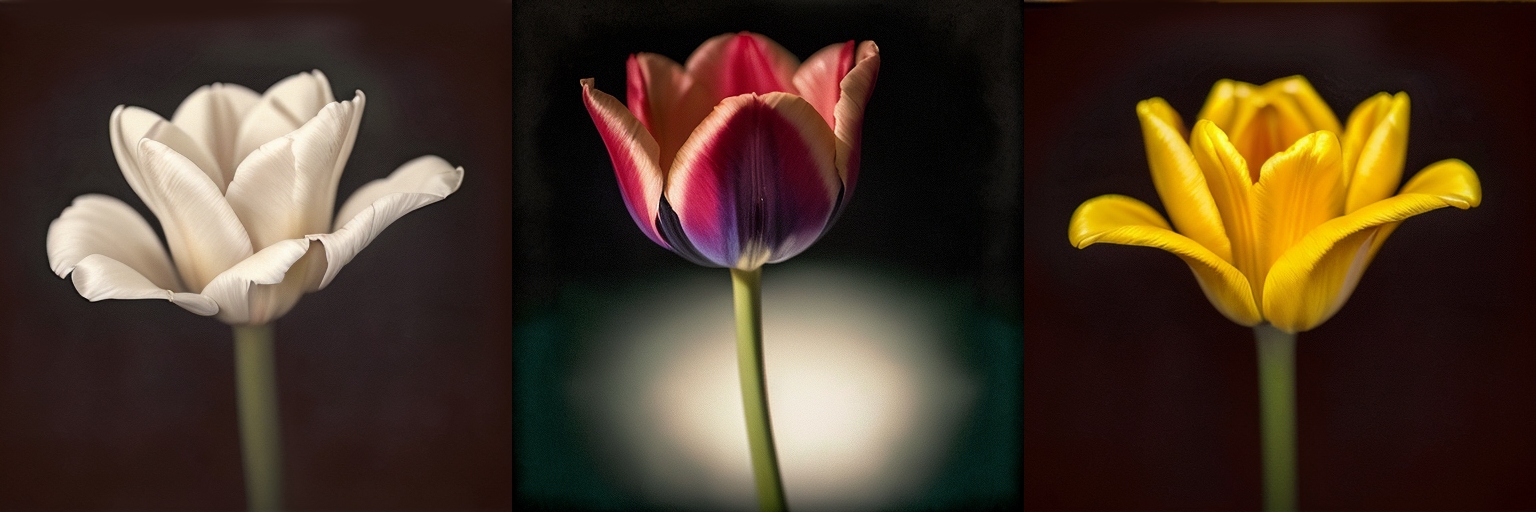
We can control the number of objects in the scene, here is 1 tulip , 2 tulip, 3 tulip:
Sometimes it can be very useful to use Danbooru tags/keywords (originally for description anime images) for definitions of components in the scene (especially for portraits, clothing, or equipment). In this case, we can experiment with colors and mood: 1 tulip, white theme , 1 tulip, aqua theme , 1 tulip, yellow theme
As the scene will get more complex, the prompting will not be so easy (tokens tend to affect parts or a whole scene, especially colors tend to "spill"). We will need extensions for better control, so let's describe the most important right away.
Install the extensions from tab Extensions/Available/Load from in A1111 web GUI.
Efficient Large Language Model Adapter (ELLA)
This technique connects SD1.5 with a local LLM, significantly improving prompting options and results, approximating the capabilities of SDXL (and SD 3) approaches. The full article on ELLA, which requires a Comfy workflow-based UI, is published here [link to article].
ADetailer
Adds details to segment of image, which is automatically masked. ADetailer is a must-have for human portraits because it can focus on the face, eyes, hands, and figure/person.The masked area can have modified prompt to better describe details or to address a special LoRA model.
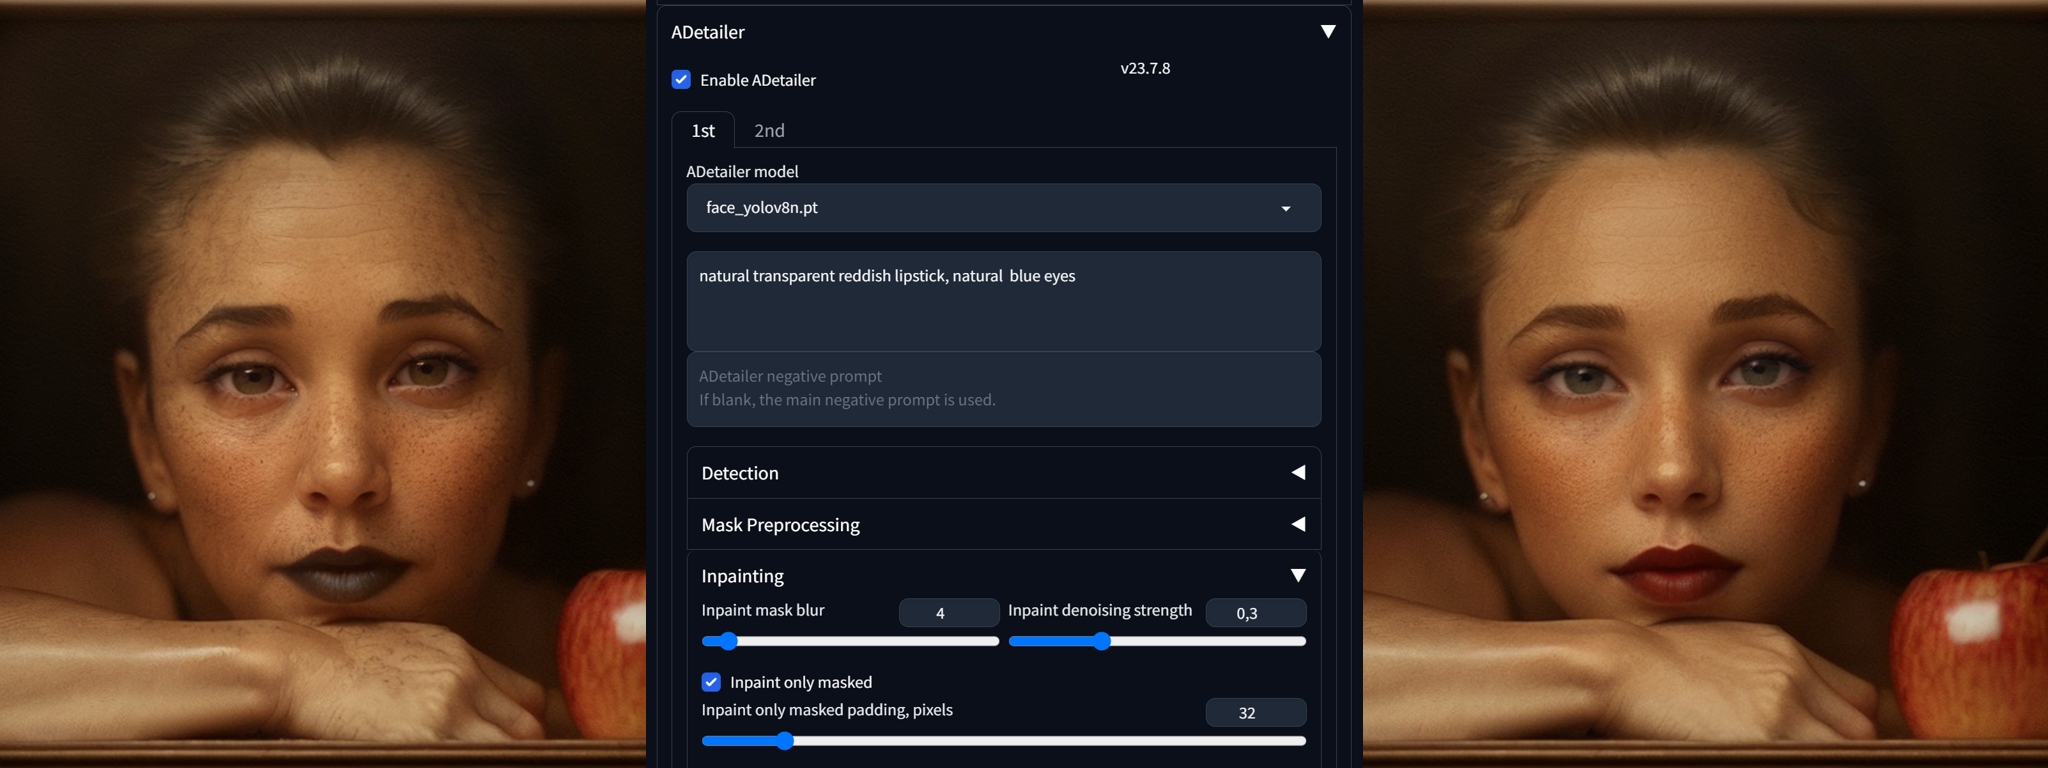
You may see the immense power of this extension for portrait work—when you will test LoRAs you will need it to work seamlessly with this one. The Inpaint denoising strength will control how much the original will change.
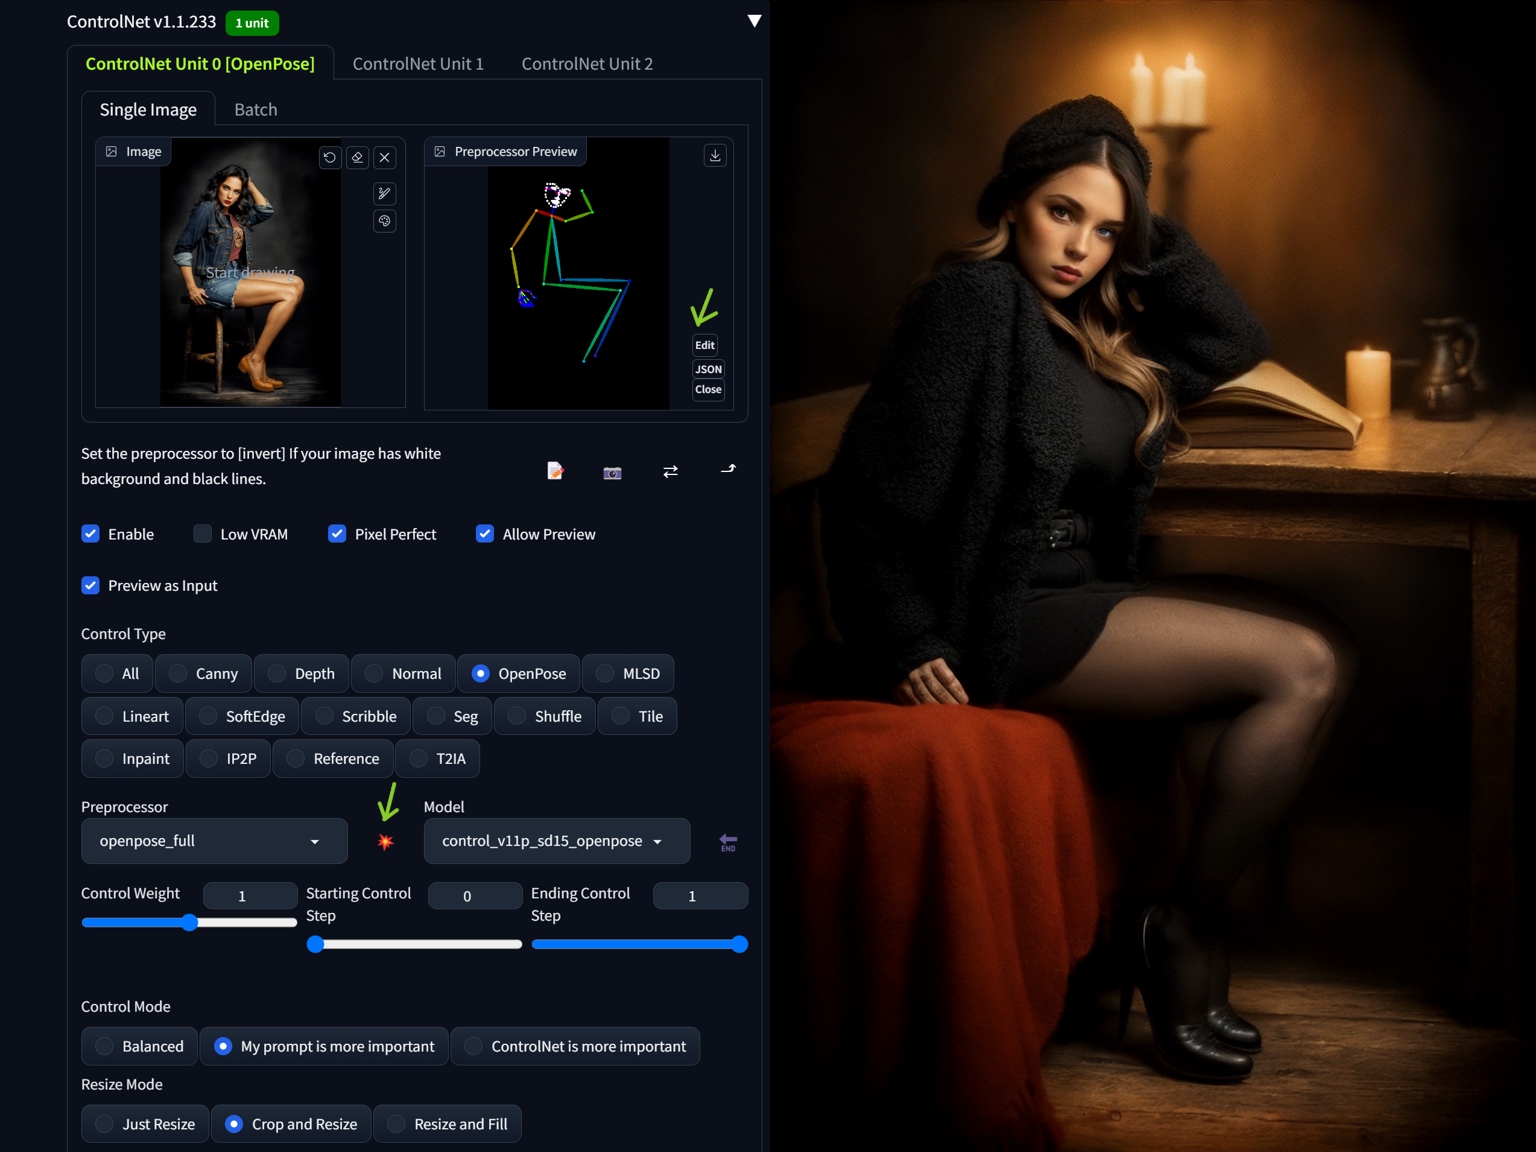
ControlNet
This is a very advanced set of tools and models for scene modification. For realism, we will most often use these:
OpenPose
Use this CN model for adding and editing pose of you character in the scene. Create your set of poses from reference images or 3D software (you can pose the OpenPose skeleton in A1111 too, in a couple of extensions, see this article). The fastest way is by using sd-webui-openpose-editor extension, which allows you to edit and fix the pose in ControlNet preview window:
Depth and Normal Maps
Useful for editing composition and adding geometry to the scene. To use together with OpenPose,just enable another ControlNet tab, set it to Normal, add control image (and in this case set Processor to None as the normal map is made in Blender) in this and lower the Control Weight of Normal Map ControlNet to cca 0,65:
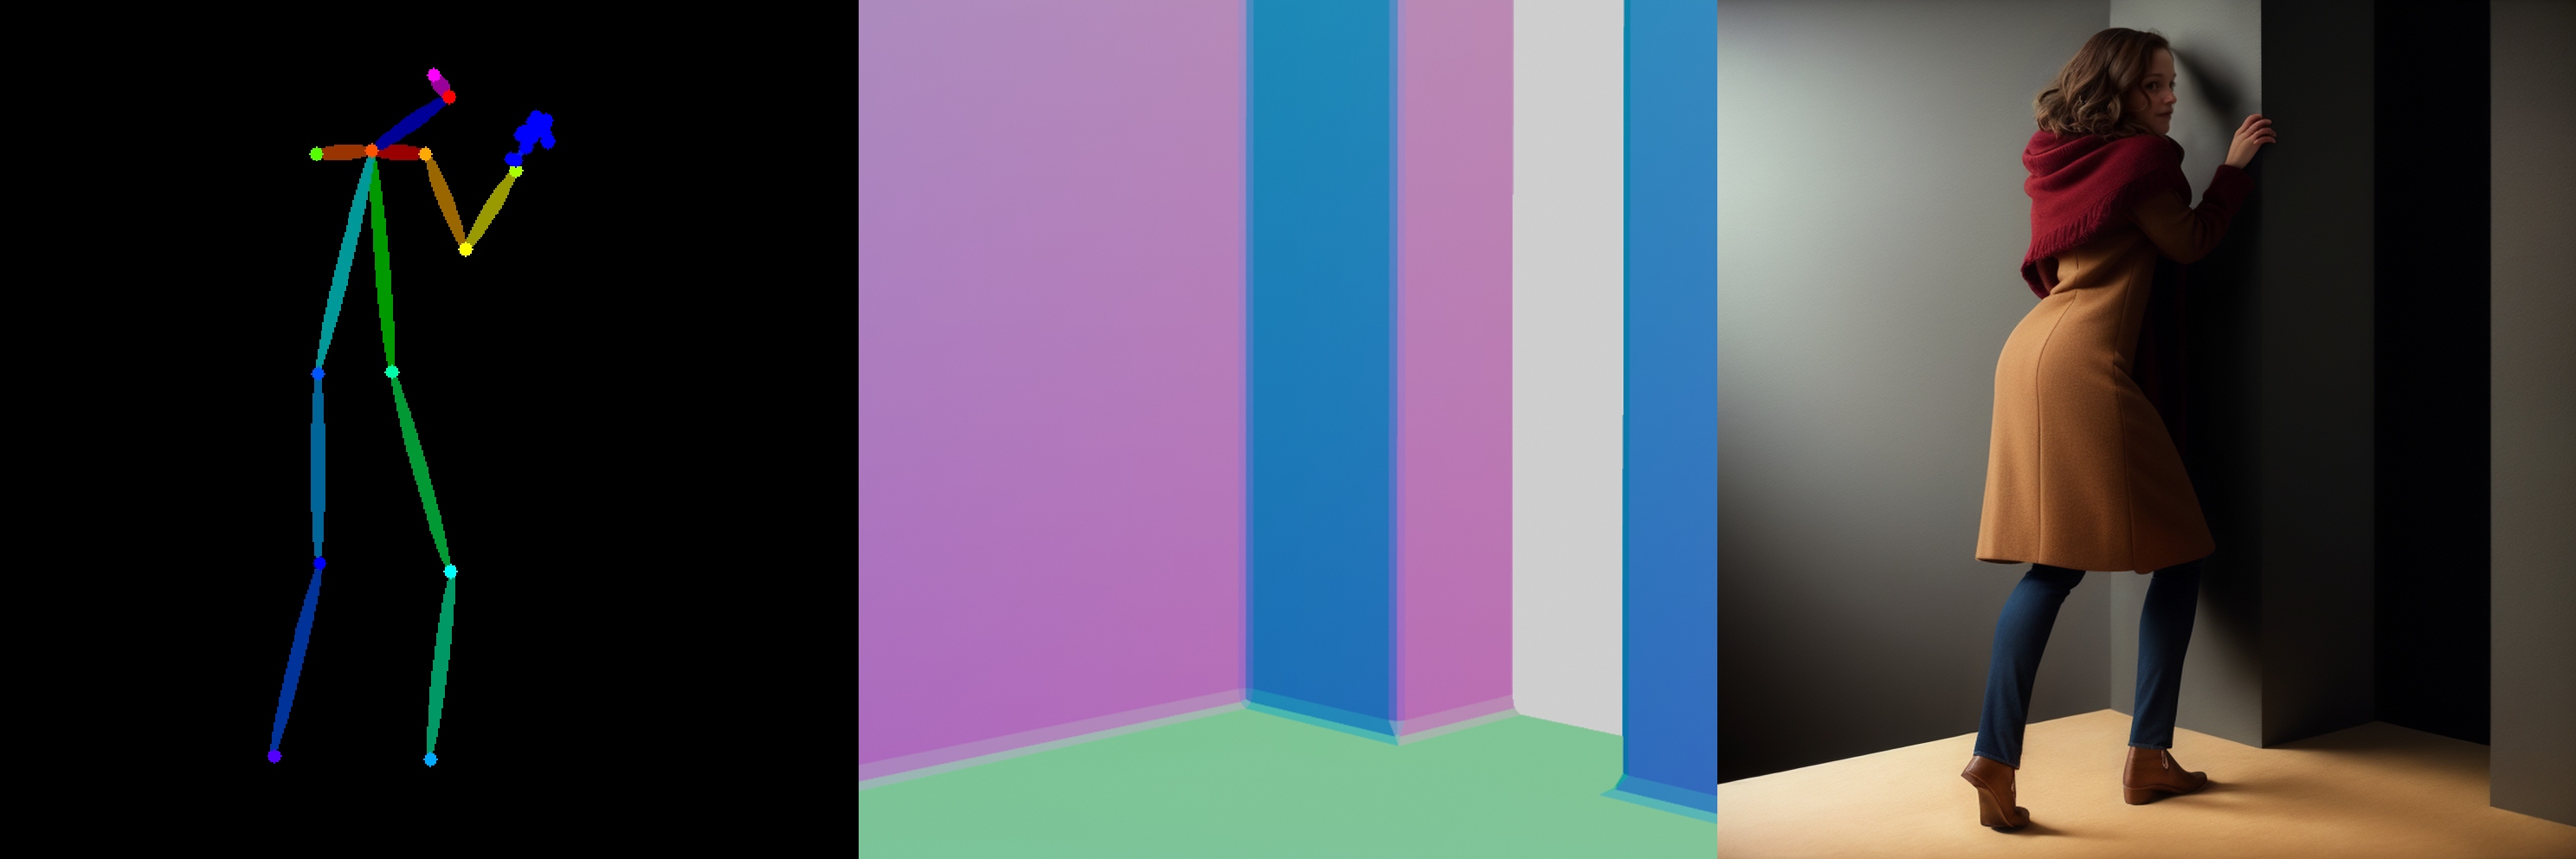
Using depth map is similar, I am elaborating more on this in Blender article here.
ControlNet Inpainting/Outpainting
Using ControlNet Inpaint option in txt2img allows to generate outpainted content in the image. Insert the image in the ControlNet and set the Inpaint, Control mode "My prompt is more important" and Resize mode "Resize and Fill". Choose inpaint_only+lama model. Then change the image size in one axis and generate the results. You can create or use a prompt or leave it empty.

Reference
Use reference image to transfer tones and style. Insert a reference image into ControlNet, set control weigth, control mode and resize mode, and Generate.
Regional Prompter
You can quickly divide the composition into regions with Regional Prompter. You will use BREAK to divide the regions in your prompt (you need one BREAK more to separate base or common prompt at the beginning). Prompt mode tries to detect area segments based on the prompt and the Matrix mode will divide the area geometrically:
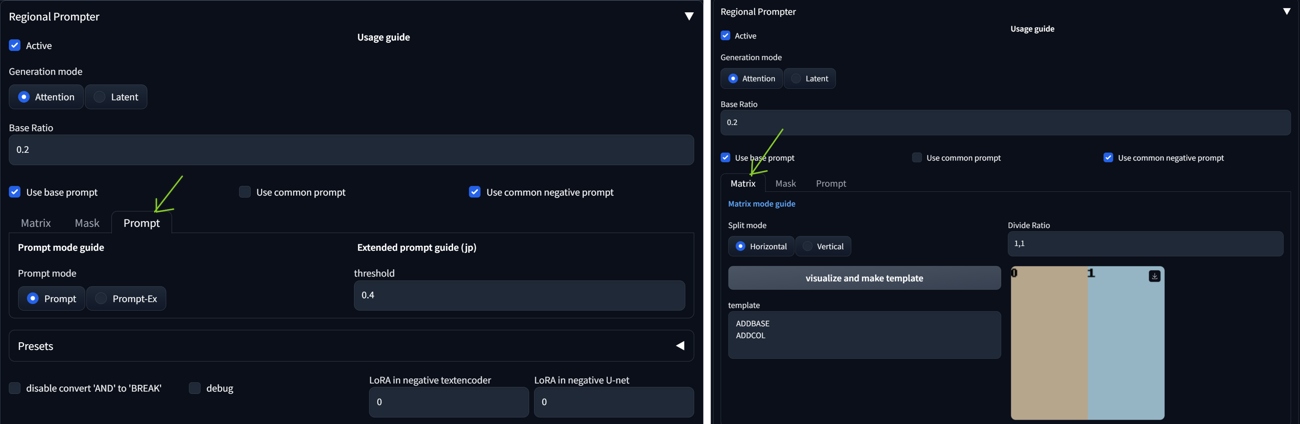
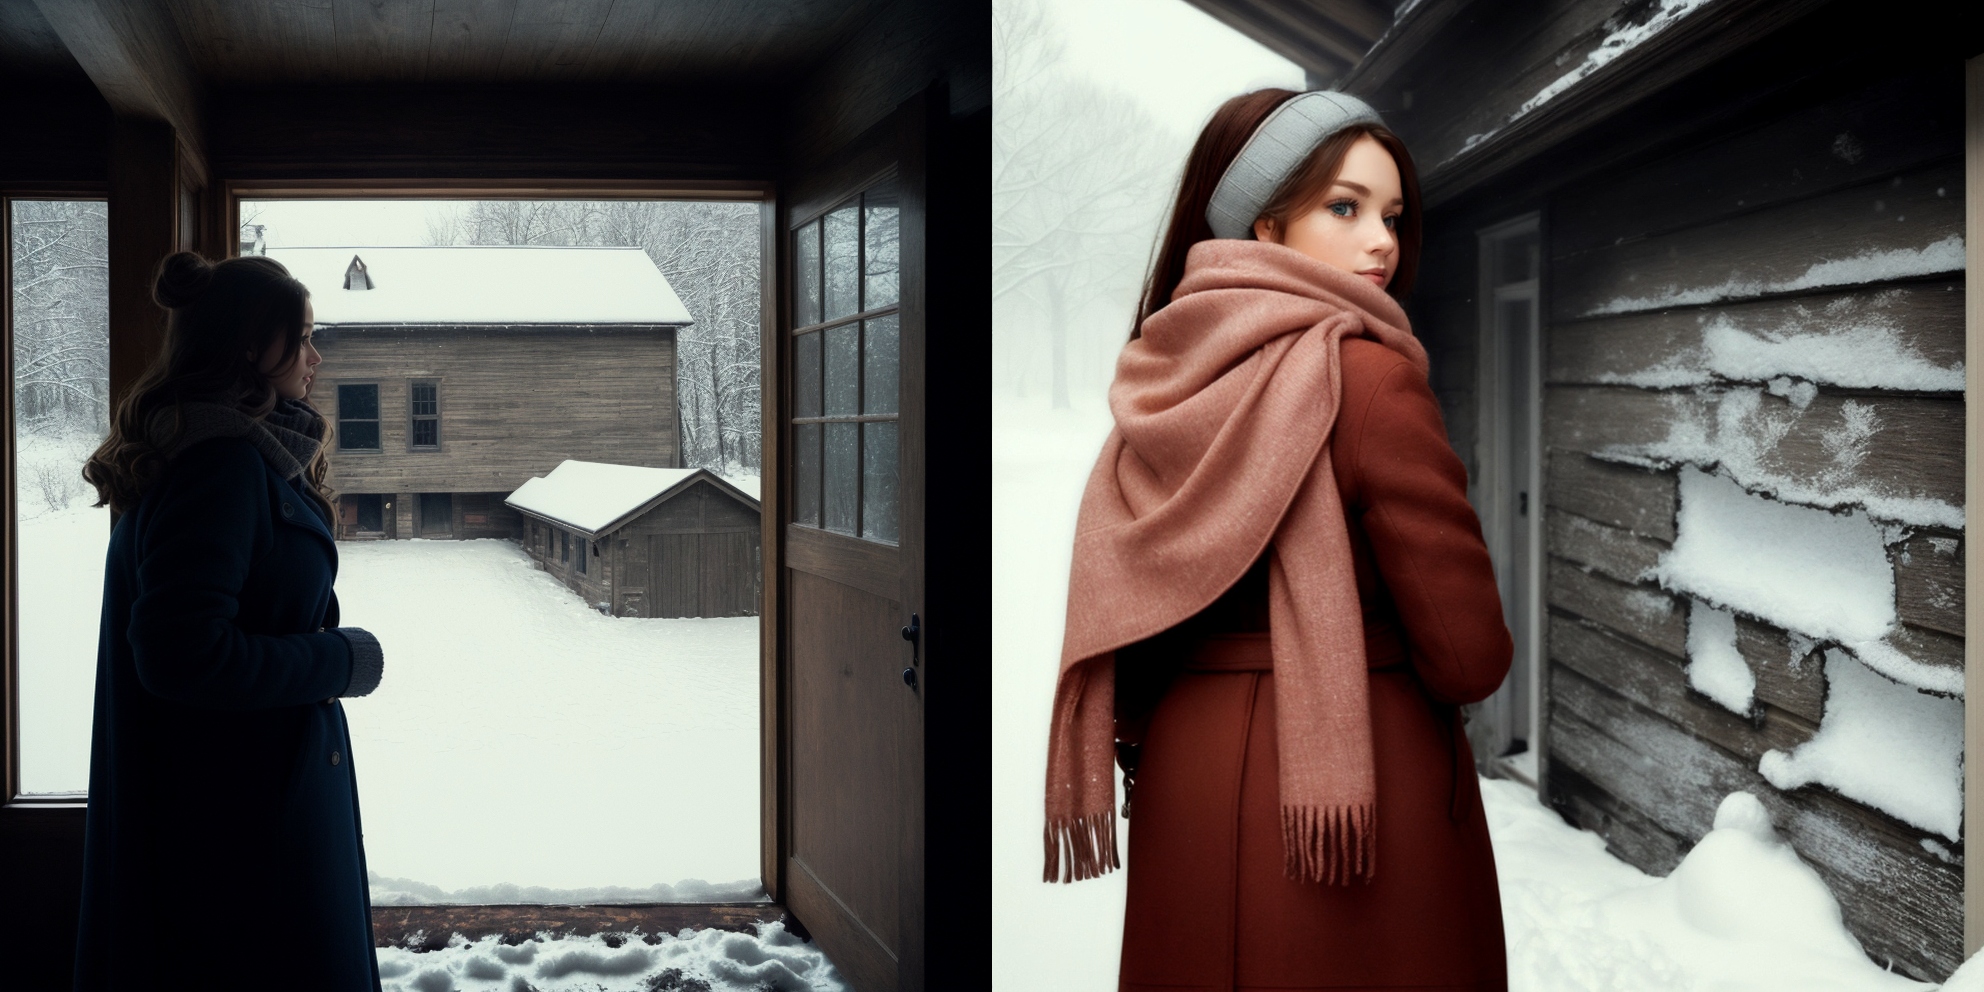
The structure in this case is: base prompt BREAK character BREAK building.
(background inside dark, moody:1.3) , POV, nikon d850, film stock photograph ,4 kodak portra 400 ,camera f1.6 lens ,rich colors ,hyper realistic ,lifelike texture, dramatic lighting , cinestill 800 rimlight (editorial photograph) BREAK
sfw (1woman:1.1),, (winter clothes:1.2), scarf, winter coat, view from back, (highly detailed face:1.4) (smile:0.7) BREAK
snowy house, cracked wall, decrepit
Latent Couple Manipulations
An extensive article on Regional Prompter and Latent Couple Manipulations is here.
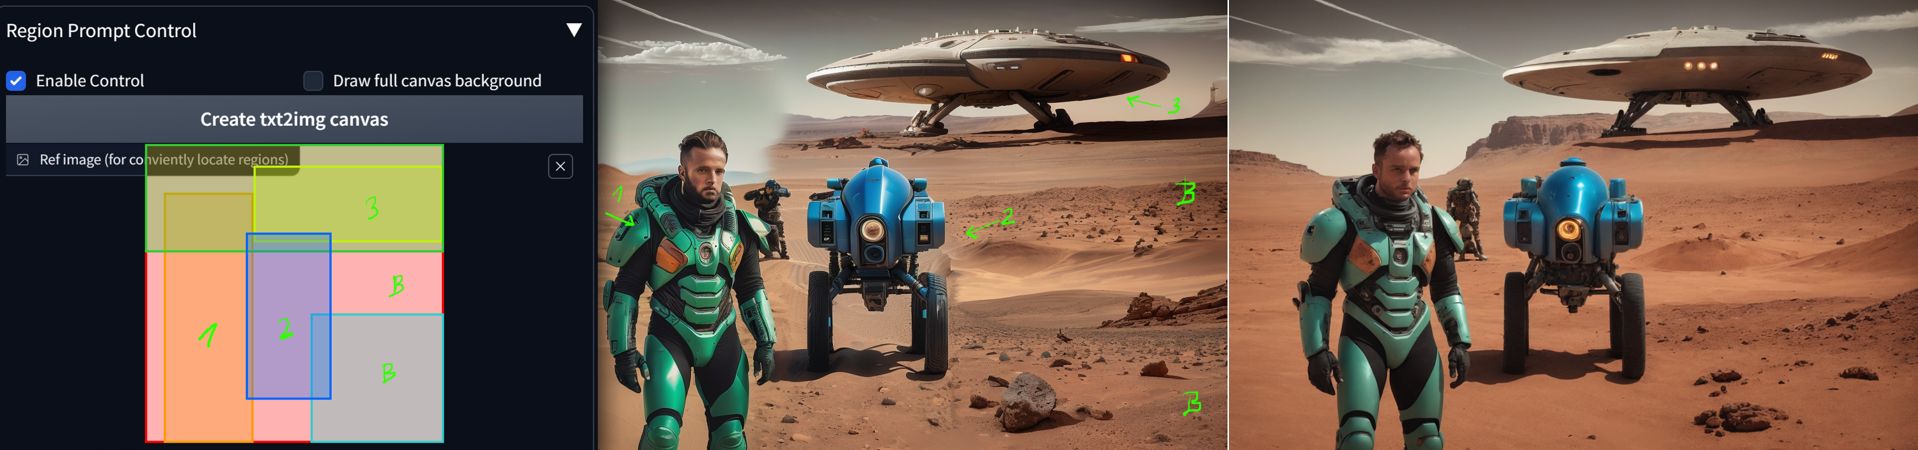
TiledDiffusion (Multi Diffusion) with Tiled VAE Manipulations + Region Prompt Control
Can divide the scene to regions, and also allows separate LoRAs for each region. In A1111 install as an extension (https://github.com/pkuliyi2015/multidiffusion-upscaler-for-automatic1111.git). Can cooperate with ControlNet v1.1 tile model (CN Tile). You need to img2img upscale afterwards (Hires fix tend to change the image too much) to blend the elements together (but keep Denoising strength 0.48-0.53 for medium changes).
- After installation, check 'Enable Tiled Diffusion' in Tiled Diffusion
- Open Region Prompt Control acordion
- In the main prompt, set global parameters for all regions (also a global negative prompt). Keep these prompts simple.
- Add regions with checking 'Enable Region X'. Set Foreground or Background options. Set positive and negative prompt for each region.You can use separate color theme or LoRA for each region. Try to blend the objects into the background even in these region prompts.
- Many times the result will look like a patchwork. Select the best results and upscale (or have Hires fix active all the time).
- The main disadvantages: It is time consuming and takes many attempts to get a decent result. But the concept is very promising.
Tiled Diffusion is useful for Img2img upscale, check the repository or following article for details.
Semantic Guidance
This technique allows to adjust properties in the scene (while keeping general composition) without using masks, it is available as an extension for A1111 and you can read more in this tutorial article.
Roop and ReActor
The simplest to use face exchange tools. Follow the instruction for the installation on the extension github page (however, the Roop extension is not updated anymore for unclear reasons).
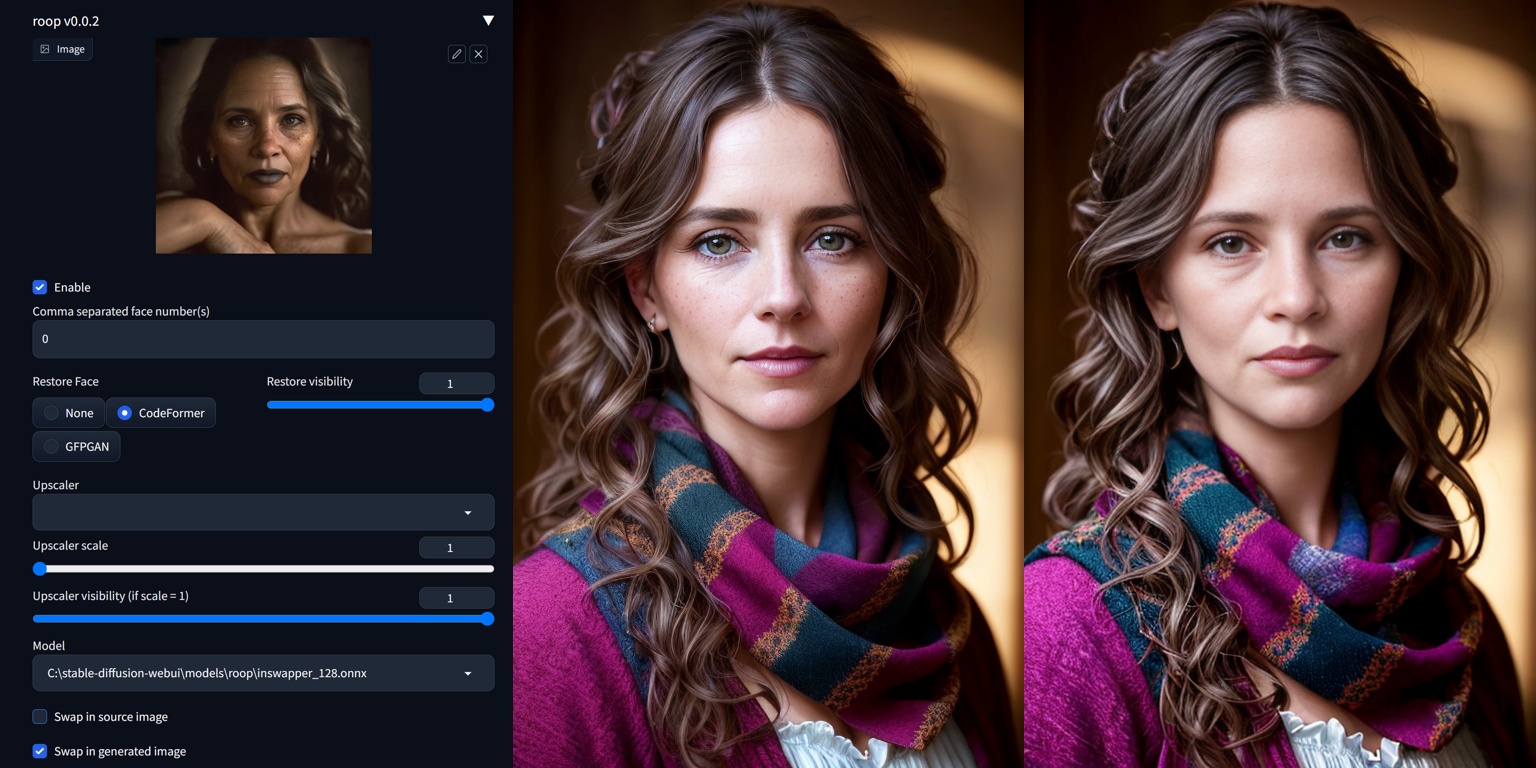
ReActor works in a similar way and is very good—and you may install it from Extensions tab in A1111. You can also build a face model from one picture (saves as .safetensors in models/reactor/faces). These models work only under ReActor, not as a LoRAs in a prompt.
It is simpler but much faster than Instant-ID (SDXL) solution in ControlNet, which allows control of diffusion process and thus a more flexible head angles.
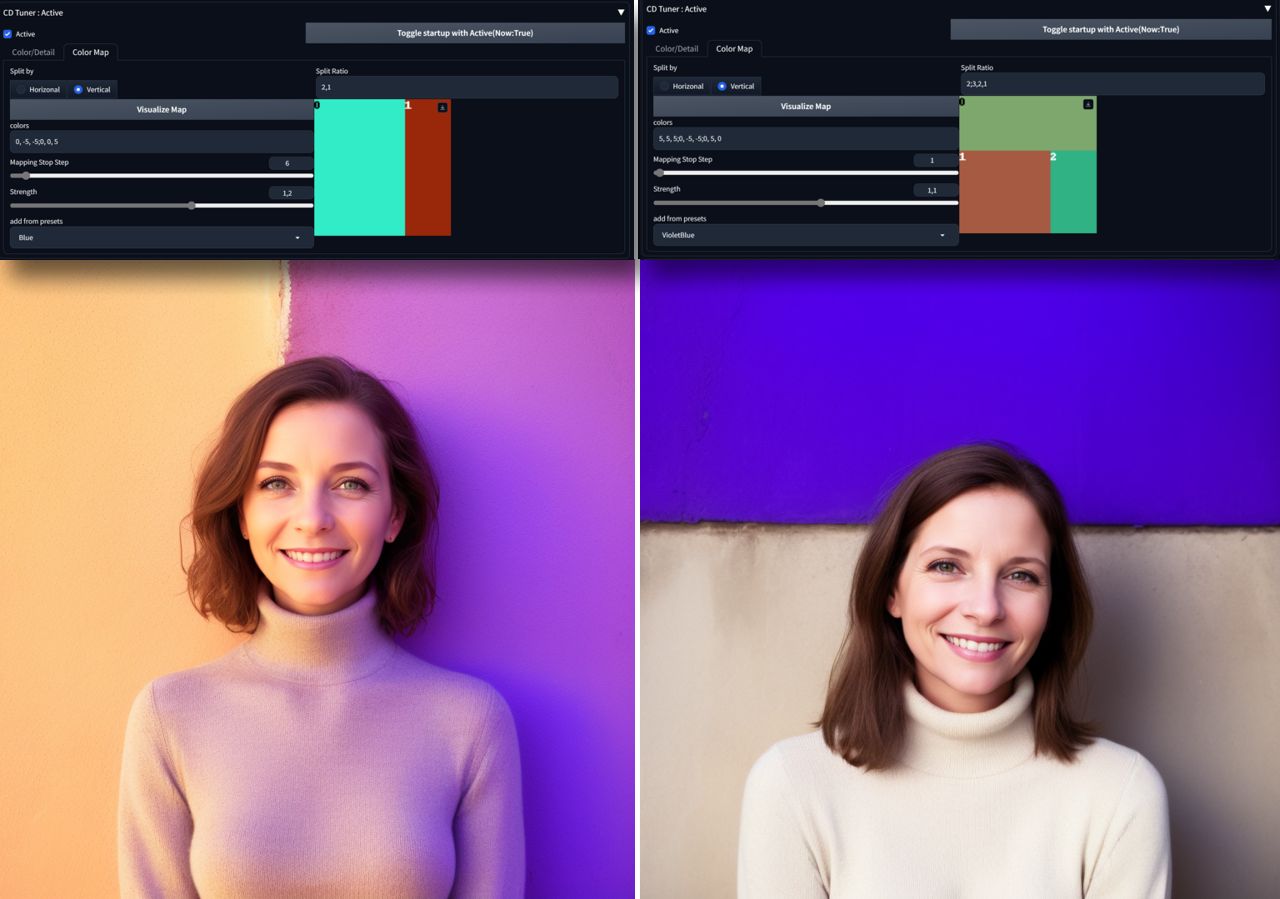
Color Manipulations With CD Tuner and VectorscopeCC
CD(Color/Detail) Tuner and VectorscopeCC are A1111 extensions modifying color and tones in latent space (offset noise way). With help of these tools you can modify color composition or adjust images, creating bracketing effects and High Dynamic Range HDR approximations.
Inpainting
You can try to "inpaint" with a normal model but for bigger changes with higher quality, you will need a special inpainting version of the base model. Short inpainting tutorial is here.
Workflows
txt2img Workflow
Using txt2img tab, this workflow finetunes prompt to create an image from a scratch. ADetailer and Hires. fix are used very often together in this mode.
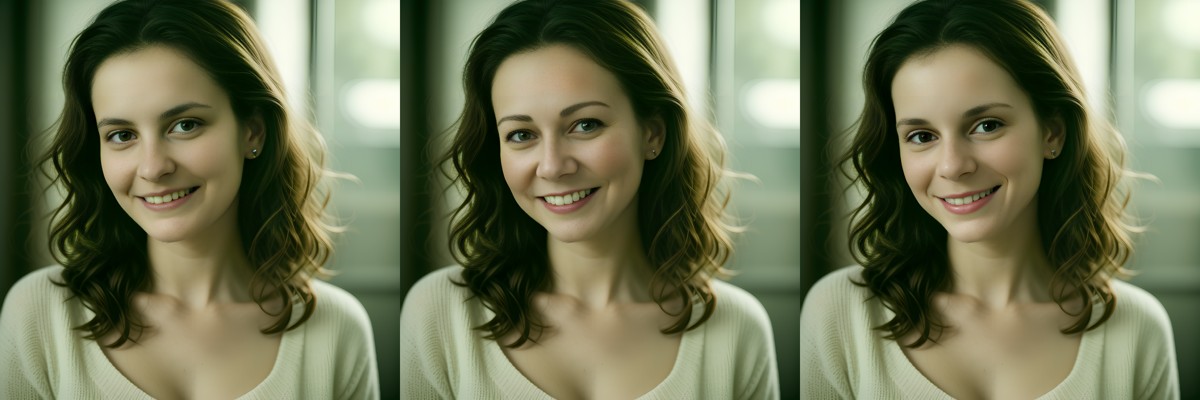
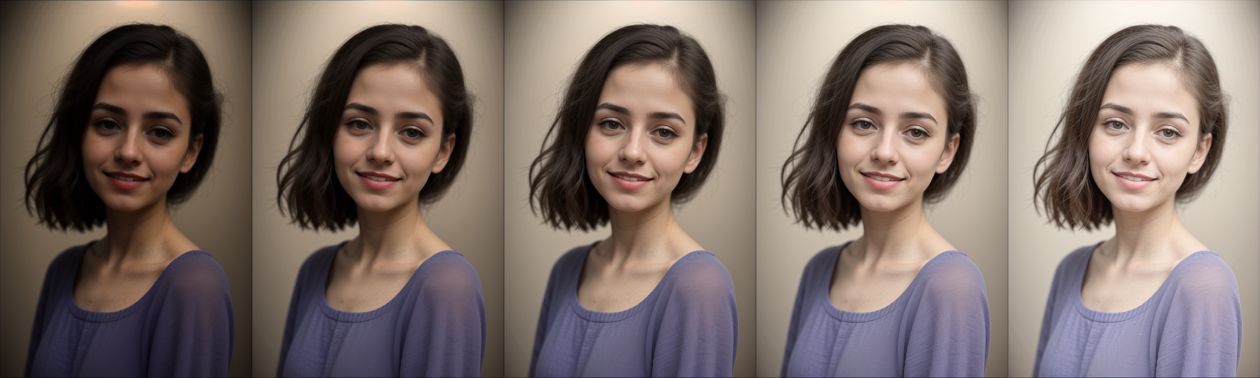
Use variation seed to create variations of an image from the main seed, you will open this option by checking Extra checkbox by Seed number in txt2img.
You can create the final image in txt2img. Good strategy is also to create low resolution image in txt2img and work from this base in img2img.
img2img Workflow
Using img2img tab, this workflow takes an image as a base for variants of an image. Many extensions work effectively also in this mode.
Upscaling
Upscaling is a technique needed in all worklows. Explore upscaler models on upscale wiki https://openmodeldb.info/. Explote the classic ones or new DAT upscalers. See a list of interesting classic upscaler models here.
Stylistic Workflows
These workflows use extensions or LoRA-type models to modify diffusion and influence the results. We have already discussed some extensions, so here are some tips:
- Dynamic Thresholding: Mimics CFG scale. We can use it for some effects too. Use higher Sampling steps (40+) to retain some color and shape information.
- Latent Mirroring: Tends to create balanced or symmetrical compositions.
- Anti-Burn: Can help with overtrained LoRAs or models.
Noise Tricks in Latent Space and Variations
By adjusting sigma noise you can achieve interesting camera effects. Read more about this in a separate article about Sigma and Eta parameters. I mention color and brightness adjustments in this color grading tutorial. Some LoRAs and extensions can also affect the diffusion decoding.
Adding Details with Hires fix
Similarly to ADetailer and similar extensions, where you can add additional prompts, you may add photographic details during the Hires fix phase (also LoRAs are possible to use in the prompt). Try SwinIR_4x, 4x-UltraSharp, or 4x_RealisticRescaler upscalers.
LoRAs
Use LoRA/LyCORIS or other NN models for various effects to enhance your images. The effects can be subtle or very radical. Here are some recommendations.
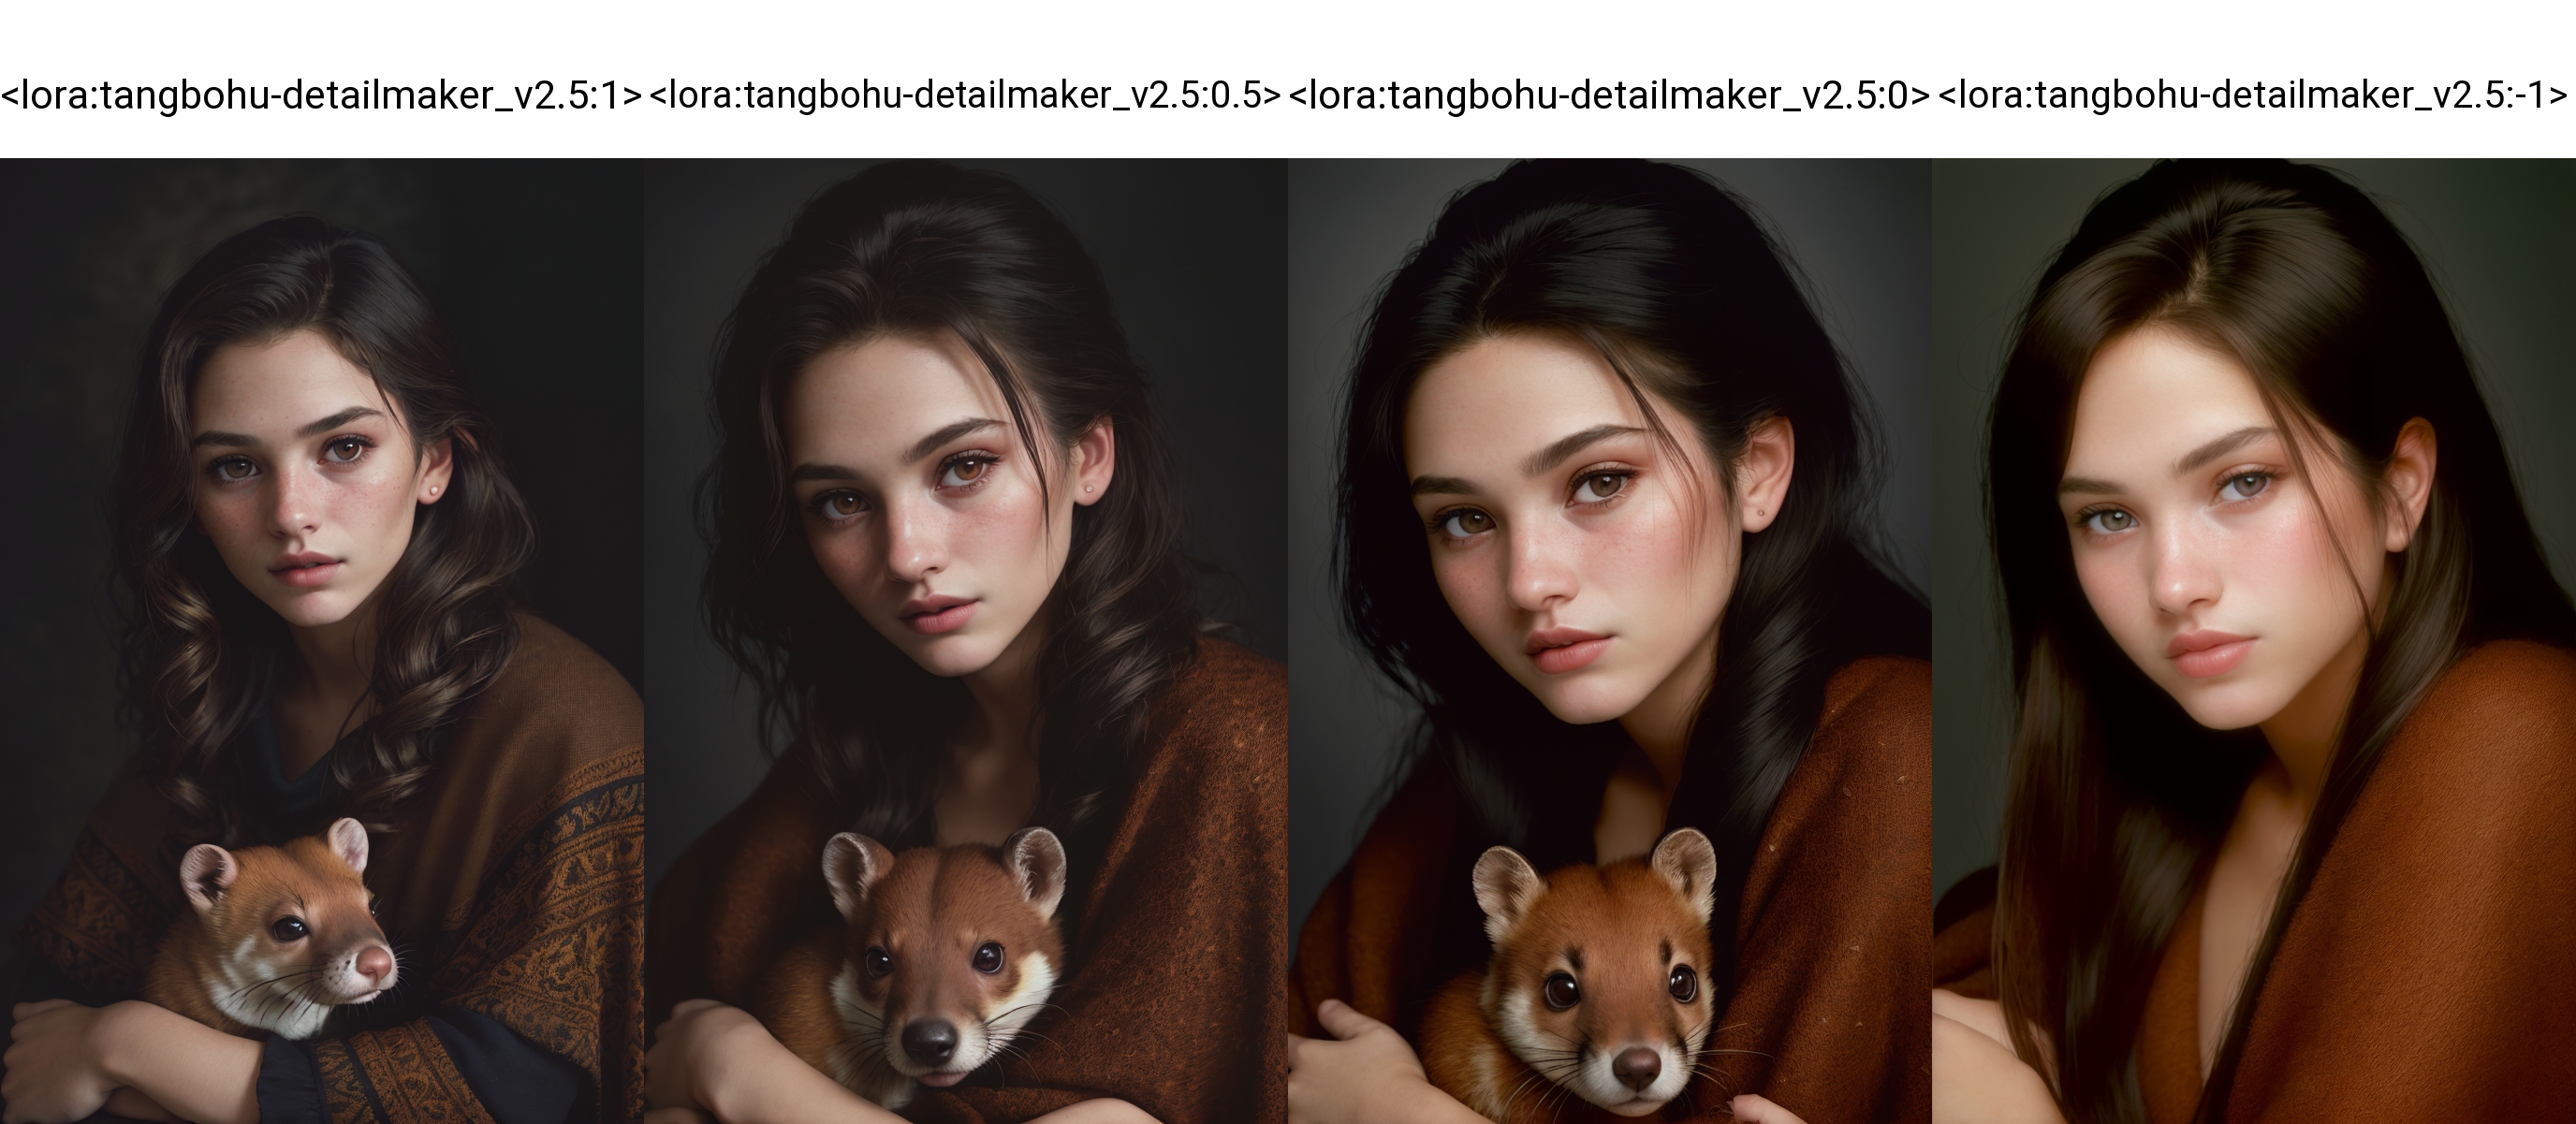
Detail Maker
Download Detail Maker from Civitai

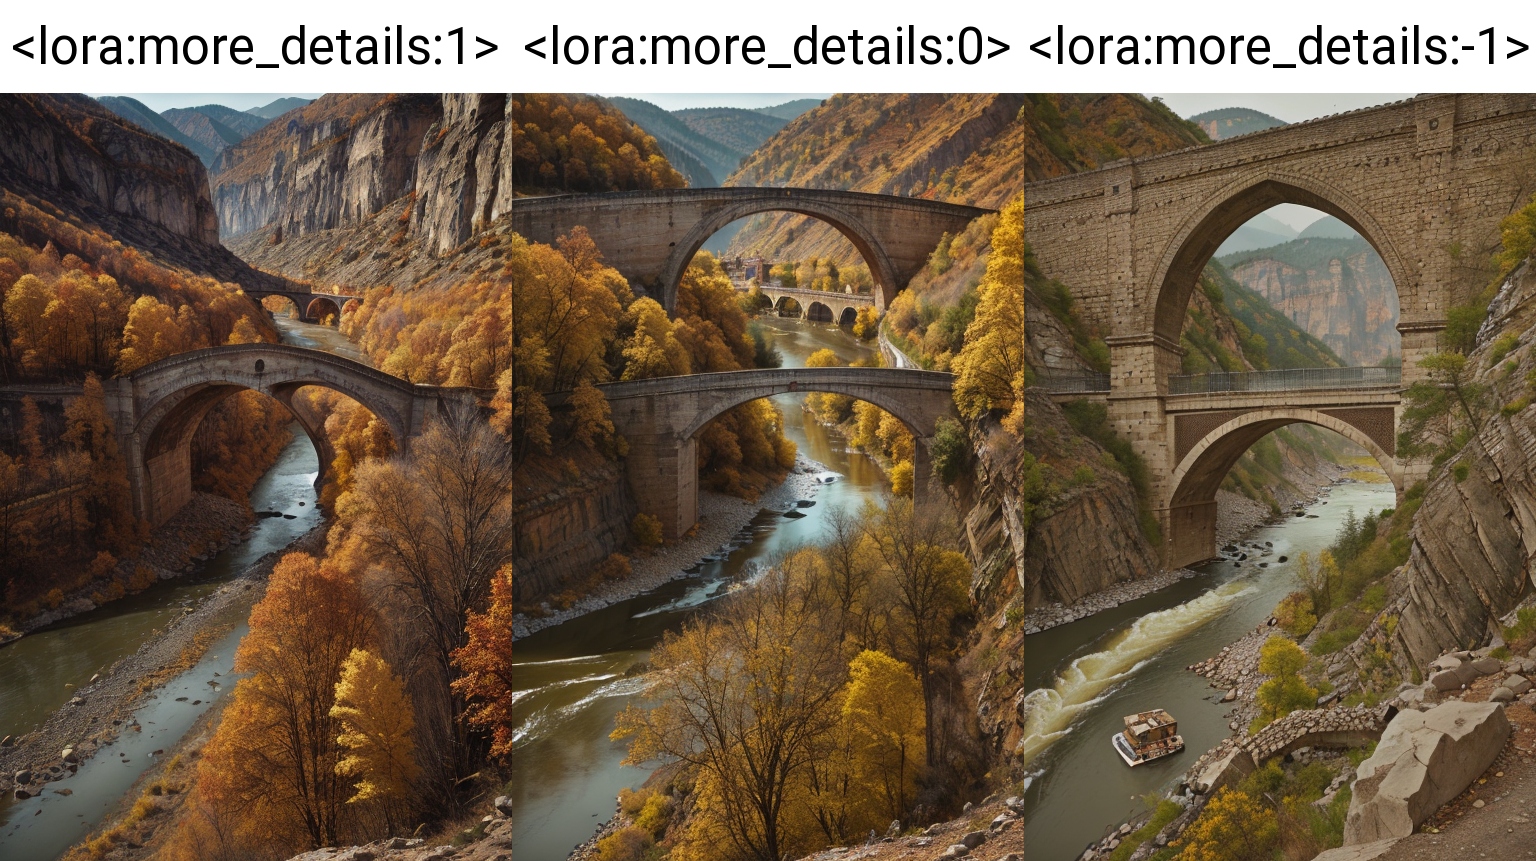
Add More Details
Download Add More Details from Civitai

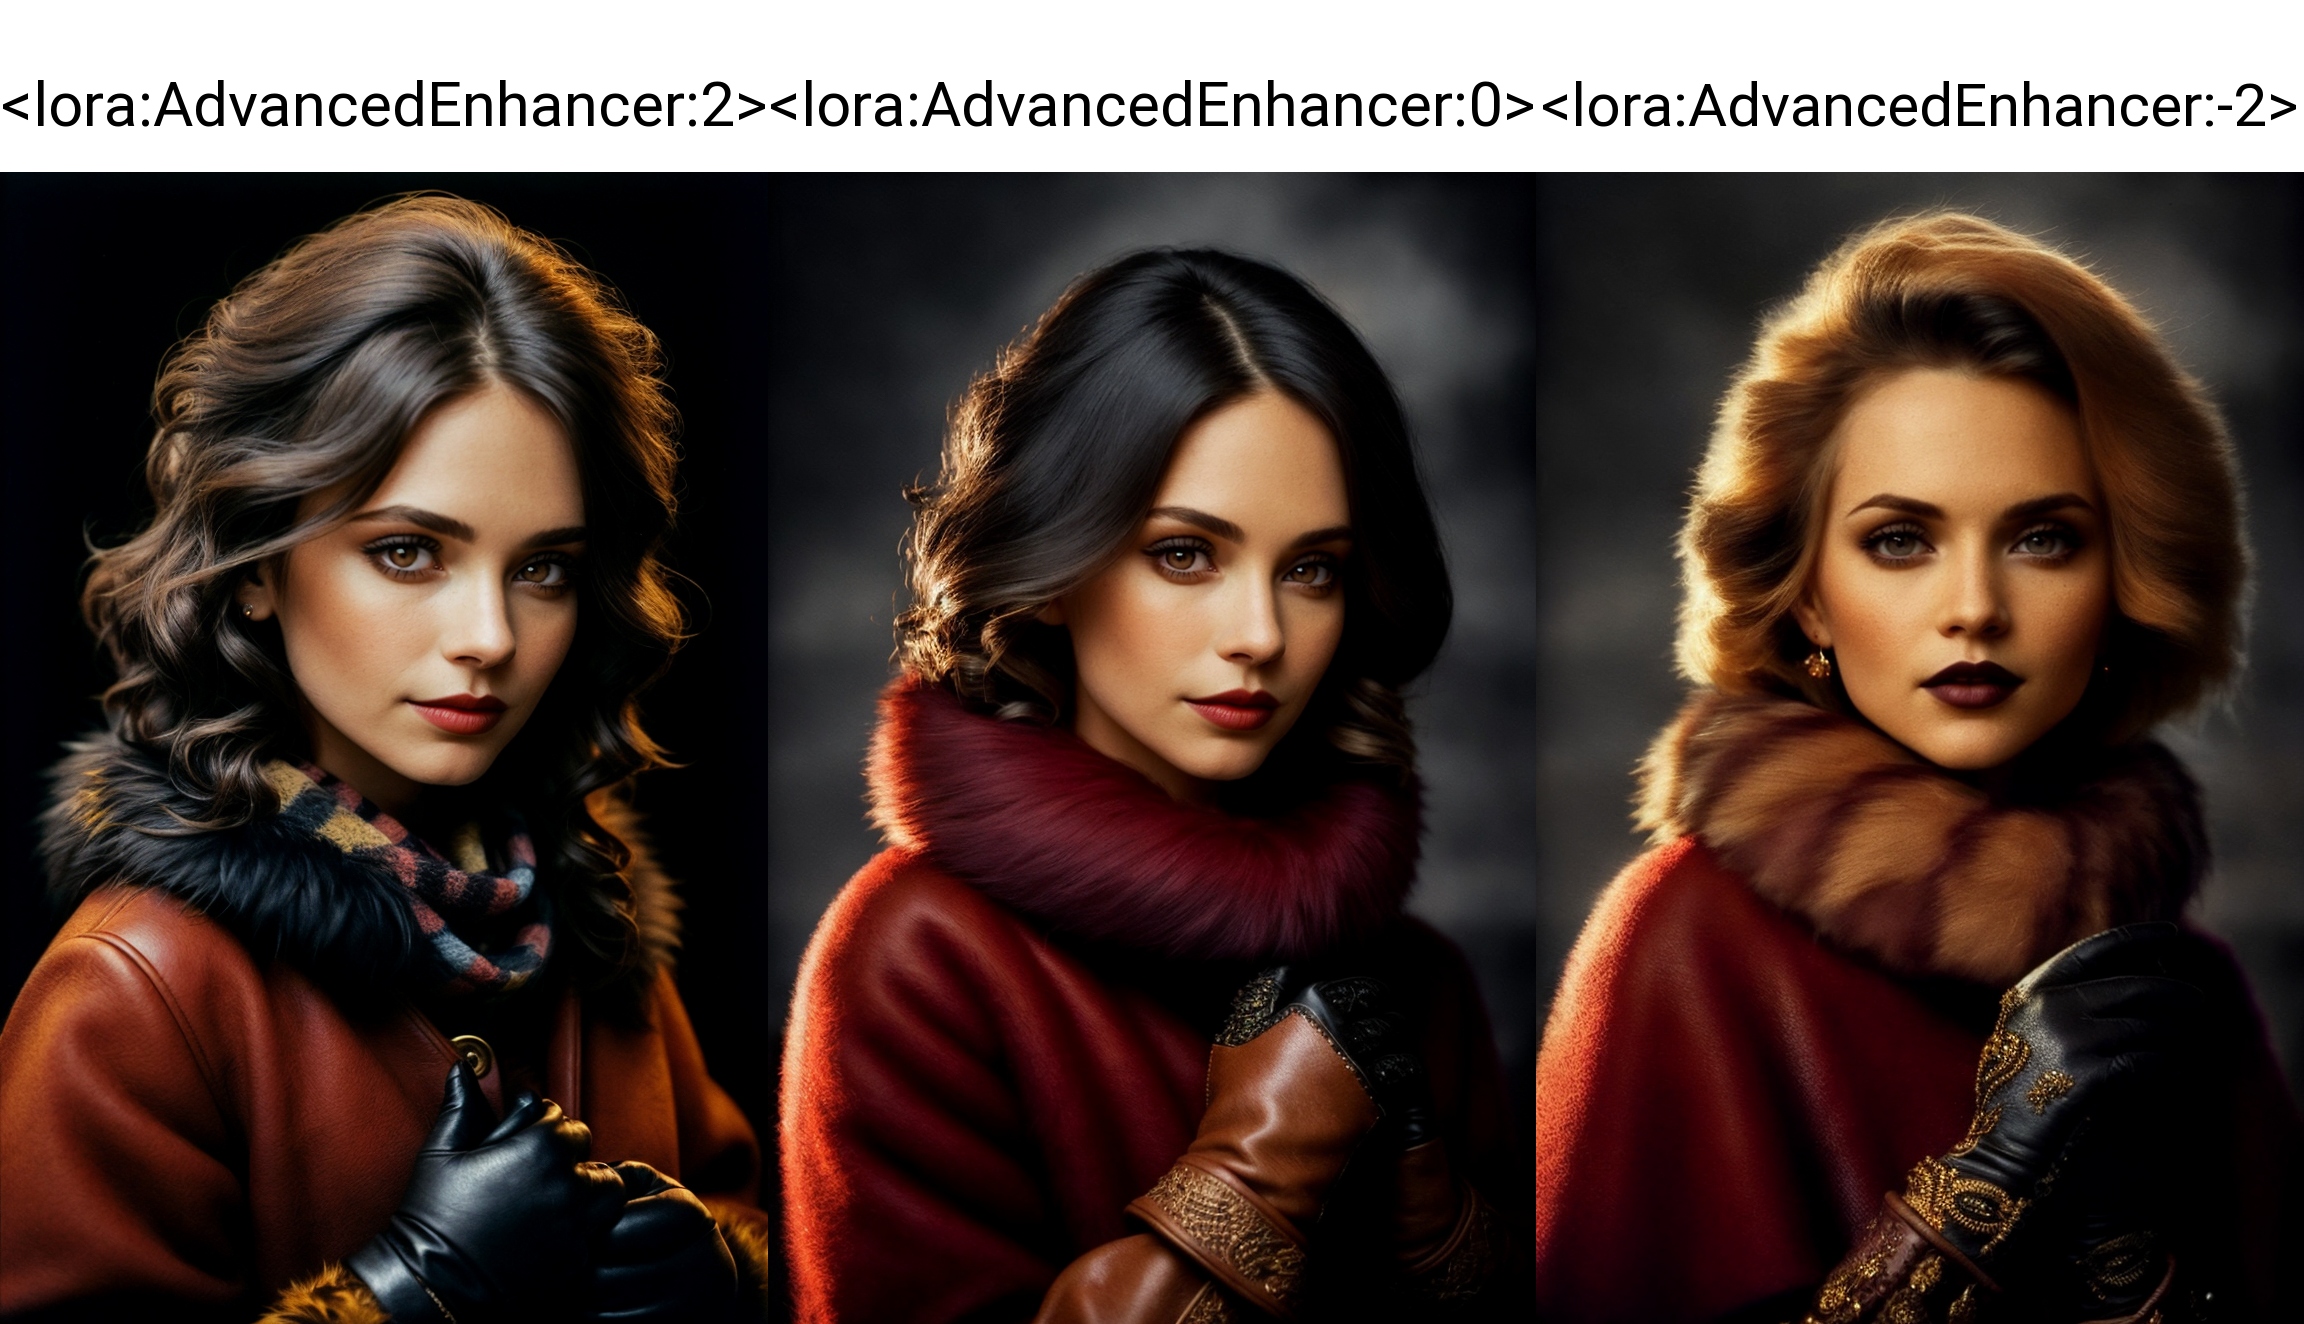
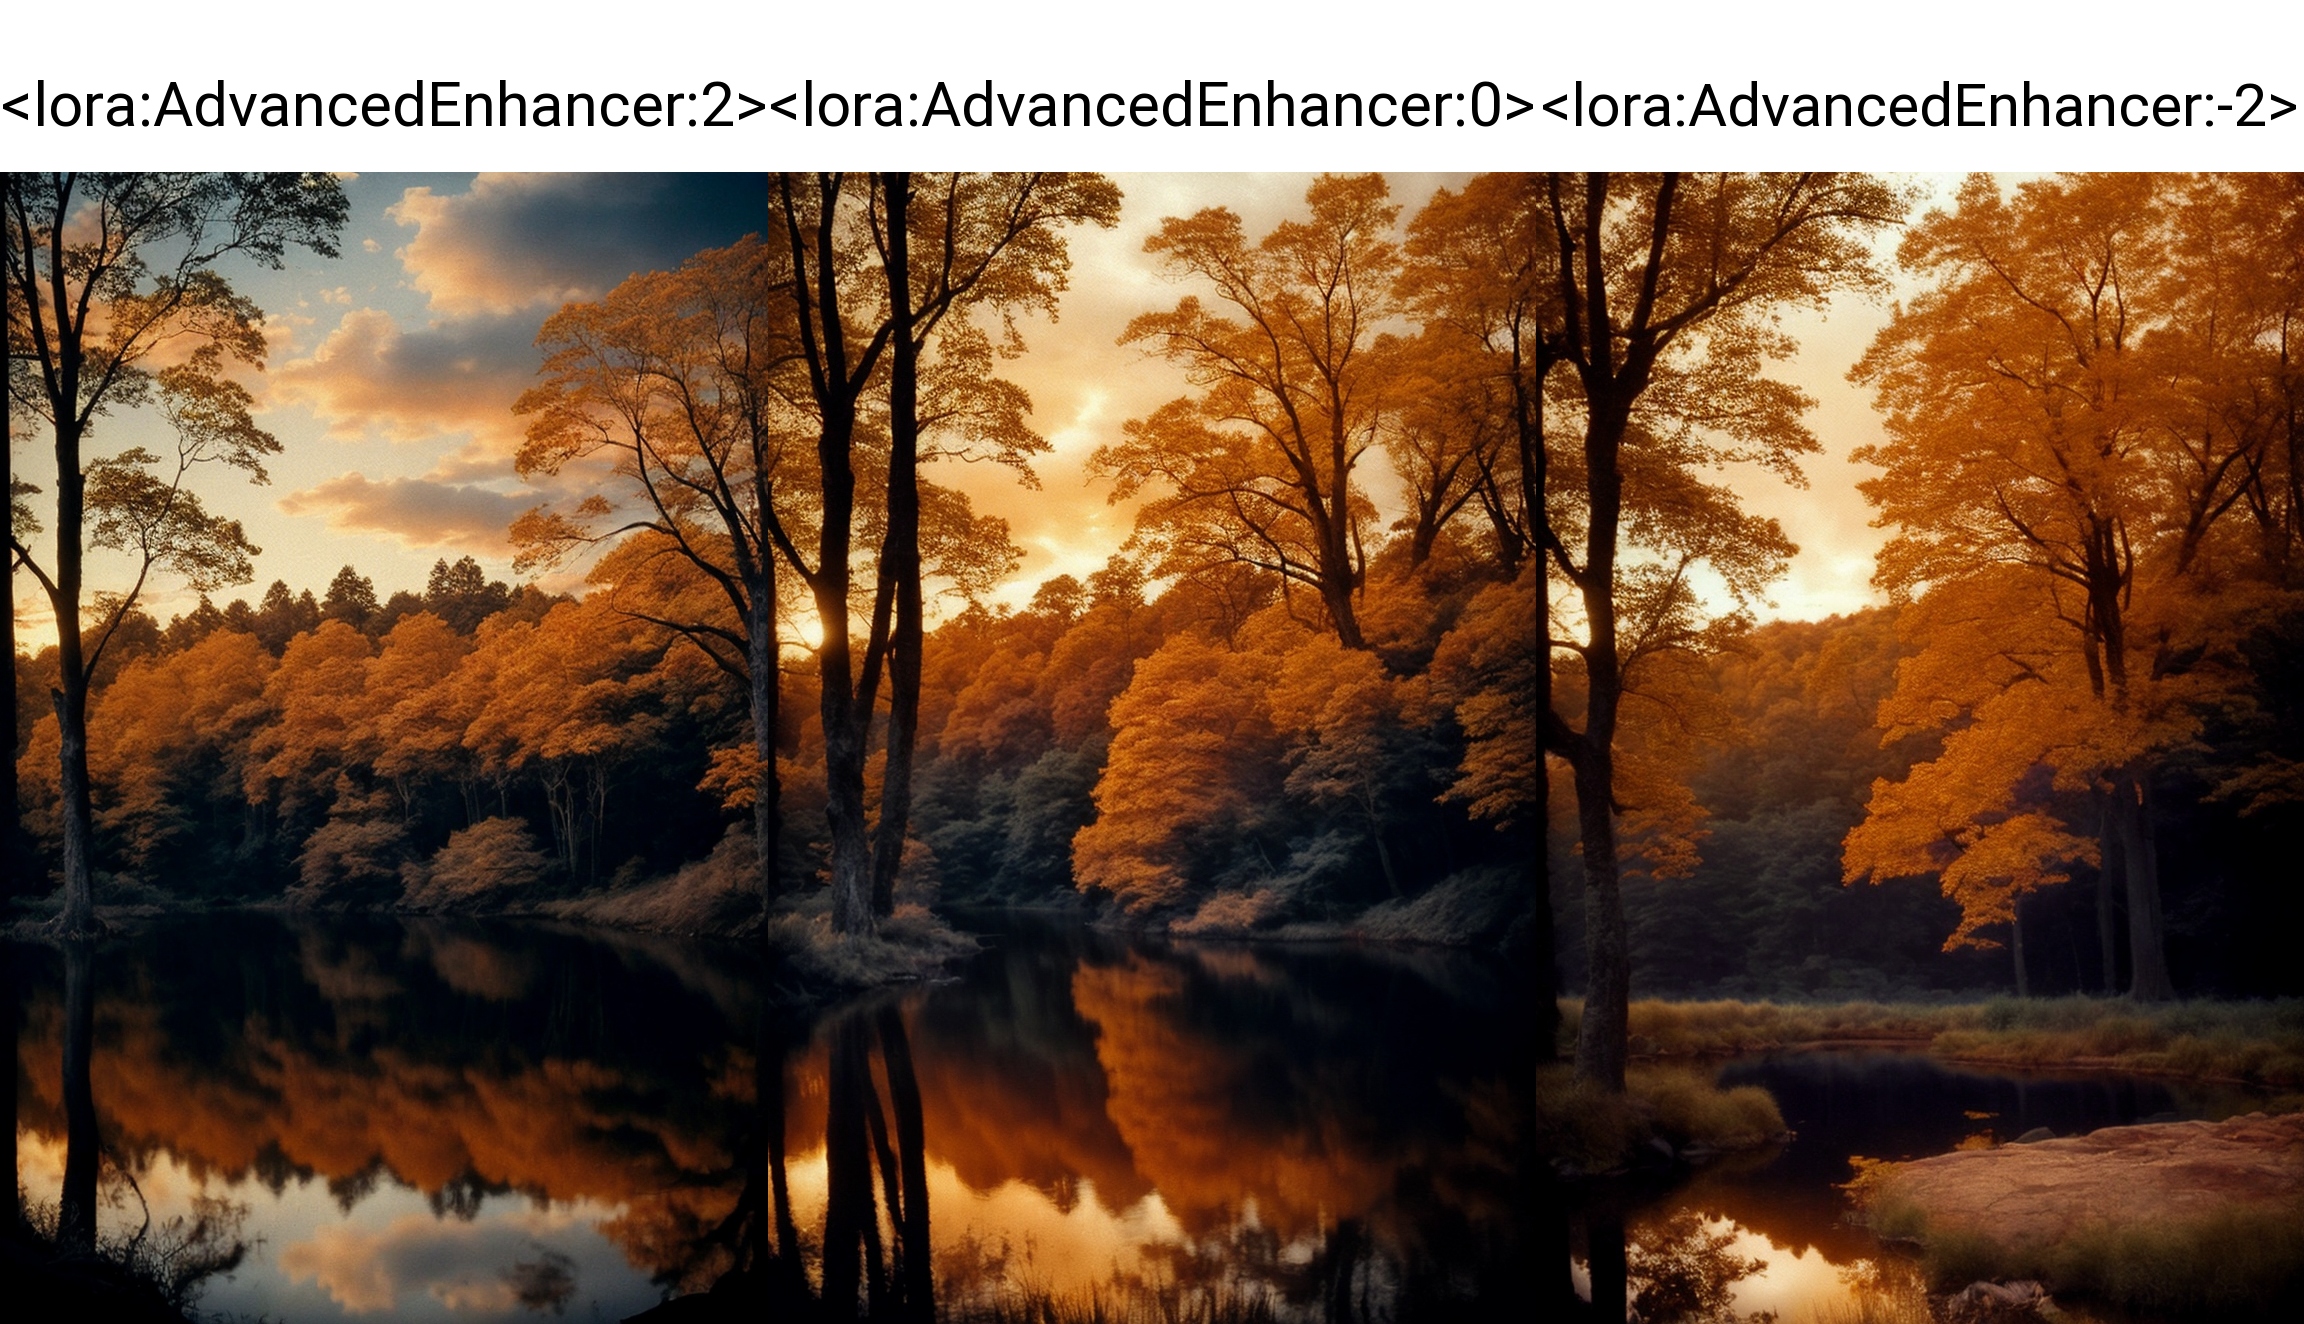
Advanced Enhancer
Noise offset utility. Helps with details and sharpness, enforces concepts from prompt. Download Advanced Enhancer from Civitai
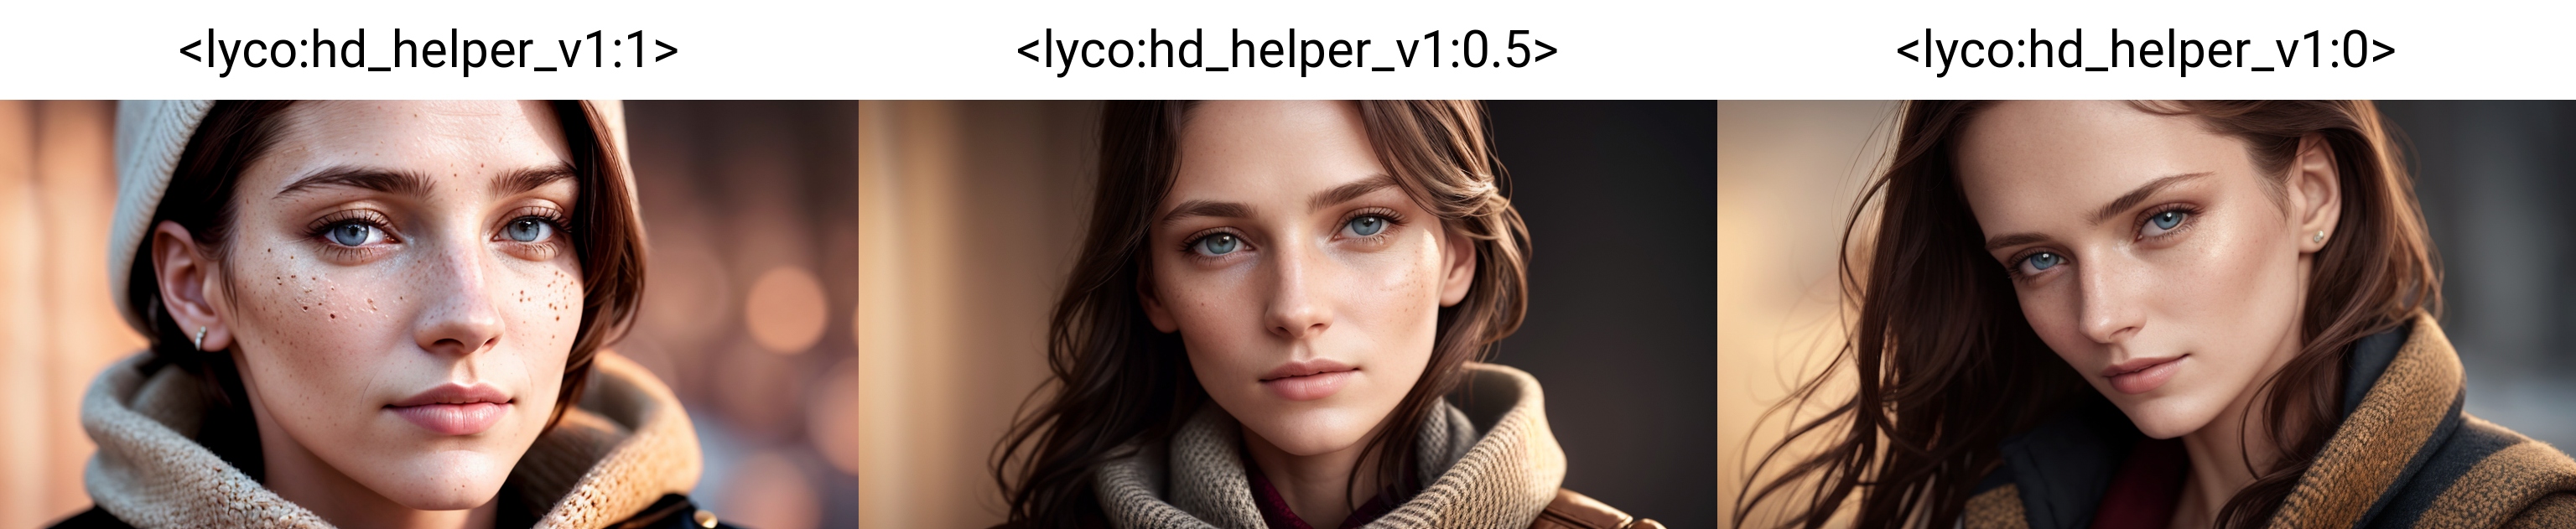
HD Helper
Helps to remove deformations in direct to HD resolutions or unusual aspect ratios. Download HD Helper from Civitai
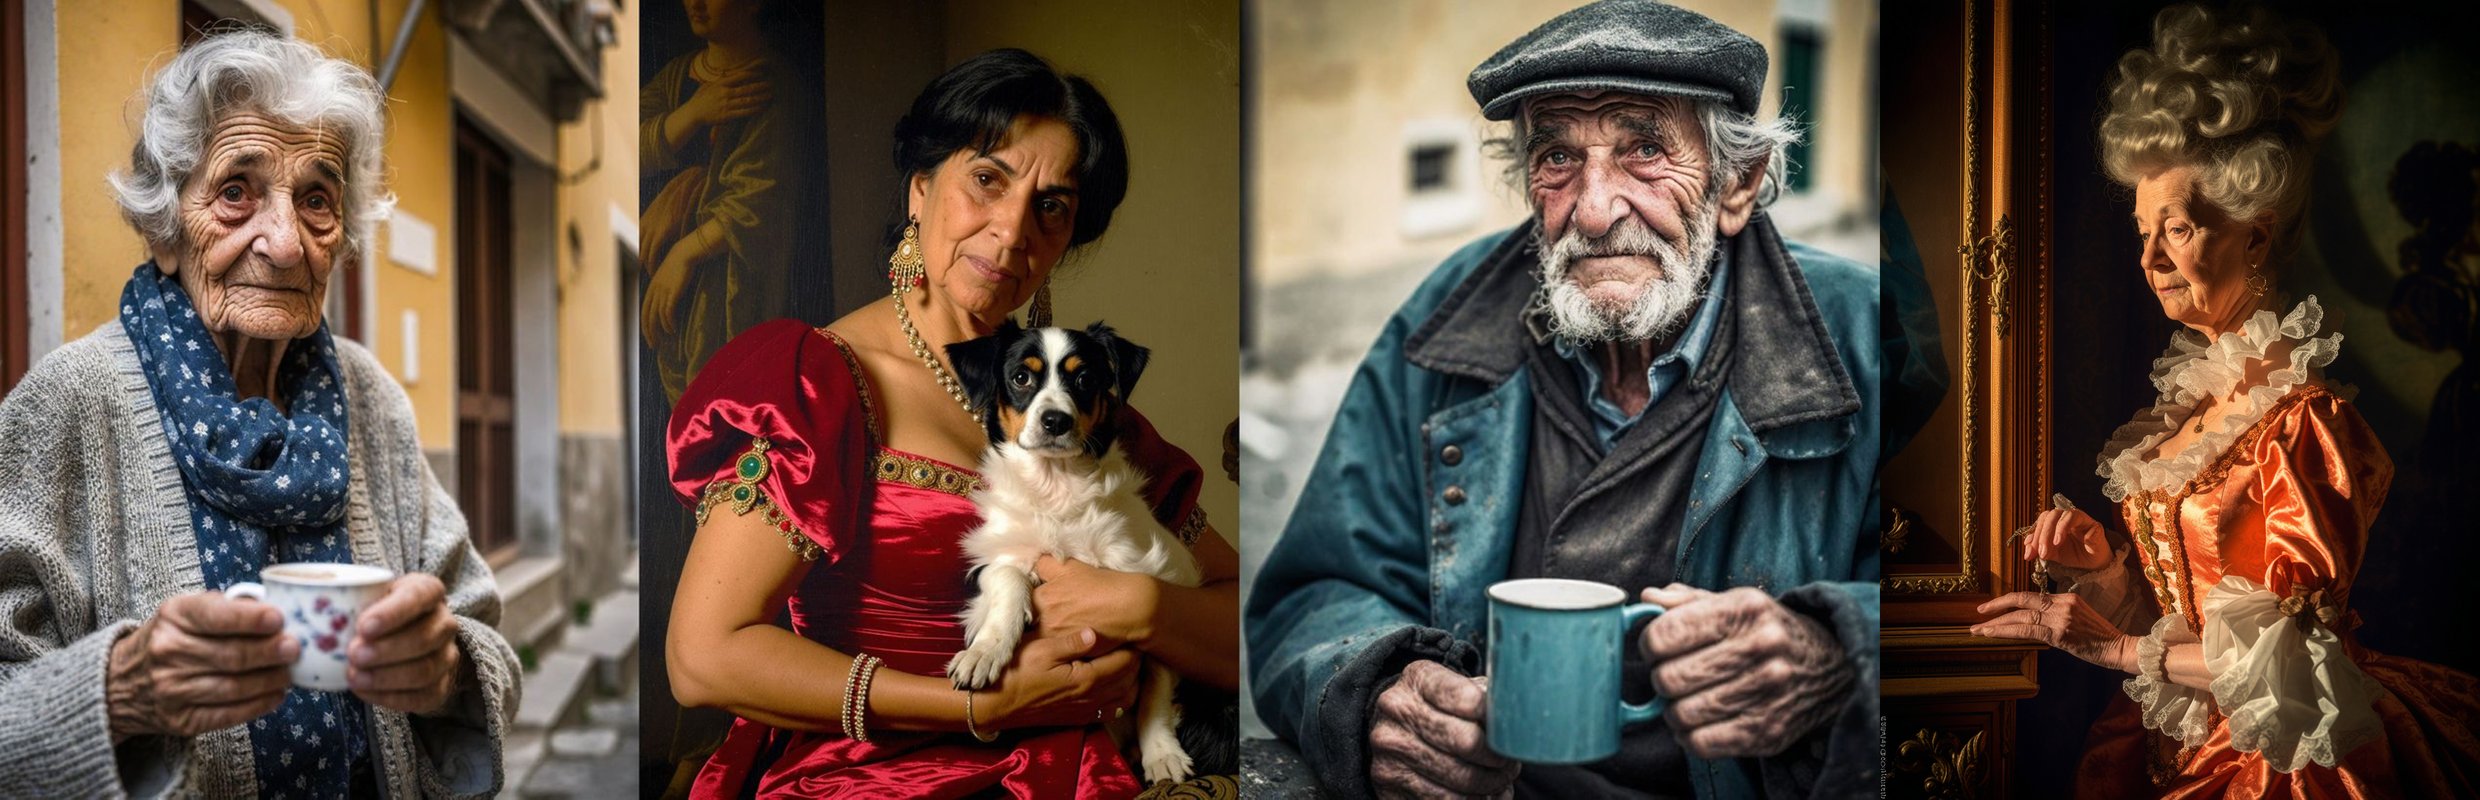
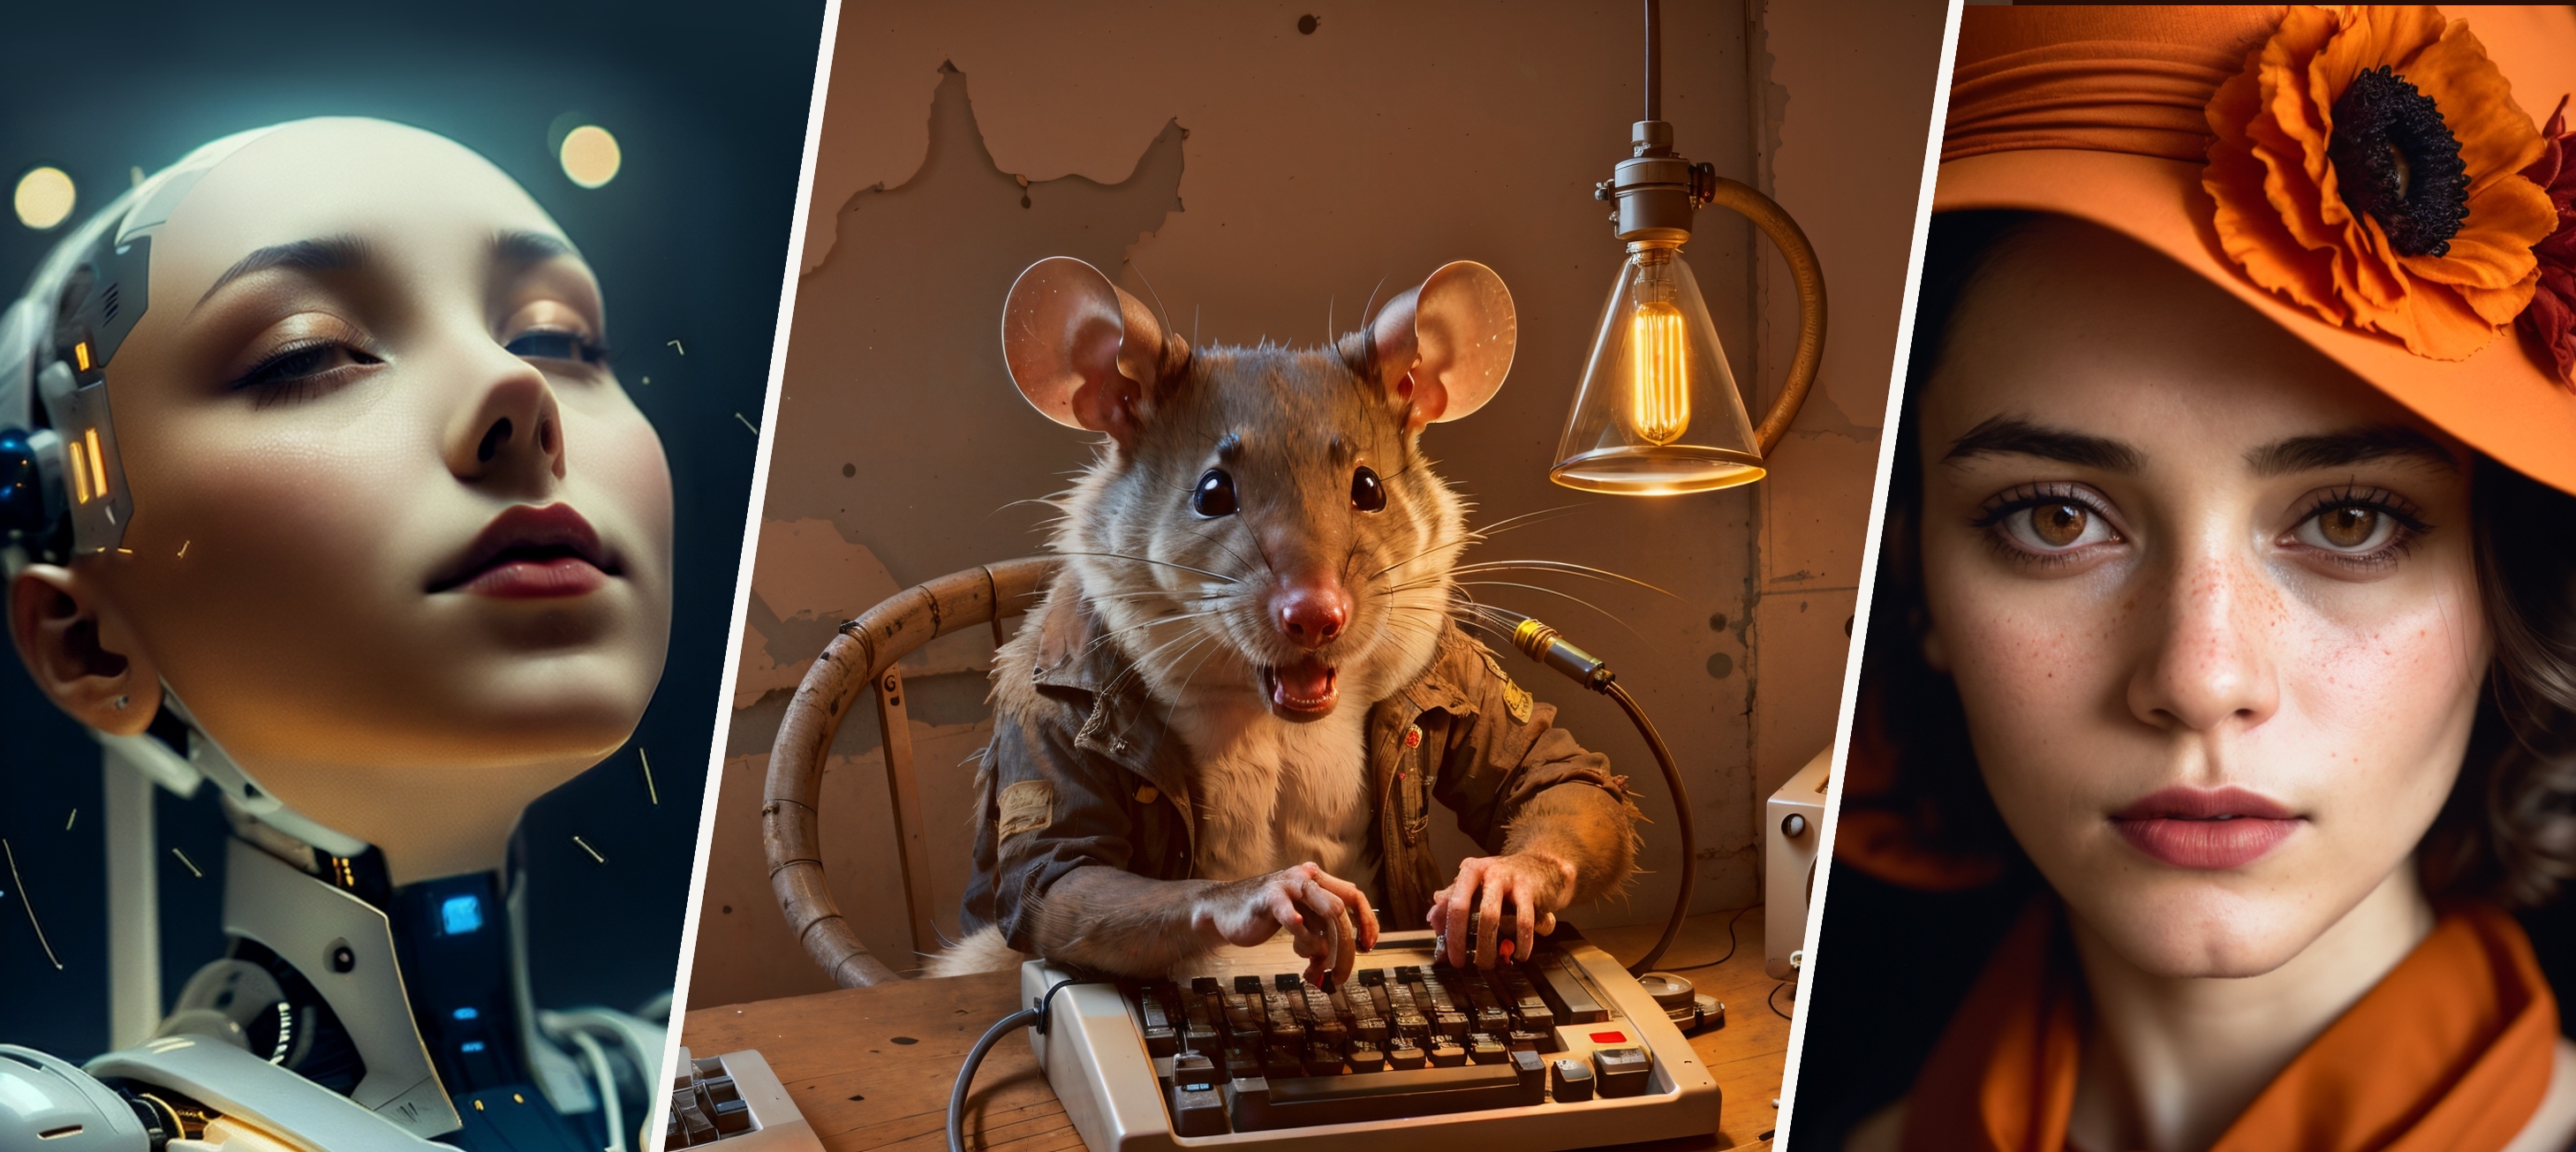
Analog Style and Photorealism LoRAs
- Analog Style Various photo camera styles, LoRA set
- Analog Diffusion Analog style, blur haze
- djx Woman Lycoris Analog photo style and dynamics for poses
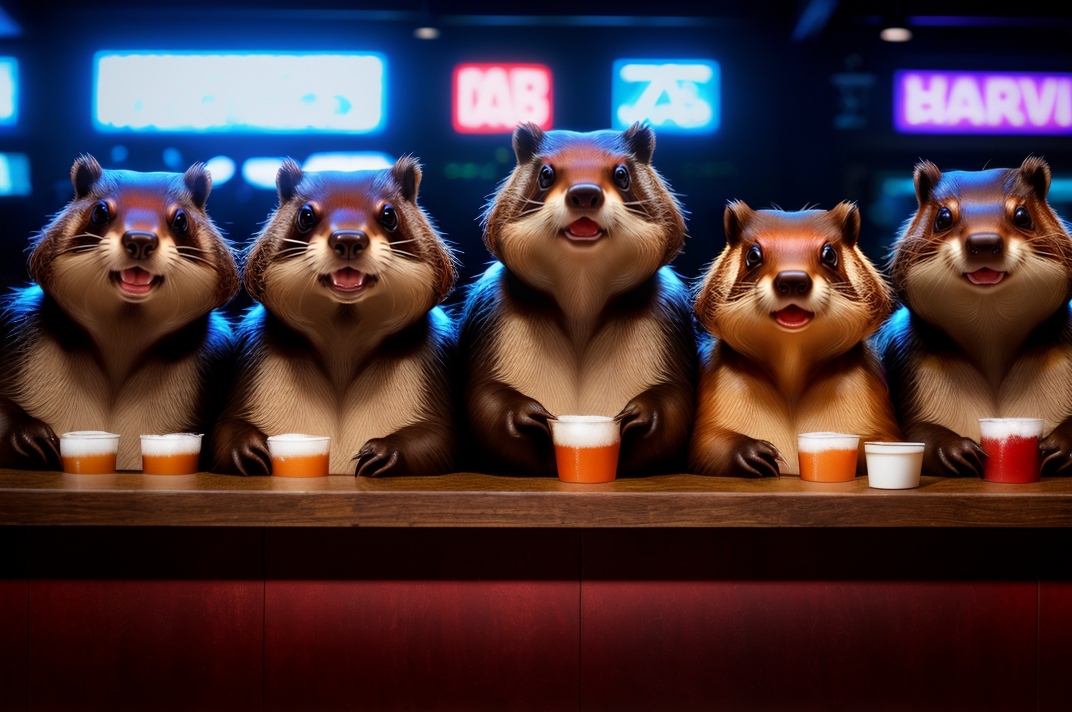
- People Count SD can count objects (sometimes), but you can try this if you need a certain number of characters in the scene (see the end of the article for an example)

Prompt Engineering Experiments and Wildcards
Wildcards are a great way to add visual noise and props into the scene. You can also test a model with random wildcards. You need to install Dynamic Prompts extension to get Wildcards Manager into tabs.
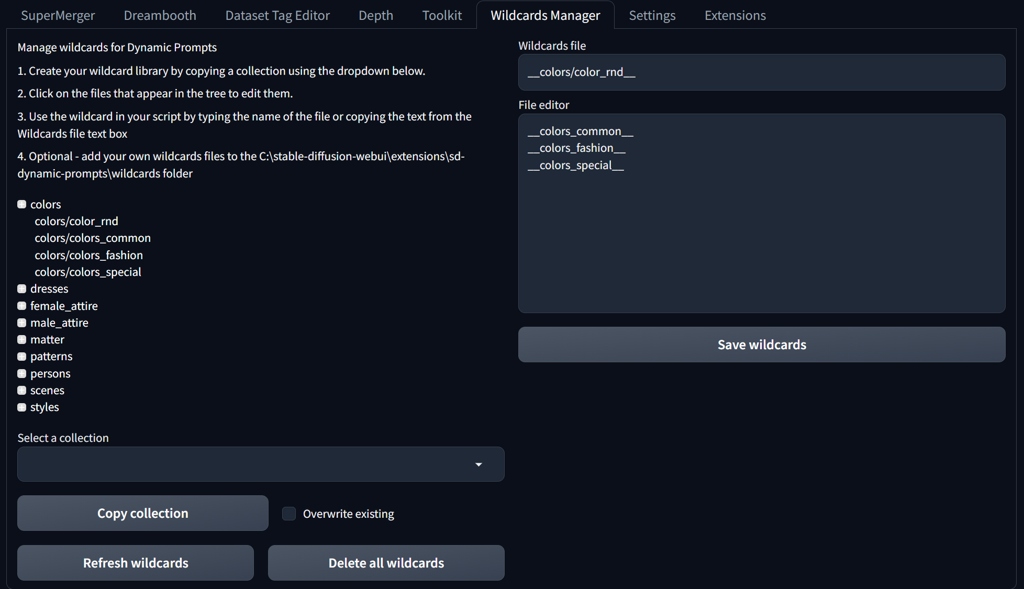
You can put your wildcards into a text file (just a list of wildcards on separate lines) with and copy the file into your \stable-diffusion-webui\extensions\sd-dynamic-prompts\wildcards folder. You may create folder structure and also embed other wildcard files. You address wildcard in prompt with two underscores syntax __wildcard__ with name of the file without .txt.
Conclusion
This guide is a simplified version of my previous articles. It describes the fastest and simplest workflows to achieve photorealism with SD 1.5 in A1111 with the use of extensions. If you want to learn more, follow the links in the article or check Education/AI Stable Diffusion in the main menu. You may also download my experimental models on my Civitai profile.