Working with Z-buffer and Depth Map in 3D and Digital Painting
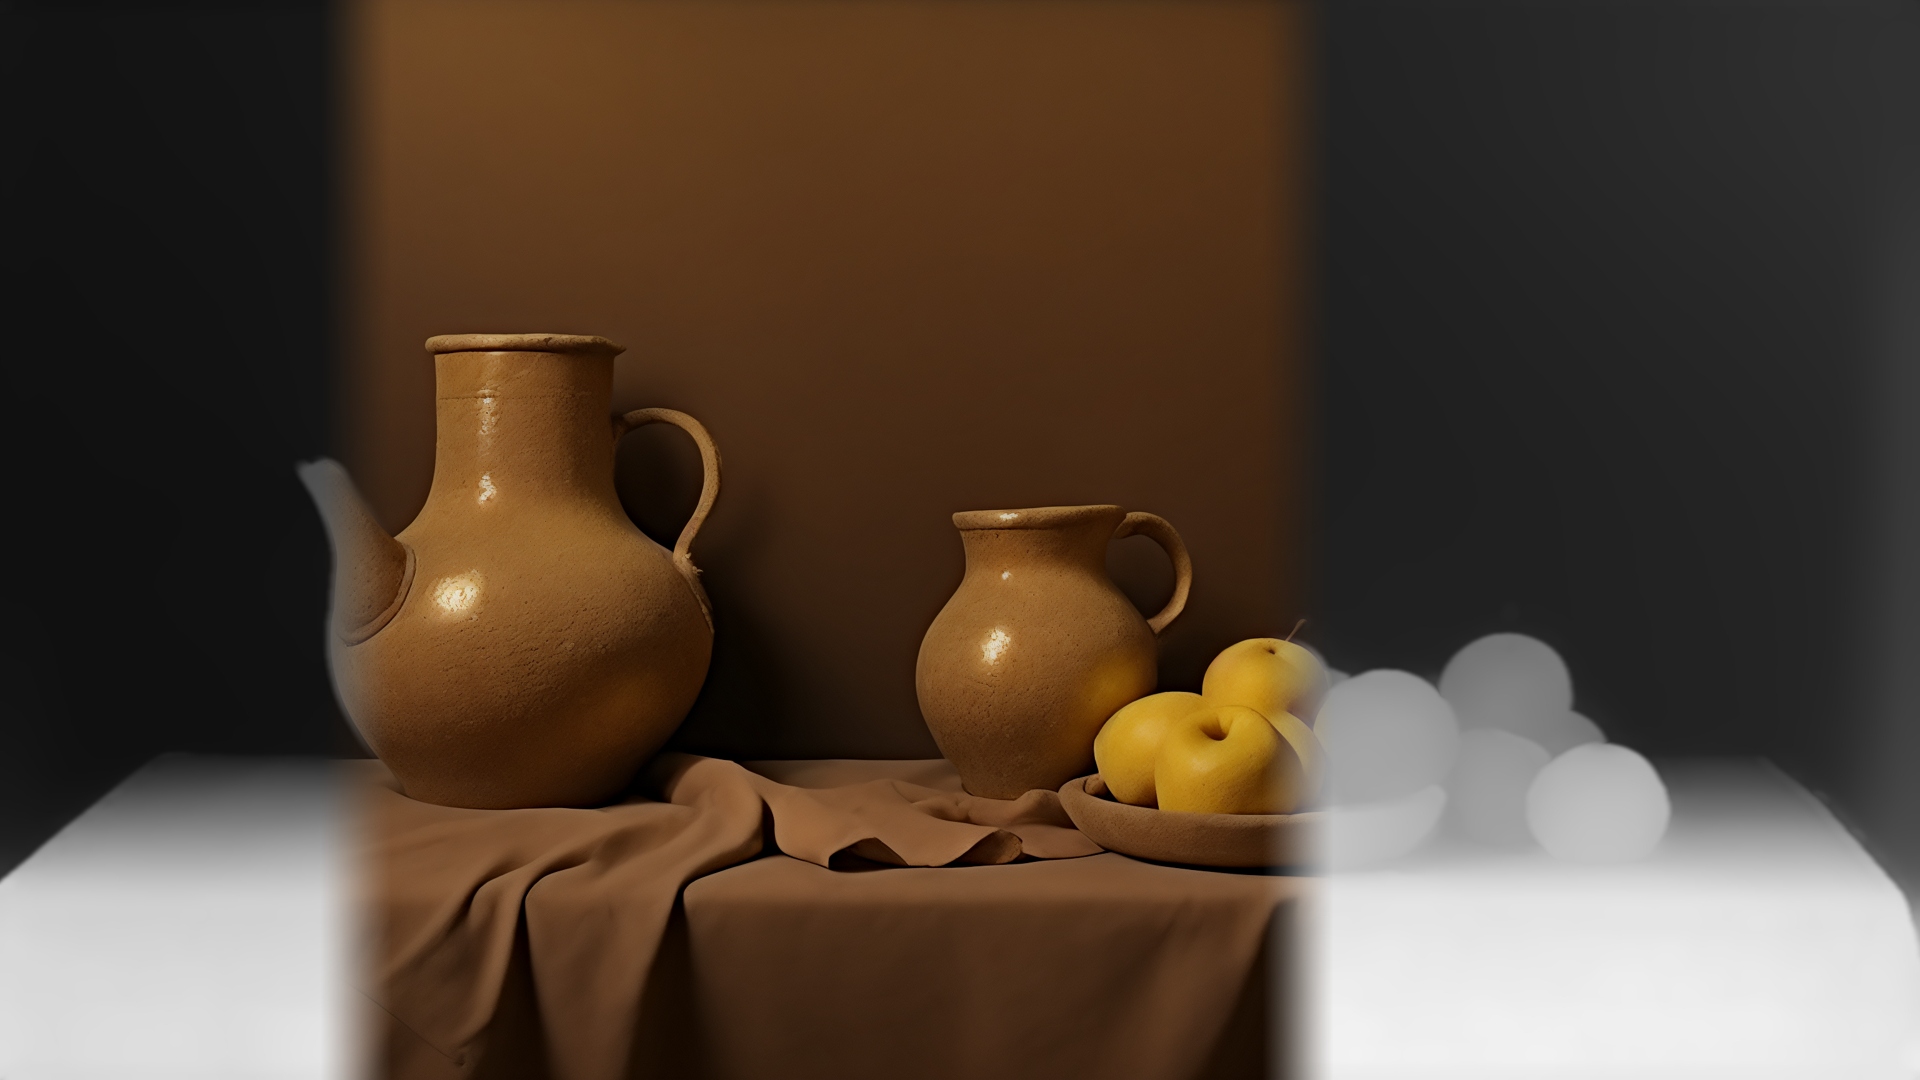
Creating realistic 3D scenes and digital paintings requires work with depth passes and depth maps, either for of depth and spatial effects in final post-production, or as brushes for 3D sculpting. 3D depth map can work also as a lead for creating 3D scene in AI generative diffusion models.
One of the keys to achieving this is the Z-buffer depth pass (or as the other option the Mist pass), which is used in computer graphics to determine the distance between objects and the camera. You can handle Z-buffer and Mist pass a little bit differently—and for convenience, you can edit them in Blender Compositing workspace.
In this article, we'll also explore how to use the Z-buffer and depth maps in 3D modeling and digital painting workflows. We'll focus on popular software such as Blender, Krita, and Stable Diffusion, and provide step-by-step instructions and helpful tips to improve your work.
Content
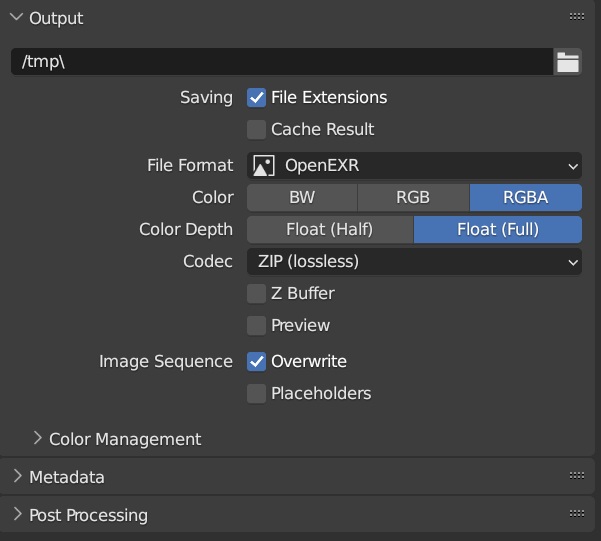
What Color Depth to Use for Depth Maps?
Generally, to avoid color banding, it is recommended to use OpenEXR format and 32-bit color depth—to keep smooth transitions, especially for Alpha Brushes and Height maps. However, in most cases, 16-bit color depth (OpenEXR or PNG) will suffice—in Blender Output Properties it is called Float (Half).
Layers and Passes in Blender
Passes are layers, creating the final image, similar to layers in image editing software. You can render separate passes and use them for postproduction.
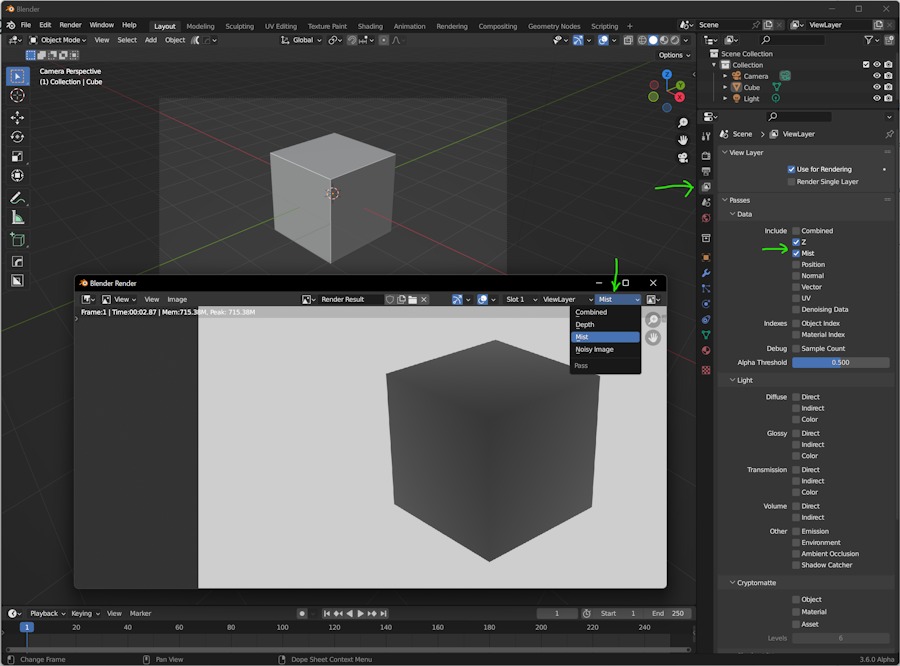
Select the passes you wish to render separately in View Layer Properties, you can inspect those layers in Render/View Render (F11).
For our example, we will use this scene, and check Combined, Z, and Mist Passes.
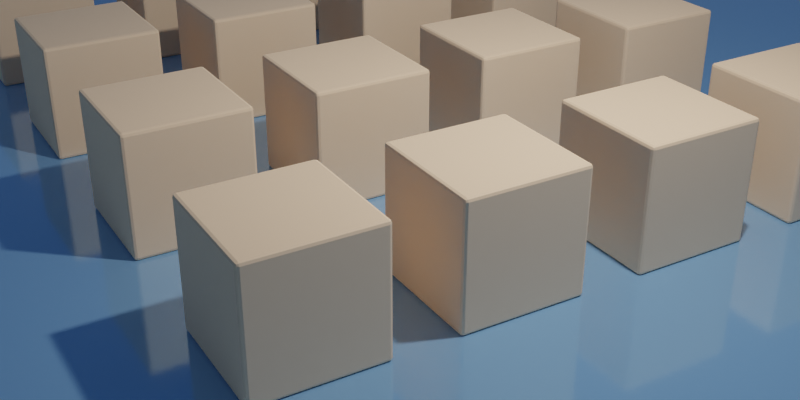
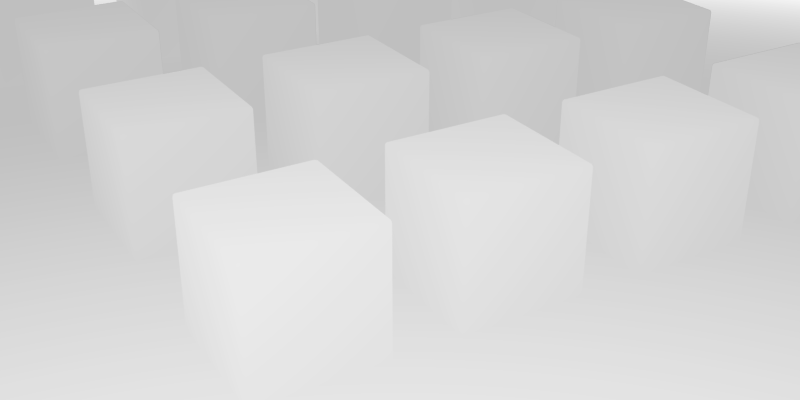
Why is Z Pass (Depth) Just a White Rectangle?
But Z pass seems to be just a white rectangle, what is happening? You need to adjust color range or normalize the tones to see the depth (scroll down to learn how to do it). To see the passes better and also to control the dynamics, we can adjust the images in Compositing workspace in Blender.
Node Setups for Mist Pass in Blender Compositing
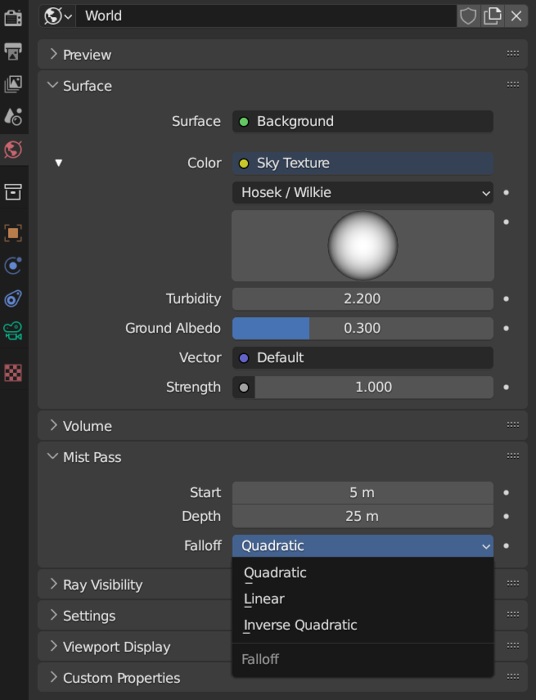
To alter the output of Mist pass we will use nodes in Blender Compositing workspace. How to setup nodes for working with Mist pass? We will take a look at the normalized display, color inversion, and setup to keep the alpha channel.
Note: To save the adjusted image, go to Render/View Render (F11) and select the Composite layer in the menu on top, then go to Image/Save As
Mist Setup for Gamma Adjust
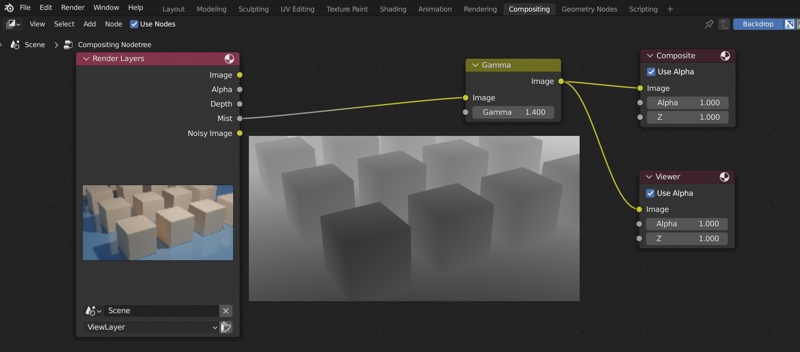
- Go to Compositing workplace and check Use nodes
- Add (SHIFT+A) Nodes: Viewer, Gamma (Check Backdrop if needed)
- Connect nodes as on the image
Mist Setup Keeping Alpha and Inverting Colors
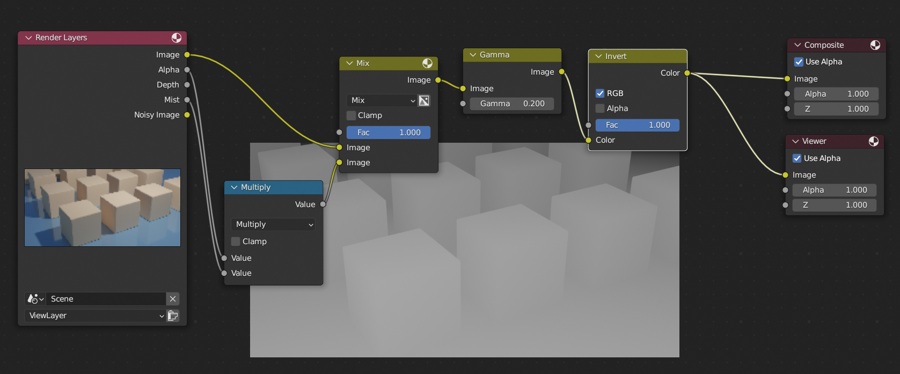
- Go to Compositing workplace and check Use nodes
- Add (SHIFT+A) Nodes: Viewer (Check Backdrop if needed), Gamma, Mix Node, Math Node, Invert Node
- Set Math node to Multiply
- Connect nodes as on the image
Quick Normalizing Setup
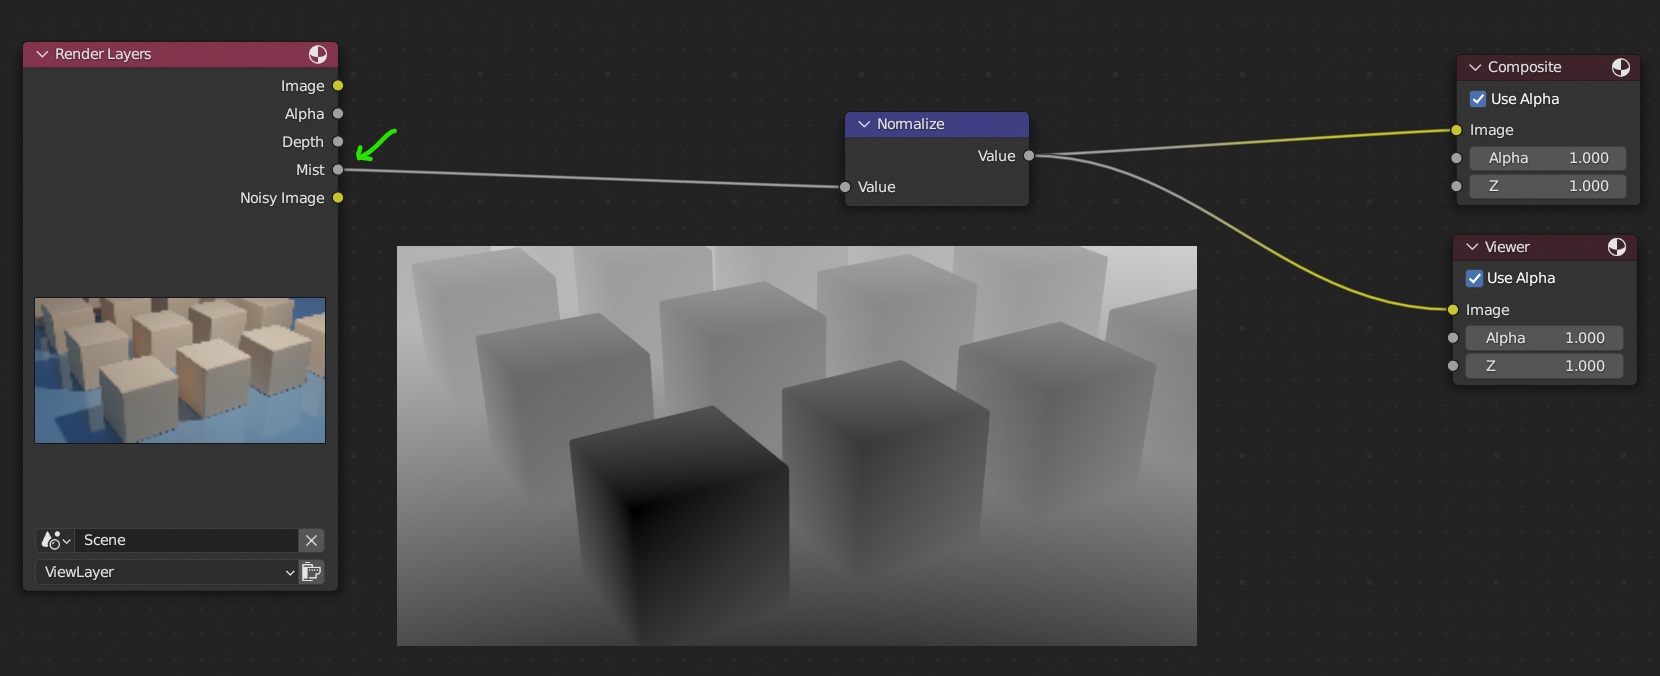
Node Setups for Z Pass (Depth, Z-Depth) in Blender Compositing
How to setup nodes for working with Z-Buffer? It is very similar to the Mist setup.
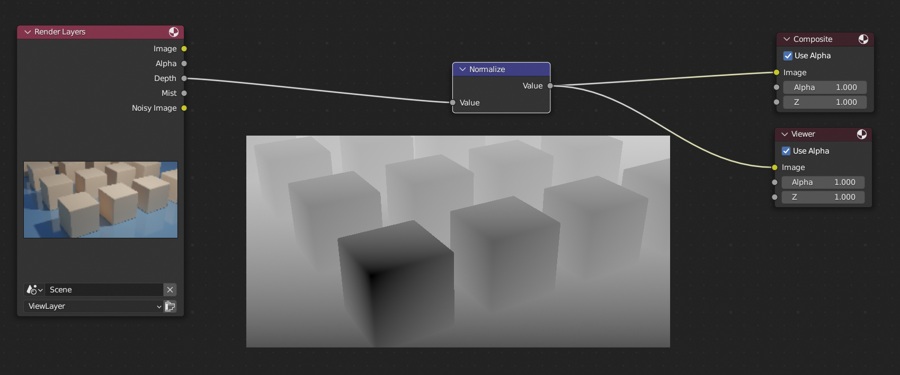
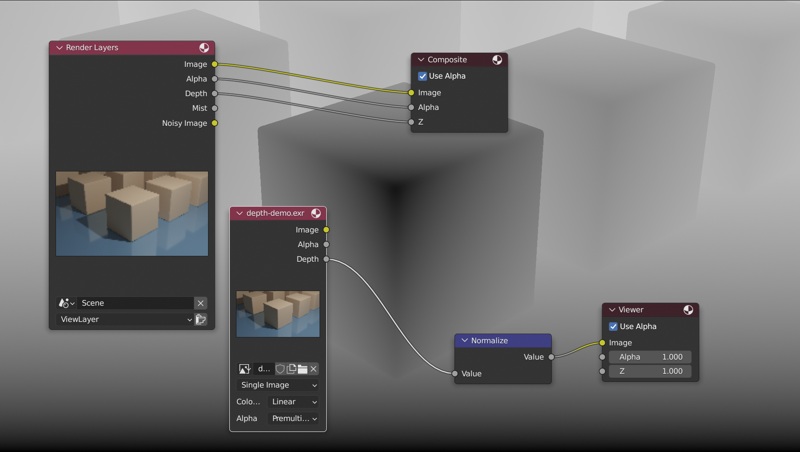
Normalizing Depth Pass
- Go to Compositing workplace and check Use nodes
- Add (SHIFT+A) Nodes: Viewer (Check Backdrop if needed), Normalize Node
- Connect nodes as on the image
Normalizing Controlable Setup With Alpha
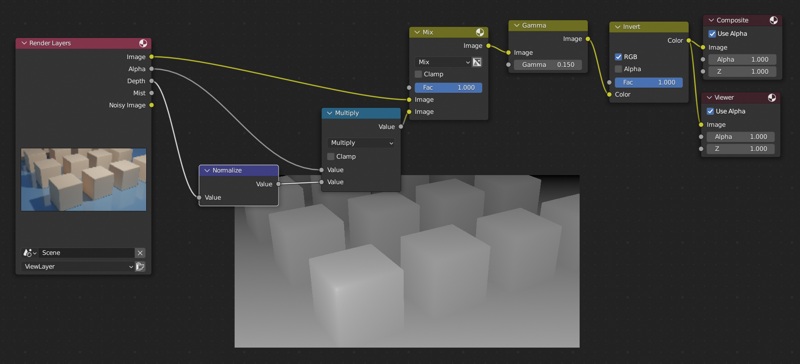
Editing Depth Maps in Krita
To edit a depth map in Krita, separate the channels as in the images above. Then you will edit it as a regular image.
Adjust and Keep Color Dynamics
Working with color profiles. OpenColorIO (OCIO) is a complete color management solution.
File Types
Use 32-bit or 16-bit EXR for file transfer, or 16-bit PNG.
Stable Diffusion
You can create depth maps from images or photos with stable-diffusion-webui-depthmap-script extension. Install it from Extensions/Available/Load from.
Using Depth Maps as 3D Representation of a Scene
ControlNet can use depth maps data as representation of 3D scene composition. You may read more in this article on 3D models in Stable Diffusion.
Using this concept allows to create 2.5D scenes for animations (and also details and decorations in 3D scenes). A handy tool for a preview is LeiaPix Converter https://convert.leiapix.com/. You can generate a depthmap there and also upload depthmap for a quick testing (since you can not set output properties for video export, unfortunately you need to create the effect in a 3D application for a quality output).
Sophisticated 3D scenes can be created in Blender using the same idea and various methods, using the depth image as displacement map or a texture effect.
Depth Maps as Sculpting Brushes in Blender
Working with sculpting brushes (alpha brushes). Digital sculpting.
Depth Maps as Layer Masks in Krita
Using depth map as a helper in digital painting and editing.
Working with the Z-buffer and depth maps is an important skill for anyone interested in 3D modeling and digital painting. By following the techniques and workflows I've covered in this article, you'll be able to create more realistic and immersive scenes and develop new styles while working on digital paintings and 3D designs . Remember to experiment with different settings and techniques to find the approach that works best for you. I hope you found this article informative and helpful, and I wish you all the best in your creative endeavors.
